Showing posts with label sound. Show all posts

Tuesday, February 20, 2024

Distortion in Windows Media Player

Fifteen years ago, I published a post on my personal (non-music) tree planting blog, talking about how to solve distortion problems in Windows Media Player.  Some people are still using this app on older operating systems, and continuing to run into problems, so I'm going to migrate that information to this music blog.  But remember, this is for the Legacy player, not the new one!

----

Have you ever listened to songs in Windows Media Player and found them to be distorted in places, so the sound quality is terrible? The same files may play perfectly in all other programs - I've had files that worked in WinAmp, RealPlayer, Quicktime, Nero, and a host of other programs with no problems, yet Windows Media Player would not handle them properly.

As it turns out, MicroSoft has a Creative PlayCenter MP3 decoder resident in the operating system which (in many but not all cases) is what causes the problem. Certain versions of Windows Media Player use this decoder, but there are compatibility problems. If you're not using that decoder file for whatever reason, you probably won't run into the distortion problems.

The simplest way to fix the problem, assuming that you're running on a Windows operating system, is to go down to your start menu on the bottom left side of the screen, click on it, then go into "search." You need to search your C: drive (or whatever drive your O/S resides on) and look for a file called "Ctmp3.acm" - if you can find that file, don't delete it, just rename it to "Ctmp3.bak" instead.

If you can't see the file extensions when you're doing searches (the default option on Windows, but one which I detest and disable immediately whenever I set up a new computer), I'll show you how to make your file extensions visible. Go to Windows Explorer, either through your Start menu or by holding down the "flying window" key (left of your left side alt key) and then pressing the letter "E" at the same time. Next, go into the Tools menu, and chose Folder Options in the drop-down Tools menu. In Folder options, click on the "View" tab. The seventh or eight option in that list usually says "hide extensions for known file types" and has a check beside it. Uncheck this, then click OK. Now you'll always be able to see file extensions in Windows Explorer and associated panels. If you're quite computer savvy, you might also want to set the other three options above and below that let you show hidden files, show O/S files, and display the full path name in the Title Bar (although this is only applicable if you're trying to conserve system resources by switching to Classic View, such as for intensive audio or video processing).


Anyway, now you know how to show file extensions, and how to fix the distortion problem on Windows Media Player. This may not be a problem on newer versions of Vista, but it certainly was on certain versions of WMP running on XP.


If you want a different approach to disabling the problem codec, here's another set of instructions:

The Creative Playcenter software rudely blocks the Windows MP3 codec. The following instructions show how to unblock it on Windows XP system. The instructions for other Windows versions are the same except the steps to get to the audio codec area from the control panel varies. Note that this will disable the MP3 capability of the Playcenter software. You can re-enable using the same steps or replace the Playcenter software.

1. Go to the Control Panel
2. Double click on "Sounds & Audio Devices"
3. Select the "Hardware" tab
4. Double-click on "Audio Codecs"
5. Select the "Properties" tab
6. Double-click on ctmp3.acm
7. Select "Do Not Use this Audio Codec"
8. Then click on the "Apply" button


Edit, a few years later:

Please note that there are a few posts online now from MicroSoft that might give you additional insight into this problem. Here are the links:

     answers.microsoft.com suggestion (June 2010)

     support.microsoft.com suggestion (September 2011)

Hopefully, between my own suggested solutions, and the comments that MicroSoft has brought forward, you'll be able to fix any issues that you might have.

Friday, February 17, 2017

Finding Royalty-Free Samples for Music Production

Are you looking for sounds to put into music that you're producing?  If so, I have a video that I think will help you out a bit.

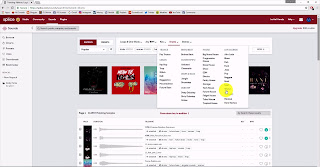
This video is about a service called Splice Sounds, from splice.com.  It's a great place to find samples and loops and sounds for your own productions.


If you're creating a song or producing a track, and let's assume that you're working on electronic-based production rather than traditional instrumental music, then you're probably looking for sounds for your track.  One source of these sounds is any instruments that might be within your DAW (Digital Audio Workstation, or audio editing/production software).  Most DAW's come with various built-in instruments, which are sometimes called VSTi's.  This stands for Virtual Studio Technology Instrument.  Examples of DAW's that come with built-in VSTi's include Ableton, Pro Tools, Cubase, Sonar, Reason, FL Studio, Logic, and several others.  The VSTi's in these various programs can produce sounds ranging from the various pieces of a drum kit (kick, snare, hi-hats, tom, crash, ride) to miscellaneous percussion instruments (shakers, sticks, tambourines, etc.) to traditional instruments like basses, guitars, pianos, and synths.

I should point out that a VSTi is a bit different than a VST (virtual studio technology plug-in).  VST's are more likely to be apps or plug-ins that affect that sound, rather than create a sounds.  For example, VST's might add things like reverb or delay or chorus or equalization or filtering to your sounds.

The only drawback with these VSTi's is that they're limited in what they can produce.  Some are pretty versatile and can produce thousands of different sounds, but more frequently, you're limited to only a few dozen sounds from a single VSTi.  Some VSTi's can only produce a single sound!  Eventually, you're going to start getting bored with the sounds from your existing VSTi's, and you'll start looking externally for additional sounds.

When you get to this point, the common practice is to go online and to start looking for things called Sample Packs.  A sample pack can contain several sounds or several dozen sounds.  These are called samples.  They're short audio clips that contain things like a note or a drum hit or a spoken word, or several of any of those things.  I've seen samples that were as simple as a single hit of a stick on a block of wood, or as complex as three or four lines of a singer's vocals.

Some samples are designed as one-shot samples.  These are intended to be played once, without repeating.  Even though it's called a one-shot, there may be more than one sound in the sample.  For example, I've seen one-shots that were a single hit on a hi-hat, and I've seen other one-shots that were sixteen consecutive hits on a hi-hat.  The main defining characteristic of a one-shot is that it's made to be played one time, rather than repeated constantly.

The other common type of a sample is designed as a loop.  Again, a loop sample can be as simple as a single sounds, but more frequently, it's a series of related sounds, such as four hits on a kick drum.  But the key thing with a loop is that it is designed to be played over and over and over again, constantly, in a repetitive motion.  And the way that it's designed, quite often, the intent is that it sounds "continuous" so that you can't really tell where the loop is starting or stopping.

Traditionally, there have been a lot of websites designed to supply loops to producers.  Some well-known examples are:

and dozens more

These sites all offer sample packs that producers can buy and use in their own music.

An important definition here is "royalty free."  You're probably going to want to make sure that all the samples you buy are designated as royalty-free.  This means that you can use them in your own music that you re-distribute, either for free or for sale, without having to pay further expenses based upon the frequency of use of the samples.  In other words, a royalty-free sample is a one-time purchase that legally lets you share the sample in your song forever, with no extra expenses owed in the future if your song becomes popular.

If you buy a sample pack, you may be paying anywhere between perhaps ten and thirty dollars.  Or less, or more.  That sample pack will contain a handful or maybe a few dozen samples, which are sometimes all fairly related, and intended to work together in the same key.  But your sample pack may also contain some diversity, such as some bass notes, some drum hits, some keyboard notes, etc.  The problem though is that you may not end up using all of those sounds.  You may end up buying a sample pack just because you like two or three specific sounds in the pack, and you ignore the rest.  In that case, those samples that you liked will be pretty expensive for you, several dollars apiece.  That doesn't sound like much, but if you do a lot of production work, you can easily go through hundreds or even thousands of samples in a busy month.

That's where Splice comes in.  Splice has several different sections.  Although we're going to focus on Splice Sounds, here's what else it includes:

Splice Studio - Collaborate remotely with other producers, using the Cloud.  Sort of like a real-time collaboration over Dropbox or Google Drive, if you can envision that.

Splice Community - Share your productions with the Splice community, which has hundreds of thousands of other producers.  Sort of like a SoundCloud meets a PHPbb message board concept.

Splice Sounds - Your source for Samples, as we'll discuss shortly.

Splice Plug-Ins - Buy or rent professional VST's and VSTi's, or download a number of free plug-ins too.

Splice Blog - Information about various topics associated with audio, music, production, etc.

If you want a full run-down of each of those sections, you can find info in the video.  But let's talk specifically about some features of the Splice Sounds section:

- Cost effective:  A subscription is either $8 or $13 USD per month, but allows you to download either 100 or 300 samples per month.  If you don't use up all your credits, they roll over into the future, so you don't lose them.  This works out to pennies per sample.
- Wide selection:  They have literally millions of samples to chose from, royalty-free.
- Easy filtering:  Sort samples by key, tempo, type, instrument, and other criteria, before you start browsing, to be able to find what you're looking for very quickly.
- Audio previews:  High quality audio preview to see if you like the sample.
- And lots more, as the video will show.

The best thing is that you can get a free test account that lets you download about a hundred samples, which lets you go through the service and realize exactly how useful it is.  And you will DEFINITELY realize that if you produce music even on a very casual basis, Splice is well worth the subscription.

If you want to skip the preamble in the video (all the stuff that I just described here), skip ahead to the 9minute 12second mark of the video, and begin playing it there.  From that point on, you'll see the screen shots as I'm describing everything.


Good luck with your music productions!

- Jonathan Clark (DJ Bolivia)
www.djbolivia.ca


PS:  Here's an example of a track that was produced predominantly with samples from Splice, plus a few stock Ableton Live sounds included:


I'm Jonathan Clark, known online as DJ Bolivia.  Do you want to learn more about DJ'ing and music production?  If so, visit:


If you happen to enjoy techno tracks, most of my tracks are available as free downloads from this link:


Thanks so much for visit, and for your support!  I really appreciate the fan base that I've been able to build up over the years.

Also, if you want to visit any of my other sites, here are a few links:
    YouTube:  youtube.com/djbolivia
    SoundCloud:  soundcloud.com/djbolivia
    Blogger:  djbolivia.blogspot.com
    Main Site:  www.djbolivia.ca

Monday, January 5, 2015

Review of the Pro 70 Lavalier Condenser Microphone from Audio Technica

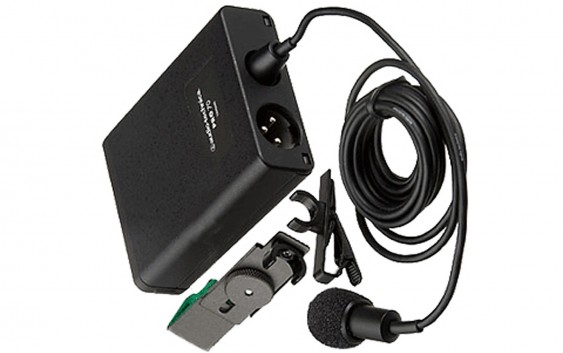
My current preferred lav is the Pro 70 lavalier microphone from Audio Technica. It's a low to mid-budget microphone, not wireless, so you'll hopefully pay less than $150 for it. It's been working decently for me, so I thought I'd do a quick overview.


This isn't an overly technical review, with all kinds of lab-testing of audio recordings. I've just covered all the basics, and talked about lav mics in general. It has a reduced dynamic pickup range compared to any studio condenser microphone that you'd buy, at around 100 Hz to 14 kHz, but that's standard for a lavalier and you'll have pretty decent quality for whatever project you're working on. If you want to just watch the video review, here's the link, although I'll also include the specs of these mics further down in this blog post:


Here is the general overview of the Pro 70, taken directly from the Audio Technica website:

This miniature condenser microphone achieves full-sounding pickup and is known for outstanding consistency and dependable performance. Supplied with both a clothing clip and guitar mount, it provides natural and articulate vocal reproduction when used as a clip-on lavalier and excels in pickup of acoustic guitar. The PRO 70 is designed to make music and speech clearly and comfortably audible, yet never draw attention to itself or its operation. The microphone is equipped with a low-frequency roll-off switch that allows for reduced pickup of room noise. The versatile PRO 70 may be powered by either battery or phantom power. Its cardioid polar pattern reduces pickup of sounds from the sides and rear, improving isolation of the desired sound source.


Here is a general list of features of the Pro 70:

- Miniature condenser microphone is ideal for both vocal and acoustic guitar applications
- Natural and articulate vocal reproduction when used as a clip-on lavalier—clothing clip included
- Excels in pickup of acoustic guitar with included instrument adapter
- Cardioid polar pattern reduces pickup of sounds from the sides and rear, improving isolation of desired sound source
- Switchable low-frequency roll-off
- Corrosion-resistant contacts from gold-plated XLRM-type connector
- Operates on battery or phantom power
- 6' (1.8 m) cable permanently attached between microphone and power module


Here is a general list of the technical specifications of the Pro 70:

- Element Pattern: Fixed-charge back plate, permanently polarized condenser
- Polar Pattern: Cardioid
- Frequency Response: 100-14,000 Hz
- Low Frequency Roll-Off: 80 Hz, 8 dB/octave
- Phantom: -45 dB (5.6 mV) re 1V at 1 Pa
- Battery: -45 dB (5.6 mV) re 1V at 1 Pa
- Impedance Phantom: 200 ohms
- Impendance Battery: 200 ohms
- Maximum Input Sound Level: Phantom: 123 dB SPL, 1 kHz at 1% T.H.D. Battery: 123 dB SPL, 1 kHz at 1% T.H.D.
- Typical Dynamic Range: Phantom: 96 dB, 1 kHz at Max SPL. Battery: 96 dB, 1 kHz at Max SPL
- Signal to Noise Ratio: 67 dB, 1 kHz at 1 Pa
- Phantom Power Requirements: 11-52V DC, 2 mA typical
- Battery Type: 1.5V AA/UM3
- Battery Current/Life: 0.4 mA / 1200 hours typical (alkaline)
- Switch: Off, on-flat, on-roll-off
- Weight of Microphone: 0.3 oz (8 g)
- Weight of Power Module: 4.7 oz (134 g)
- Dimensions of Microphone: 0.98" (25.0 mm) long, 0.40" (10.2 mm) diameter
- Dimensions of Power Module: 3.27" (83.0 mm) H x 2.48" (63.0 mm) W x 0.87" (22.0 mm) D
- Output Connector: Integral 3-pin XLRM-type
- Cable: Integral 6' (1.8 m), permanently attached between microphone and power module
- Accessories furnished: AT8411 clothing clip; AT8444 instrument adapter; power module; windscreen; battery; soft protective pouch
- Audio Technica Case Style: M1


As I've mentioned, I've owned the Pro 70 for a while now and I've been pleased with it, so I figured it was worth a review.


I'm Jonathan Clark, known online as DJ Bolivia.  Do you want to learn more about DJ'ing and music production?  If so, visit:


If you happen to enjoy techno tracks, most of my tracks are available as free downloads from this link:


Thanks so much for visit, and for your support!  I really appreciate the fan base that I've been able to build up over the years.

Also, if you want to visit any of my other sites, here are a few links:
    YouTube:  youtube.com/djbolivia
    SoundCloud:  soundcloud.com/djbolivia
    Blogger:  djbolivia.blogspot.com
    Main Site:  www.djbolivia.ca

Sunday, January 4, 2015

Simple Audio Editing Tutorial

I've been working on a couple of microphone review videos this weekend, and in each, I did a bit of audio editing of test recordings. These weren't high-quality comparison testing recordings, where the microphones were lab-tested against competing brands, just short tests of a few of my favorite current microphones (studio condenser mics, a lav mic, and a shotgun mic).


In each of the videos, I did some simple audio editing to tidy up the video, similar to what I might have done if I was using the audio in a project. The steps included some basic noise reduction, some equalization, and adding a light touch of reverb. To spare the effort of explaining what I was doing in each microphone video, and keep them shorter, I figured that I'd do a separate video to explain those steps in detail, so just the people who were curious could learn more, and it wouldn't detract from the microphone reviews. Here is that video:


Later this week, I'll add links to some of those other microphone review videos here, for anyone who is curious. Here's the first one:


I also referred to another tutorial during the middle of this video. Here's a link to that other tutorial, which talks in even more detail about basic editing of voiceovers for DJ mixes and other spoken word editing:


I'm Jonathan Clark, known online as DJ Bolivia.  Do you want to learn more about DJ'ing and music production?  If so, visit:


If you happen to enjoy techno tracks, most of my tracks are available as free downloads from this link:


Thanks so much for visit, and for your support!  I really appreciate the fan base that I've been able to build up over the years.

Also, if you want to visit any of my other sites, here are a few links:
    YouTube:  youtube.com/djbolivia
    SoundCloud:  soundcloud.com/djbolivia
    Blogger:  djbolivia.blogspot.com
    Main Site:  www.djbolivia.ca

Tuesday, April 16, 2013

Audio Recording tutorial #07: Basic MIDI Recording


I just uploaded part seven of my Audio Recording tutorial series (and I have some additional study notes further down in this post). This series is more related to home studio work than it is to DJ'ing, although I'm still covering the very basics of audio engineering and production work.

If you're just discovering these tutorials and want to start at the beginning, visit:  djbolivia.ca/audiorecording  


Audio Recording Tutorial #07: Basic MIDI Recording

In this video, we start exploring basic MIDI recording. I start off with a very brief overview of MIDI, then move into a practical, hands-on tutorial where I play a song on an electronic piano keyboard and record it into Pro Tools. I then do a couple of very basic edits, so you understand how note data can be edited.


If you want to download the audio files that I was using in this video, to better hear the audio (or experiment with it) in your own home studio setup, here’s a link to a zipped folder containing the relevant files. Remember that this is TINY compared to the download files for previous videos. MIDI data takes up almost no space. This file is only 27 kilobytes, compared to the audio files for tutorials two through five which were about a thousand times larger:

www.djbolivia.ca/tutorials/audiorecording07.rar


Links about MIDI:


I'm Jonathan Clark, known online as DJ Bolivia.  Do you want to learn more about DJ'ing and music production?  If so, visit:


If you happen to enjoy techno tracks, most of my tracks are available as free downloads from this link:


Thanks so much for visit, and for your support!  I really appreciate the fan base that I've been able to build up over the years.

Also, if you want to visit any of my other sites, here are a few links:
    YouTube:  youtube.com/djbolivia
    SoundCloud:  soundcloud.com/djbolivia
    Blogger:  djbolivia.blogspot.com
    Main Site:  www.djbolivia.ca

Nyquist, Anti-Aliasing, Quantization Noise, and Dithering

If you want to produce better music, you should understand the Nyquist theorem, anti-aliasing, & dither.  This post is directly related to another of the videos in my Audio Recording tutorial series (#09), which is embedded below.

As an overview, this post is going to cover topics including the Nyquist-Shannon Sample Theorem, Fletcher-Munson curves/charts, what aliasing is and how anti-aliasing is used to eliminate it, what quantization noise is, and finally, how dithering can be used in various ways, such as increasing sampling accuracy over a broad range of samples, or masking problems in audio. If you want to watch the video first, here it is:


Although watching the video is the best way to learn about this topic, because of my illustrations on the whiteboard, I've also put a copy of the audio portion of that tutorial video on SoundCloud, for people who would like to download it to listen to in vehicles, while travelling, etc. Here's the audio-only version:


Nyquist-Shannon Sampling Theorem

So why are CD’s sampled at 44.1 Hz? If film/video is often shown at between 24 and 30 frames per second, why is audio at more than a thousand times that rate? Why not sample at something like one thousand times per second or a nice round number like 10,000 Hz? Well, first of all, in movies, you aren’t sampling a frequency, you’re showing the equivalent of a photograph. Completely different situations. But as for the 44,100 Hz, we first need to understand the bare essentials of the Nyquist Theorem, which I only touched on very briefly in Audio Tutorial #06.

The Nyquist-Shannon Theorem was named first and foremost after a scientist (Harry Nyquist) who published research in 1928 about pulse samples, although that research wasn’t actually exactly about the Theorem that later bore his name. In fact, quite a few different scientists contributed to the subject. And sometimes it’s just called “The Sampling Theorem.” Personally, I’m glad that Claude Shannon got his name attached, because Shannon invented Boolean algebra, which is unquestionably the most important mathematical invention of the 20th century: without it, we would not have computers. Look him up.

The Nyquist Theorem essentially states that if you’re going to capture an audio signal (record a sound) accurately, your sample rate must be at least double what the highest frequency in the signal is. Let me break this down. We’re talking about a situation where a real-life sound (analogue) needs to somehow be converted into a digital representation (sampled). Essentially, the more frequently a sound is sampled, the more accurate the results will be: the digital waveform that is created will be closer to whatever the real waveform originally was. So Nyquist basically stated that in the search to determine what is the “minimum bare acceptable,” taking your highest frequency and doubling it gives you an accurate sample frequency.

Let me also define a term right now that is important. Whatever sample rate you pick, the “Nyquist frequency” is half that rate. So for CD audio, the Nyquist frequency is 22.05 kHz. For DVD-V, which is sampled at 48 kHz, the Nyquist frequency is 24 kHz.

Now of course, the math to back this up is complex, but I don’t want to get bogged down in higher mathematics. Think of it this way: If you don’t take enough samples, you’ll get an inaccurate representation of the original audio signal. I’ve talked about that in the accompanying video. But when you take at least two samples for every oscillation, your representation starts to become fairly accurate. Of course, even higher sample rates would be better and more accurate, but “double the highest frequency” is the bare minimum. And you don't want to go too high above the bare minimum, because that starts to consume excessive computer resources with decreasing incremental gains.

Now, think back to what is considered to be the usual range for human hearing: 20 Hz to 20,000 Hz. Since the majority of people can’t hear anything above 20 kHz, when an audio engineer is doing final mastering on a song, he/she will probably put a filter on the track to try to eliminate frequencies above 20 kHz. Why bother keeping them, if nobody can hear them? So that means that once the mastering is done, the highest frequency is supposed to be around 20 kHz. Use Nyquist, and you’ll see that double that number is 40 kHz, which should be our minimum effective sample rate to hear an accurate representation of the audio.

But wait, 40 kHz is not the same as 44.1 kHz! Well, you have to understand that high-cut filters don’t work perfectly at an exact frequency. It’s more of a roll-off. So if you’re trying to cut everything above 20 kHz, you’ll still have a bit of stuff at 21 kHz and 22 kHz coming through, although it’ll be quite diminished. So some sources say that when the people who wrote the standards for CD’s were trying to come up with a number, they picked 22.05 kHz as being the highest frequencies that really mattered. So double that was 44.1 kHz. And that became the new standard, even though it was a somewhat arbitrary number. Mind you, other sources say that it relates to the fact that video tape was originally used for digital mastering of CD’s and give a highly technical (and plausible) proof of the math as related to video standards. And some other sources point out, perhaps just for fun, that 44,100 is the product of the first four prime numbers squared (two^2 times three^2 times five^2 times 7^2).

Whatever the actual reasoning, the main thing is that people can’t generally hear frequencies above 20 kHz, so the Nyquist Theorem says that they have to be recorded with a sample rate of at least 40 kHz, and for some reason a slightly more conservative number of 44.1 kHz was picked for CD's, and remains the standard to this day.


Fletcher-Munson Curves

A Fletcher-Munson curve is used to represent ranges of "equivalent loudness" at various frequencies. This is a fairly subjective measure, since a person has to estimate the perceived volume of a sound, but tests of large samples of the population have given some fairly detailed results over time. Essentially if you pick a line on the graph, and follow it, you'll be able to see what volume for any particular frequency is required to be "equivalent" in perceived volume to a different frequency at a different actual volume. Here's a chart:


Aliasing and Anti-Aliasing

If an engineer didn’t filter out frequencies above 20 kHz, what would happen? Well, the simple answer is that those frequencies would “still be there” even though we couldn’t hear them. The problem would be that these inaudible frequencies would get sampled. Any frequencies that are at higher levels than half the sample rate don’t get sampled accurately. The equipment doing the sampling perceives a different waveform than what it’s actually looking at.

There is actually a mathematical way to predict the “fake” frequency that the A->D converter perceives. It is the sample rate minus the frequency. So if you had audio at 33.1 kHz going through something being sampled at 44.1 kHz, the converter thinks that it is hearing a waveform with a frequency of 44.1-33.1 kHz, or 10 kHz. So you get artifacts at the 10 kHz frequency in your audio. The 10 kHz frequency is thus called the “alias” of the original frequency, its false identity. To further complicate matters, consider that every sound has harmonics. So a tone at 10 kHz produces harmonics at 30 kHz (among other frequencies), so you also have to consider the affects of alias problems from those harmonics.

Anti-aliasing is very simple. It is the name for the process whereby the high frequencies are filtered out so they don’t create aliases. I referred to this already in the previous section: anti-aliasing is basically just the application of a high-cut filter to eliminate the high frequencies that aren’t needed, so they don’t create aliases (artifacts and distortion) in the good, audible part of the frequency spectrum. By the way, anti-aliasing is also used extensively in graphics, and one of the links at the bottom of this post has some good information re. the graphical applications of anti-aliasing.


Quantization Noise

When you're taking a sample of an instantaneous signal level (ie. analogue-to-digital conversation, or ADC), the difference between your recorded or stored value of the measurement and the true value of the signal is called the quantization noise. Basically, this error is causing by rounding or truncation of data during the sampling of the signal. It can also happen during signal processing and data communication. So in other words, quantization noise is the minor errors in accuracy during any of these processes. Luckily, if quantization noise becomes a problem in your audio, it might be possible to mitigate that with the use of dither.


Dithering

When calculations are performed on audio data, certain patterns arise. That’s because the calculations are all mathematically based, so the results are the same no matter how many times you try the calculation over. Through a complicated process, these calculations can produce audio artifacts in consistent parts of the frequency spectrum that the human ear can notice slightly. The process of down-sampling from 24 to 16-bit can cause those same unwanted patterns. We want to get rid of those patterns, to make the audio sound smoother. And as noted above, we can also have problems with quantization noise that occurs during the sampling process.

Dithering is a process by which a tiny bit of random “noise” is added during processing, and it has the effect of “smoothing out” anomalies. A real-world attempt at an analogy? Let’s say that you’ve got a pool of water that is perfectly still except for the fact that there is a bag of golf balls hanging over it, and a golf ball drops out of the bag into the water once every three seconds. That disturbance, where the golf balls keep hitting, is very obvious. However, if in addition to the golf ball, there are tons of small pebbles landing all over the surface randomly, the disturbance of the golf ball is a lot less obvious. The other small bits of noise help “drown out” the obvious disturbance. I guess that a more realistic analogy would be on a golf course. If you shank a ball into a water trap on a calm day, it’s easy to see it land in the water. But if there is rain disturbing the surface of the water, it’s a lot harder to notice the golf ball hitting. Think of the obvious disturbance of the golf ball as being analogous to the audio artifact that we need to mask, and the constant disturbances from the rain as being our noise for dithering.

The availability of excellent dithering algorithms on most systems today, combined with 24-bit recording capabilities (which means the noise floor in a digital system is extremely low) means that you don’t really have to worry about recording signals at a fairly low level and then having to deal with lower-resolution quantization noise, or systemic noise. So when you’re recording a multi-track project, you don’t have to try to get every single track up around -5 to -3 for best results. You can probably record everything down around -12 to -10 and give yourself lots of headroom to work with during mixing, without running into noise problems.

If you’ve done your project at one level and want to down-sample the final result (ie. converting a 24-bit session to a 16-bit track destined for CD), you take that final version of your song and convert it. There will usually be an option in your audio editor that asks if you want to apply dither when down-sampling. There are also lots of complicated options and algorithms that can be applied, with respect to dither types and noise-shaping. That’s beyond the level of discussion that we want to get into today. Just go with the defaults if you’re not sure what to pick. If things sound funny after the down-sample, try against with a different algorithm.


Parting Words

Obviously, I’ve covered these subjects in a fairly superficial manner. Baby steps. Hopefully, if you watched the video, that gave you a lot of additional insight. Now you know the general theory behind these subjects that are important to audio engineers. If you want to do further research on your own, I’ll put some links here now. Be forewarned! The physics and mathematics behind these topics can be pretty intense! Especially with dithering algorithms.


More of my Understanding Sound tutorials:
To see the rest of the tutorials in this Audio Recording series, visit:


Thanks so much for visit, and for your support!  I really appreciate the fan base that I've been able to build up over the years.

Also, if you want to visit any of my other sites, here are a few links:
    YouTube:  youtube.com/djbolivia
    SoundCloud:  soundcloud.com/djbolivia
    Blogger:  djbolivia.blogspot.com
    Main Site:  www.djbolivia.ca

Saturday, April 13, 2013

Basic Mathematics of Sound: Sample Rate, Sample Size, and Binary

When I first sat down to write this post, my intent was to teach some of the people who follow me on YouTube what sample sizes and rates are all about. You may have seen reference to sample rates before: CD’s at 16/44.1. High quality studio sessions at 24/96. I figured that I could type up a few paragraphs, record a short accompanying video, and be done in under an hour.


But then I started to think about what I’d have to explain if I explained sample rates: for starters, how frequency is measured, what is considered the normal range for human hearing, and how binary works. And then I started to realize that I should probably touch on the Nyquist Theorum, which directly affects minimum sample rates required to make a recording sound good. If I got into Nyquist, it seemed that overlooking a quick explanation of aliasing and quantization noise would be criminal. And if I was going to mention anti-aliasing techniques, it would be a shame to skip over a basic explanation of dithering.

So this is going to be a story that touches as lightly as possible about some of the mathematics of sound and recording, but I promise that I will try to explain this in the most simple, common-sense, layman terms possible. I don’t want your eyes to glaze over and have you navigate to the latest episode of Breaking Bad, where the science seems more applicable to everyday life. Therefore, if you’re a professional audio engineer and you’re reading through this, and one of my explanations makes you start sweating and stuttering and your heart begins to palpitate, remember that I’m trying to make these explanations more accessible for a wide audience of people who don’t have advanced degrees in audio engineering. I’m going to explain things in ways that make simple sense to me. If you see an outright mistake, sure, go ahead and email me. But realize that sometimes I’m just trying to keep things simple. I’m sort of implying the spherical cow.

Before you go further in reading the rest of this post, here’s a link to an associated tutorial video that I put together to accompany this post:


Although watching the video is the best way to learn about this topic, because of my illustrations on the whiteboard, I've also put a copy of the audio portion of that tutorial video on SoundCloud, for people who would like to download it to listen to in vehicles, while travelling, etc. Here's the audio-only version:


Sample Rates

Alright, let’s get started. You’ve probably heard lots of things about sampling. First of all, you need to understand that I’m talking about sample rates and frequency, which relate to the way that a computer converts an analogue signal (a real-world sound) to a digital representation. The word “sampling” is also used in the music industry in reference to recording a short section of audio, perhaps from another record or song, and pasting copies or altered copies of that into a new song. I’m not referring to that kind of sampling.

When “digitizing” an audio source, the way that a computer works is that it takes a measurement of the audio many times per second, and then just plays these samples back in order very quickly. Each individual slice is called a sample of the audio. The number of times per second that the audio is sampled is called the “sample rate.”

Basically, anything that is expressed in “occurrences during a period of time” is a frequency. There was a German physicist and Nobel Prize winner named named Gustav Ludwig Hertz. Any time people refer to frequency, they refer to something that happens over and over again at a regular interview, whether it is a cyclical thing (rotation, oscillations, or waves) or a periodic thing (counts of an event). The number of occurrences per second is the frequency, and the unit it is expressed in is called the Hertz (Hz). The “period” of something, ie. the time between occurrences, is the reciprocal of the frequency.

So when something is recorded at 800 Hz, that means that a sample measurement of the sound is recorded eight hundred times a second. That seems like a lot, eh? It’s not. In today’s world of audio engineering, a typical sample rate is much faster than that. All CD’s have been standardized as having sample frequencies of 44,100 Hz, or 44.1 kHz. That’s why the default sample frequency for a lot of music is at 44.1 kHz, because it’s been conformed for CD distribution.

Having a higher sample frequency gives you a better true representation of what was happening in the underlying waveform. Let’s try to use a really simple example. Let’s say that you’re in a concert hall listening to a singer. The singer’s volume, as he/she sings, is jumping up and down a lot, from very quiet to very loud and back. If you take a “sample” once per minute, you don’t have a very good idea of how loud the singer is over the time that he/she is singing. You have no idea whether the sound is louder or softer in the other fifty-nine seconds between your samples, or maybe both, jumping up and down. But if you increase your sample rate so you can take sample once per second, you’ve got a better idea of how much the singer is changing their volume over time.

That was a coarse example. Increasing your sample frequency means that your digital interpretation of the audio is more accurate. But to get a really accurate representation in today’s world, computers sample audio at a stunning 44,100 times per second to get a really accurate representation. And that’s just for CD’s. If you can sample faster, your digital sound is going to be even better (more similar to the original). DVD’s are recorded at a slightly higher sample rate than CD’s, at 48 kHz. And in today’s recording studios, sampling audio twice as fast is quite common, at rates of 96 kHz. Of course, taking twice as many measurements (96 thousand per second instead of 48 thousand per second) means that you’re going to require twice as much storage space on your computer, and more accurate equipment, which is why many studios don’t go with rates that are higher than 96 kHz.

So now that you understand what sample frequency is, what does the bit depth mean? The simple answer is “the resolution or accuracy of each individual sample.” But in order to understand that better, I’m going to talk a bit about binary numbers. I promise, this next section about binary is the only section where I have to get fairly mathematical.


Binary Notation

How does binary work? Binary is a numbering system. It’s the simplest complex numbering system, base two. There are only two digits in this numbering system, 0’s and 1’s. We’re used to base 10, which has ten different digits. Base two should be a lot easier with only two digits to think about. And base two is also easy to deal with when you’re thinking about computers and electrical engineering. Computers can’t “think” because they aren’t sentient brains. But numbers can be represented by “simulating” the 1’s and 0’s of binary with two different power states, power-on and power-off.

In binary, a single digit is called a “bit.” Bit is basically the base-two equivalent of “digit” in the base-ten system that we’re used to.

In binary, a numerical value is called a “word.” Word is basically the base-two equivalent of “number” in base-ten.

In base ten, we don’t really use the phrase “number length” to talk about how many digits are in a number. But in base-two, we use the phrase “word-length”. Computers have to deal with electrical connections that are much more simple than the human brain, so we have to keep things simple and consistent. When computers communicate, instead of a stream of single bits, they can sometimes deal with full words, ie. a group of bits communicated simultaneously. Think of it like a highway with multiple lanes, and individual cars as being bits. Because there are multiple lanes, several bits can pass a certain point at the same time. Computers are analogous because a full “word” of bits can often be shared as a single entity. The word-length refers to how many bits that is.

In the early days, computers were simple and could only understand short binary words. By the 1980’s, the commodore 64 and the apple computers were talking with 8-bit word lengths. Soon after, PC’s with MS/DOS came out that talked in 16-bit words. In the past few years, PC’s have grown up from 32-bit operating systems to 64-bit.

In the audio world, a sixteen bit word length allows for a lot of different numbers. The number of different samples possible in binary depends on the square of the word length. If you have four-bit words, you have sixteen different choices (4^2). If you have eight-bit words, you have 256 different choices (8^2). If you have sixteen-bit words, you have 65,536 choices. If you have 24-bit words, you have TONS of choices – 16,777,216 to be exact.

Ok, enough math. What does this mean? Well, having more choices means higher resolution. What if you could measure the volume of a sound that could vary from complete silence (zero decibels) to the volume of a loud jet engine (128 dB)? And what if your scale for measuring is digital? With an analogue measurement, such as recording on magnetic tape, you can measure the exact volume. But if you have to have a digital representation, you only have certain numeric choices. If you’re limited to 4-bit sample size/resolution, then remember that 4 bits only gives you sixteen possibilities. So you have to go with some pretty rough measurements. Anything from 0 to 8 dB might have to be represented in your sample as “0”, from 8 to 16 dB as “1”, from 16 to 24 dB as “2” and so on. But there’s a lot of variation between say 8 and 16 dB. That’s not very accurate if you later see that your sample was written down as “1” and you have no idea whether the real sound was at 8dB or 16dB, or anything in between.

But what if you can increase your sample width, the number of choices. If you can measure the sound with 16-bit sample size, you have 65,536 different possible levels to choice from. That gives you a lot more choices in the scale from silence up to 128dB. You might be looking at a scale like this:
       0 = 0.000 dB
       1 = 0.002 dB
       2 = 0.004 dB
       3 = 0.006 dB

And all the way up to:

       65,534 = 127.998 dB
       65,536 = 128.000 dB

Obviously, by having more bits, you can capture/communicate more information at a higher resolution, which gives you a better representation of what the volume was in the original sound. Going from 16-bit sample size to 24-bit sample size obviously means that you can measure things with an even better resolution. By the way, note that I'm talking in generalizations here so far. If you're an experienced audio engineer, you'll know that digital audio in a DAW is treated a bit differently in that the higher sample size actually means a lower noise floor, but we'll get into that in tutorials 8 and 9. For now, let's keep things simple.

If you want a rough example of a real world analogy, think about the resolution of the camera in your cell phone. If you’ve got a 3 megapixel camera in one phone and a 13 megapixel camera in a second phone, the 13mp is obviously going to give you a better picture, right? That’s because it’s a higher resolution. You’ll get a more accurate representation of what you’re trying to record (photograph) because there are more bits used to store the information.

CD standard resolution is 16-bit. That should be the minimum sample size that you want to work with in a music production or recording environment. Anything less sounds noticeably imperfect even to untrained ears. But we have the technology to do better. If you see a sound card that is referred to as 24/96, it means that the sample size is 24-bits, and the frequency with which those samples are taken is 96,000 times per second. If you have the choice, try to work with 24-bit equipment, and make sure your computer software has your “project settings” at 24-bit instead of a lower number. The only drawback is that 24-bit recording takes up more space on your storage device.

Before I move on, let me just say something about a different type of binary. Different type? Well, in all of the above, I’m assuming that you’re using what’s called a “fixed point” notation. But there is also something called a “floating point” notation, so you’ll see things like “32-bit floating.” In such a system, the last eight bits may not be used specifically to increase resolution, but might instead be used to increase dynamic range significantly. I won’t bother trying to explain the significand/mantissa or the rest of the theory. You’ll find all kinds of discussion and debate about this on the internet, but I think the simple answer is that 32-bit floating isn’t necessary much better than 24-bit fixed, and 32-bit takes up 33% more space. Check out this link for more: http://www.bores.com/courses/intro/chips/6_precis.htm

For now, I’d suggest that you shouldn’t select 32-bit at the start of a project because your newly recorded files will be 33% larger without any improvement whatsoever in fidelity. It makes more sense to switch a session's resolution to 32-bit float later, when bouncing mixes or performing complex signal and effects processing.


Sample Rates as applied to Sound

So I started out to explain the difference between sample frequency (times per second that samples are taken) and sample depth (number of bits of data per sample). And it turned into a three thousand word essay. Can I give you anything more practical to wrap things up? I’ll try:

First, be aware that if you are saving audio files, a single STEREO audio file at 16-bit resolution and sample rate of 44.1kHz will take up approximately ten megabytes of disk space for each minute of audio. Memorize that. Once you know that, you can calculate potential storage requirements for all variations of sample size, rate, number of tracks, and project length.

Example:

Let’s say you’re recording a vocal (single mono track), an acoustic guitar (single mono track), and a piano (feeding a stereo signal to your DAW). All told, you have a total of four tracks. Mono signals count as a single track, and stereo signals count as two. Four mono track is equal to two stereo tracks. So based on what you’ve memorized of 10 megs per minute of stereo audio at CD quality (16/44.1), then you’ll need double the storage space for your project, because you have the equivalent of two tracks. So budget for 20 mb per minute of audio.

Let’s say that you’re making a recording that will be exactly eight minutes long. Multiply your 20megs by 8, and you’ll need 160megs of storage.

But wait, let’s say that a studio engineer comes in and says that he wants you to change from 16-bit to 24-bit sample sizes. Your requirement just grew by 50%, so now you need 240megs of storage instead of 160.

Then, let’s say that he also adds that the project will be for DVD with no CD equivalent, so you need to change from 44.1 kHz sampling to 48 kHz. Roughly, add 10% to your numbers, so your 240megs becomes 264megs.

Then finally, the engineer changes his mind yet again and decides to jump it up from 48 kHz to 96, just because he’s going to be working with a lot of digital effects and he wants the highest project quality possible. So double it again, and your storage requirements go from 264 to 528megs.

That kind of stuff is handy to know when you’re calculating space requirements for a project. However, to be honest, if I’m budgeting for storage space for a project, I’ll double what my calculations show me, just to be safe. So I’d want to have a full gigabyte of storage available for the example above. Things always get out of control and take up more room than you anticipate.


Oh yes, and what do I recommend/use for sample rates? I often just use 16/44.1 for projects. Face it, CD standard has been great quality for a couple decades. How can you go wrong? Unless the project is very important, using 16/44.1 saves disk space, and saves a bit of time because I don’t have to down-sample my final track at the end for compatibility with CD players. For most of my work, CD quality is just fine. However, I'll sometimes use 24/44.1 for projects. That's an odd setting, which you'll rarely see, but I'll explain why I use that in tutorials 8 and 9. You'll also see most studios use 24/96 for their projects. The advantage of 24/96 is that when you save it as an archive, if you need to go back to it ten years from now, computers will probably have advanced so much that it’ll probably even be possible for cell phones to be used to edit projects of that complexity.


Alright, that’s enough for today. I’ll save the Nyquist Theorem, Quantization Noise, Anti-Aliasing, and Dithering for future tutorials. Thanks for reading. I hope you now understand a lot more about the basic mathematics of audio.


To see the rest of the tutorials in this Audio Recording series, visit:


Thanks so much for visit, and for your support!  I really appreciate the fan base that I've been able to build up over the years.

Also, if you want to visit any of my other sites, here are a few links:
    YouTube:  youtube.com/djbolivia
    SoundCloud:  soundcloud.com/djbolivia
    Blogger:  djbolivia.blogspot.com
    Main Site:  www.djbolivia.ca

Saturday, April 6, 2013

Audio Recording Tutorials #03 to #05 - Layered Multi-Track Recording


Videos #03 through #05 of my Audio Recording tutorial series are now online (and I have some additional study notes further down in this post). These three particular videos explain how to go about making a multi-track recording when you must record the tracks one after another in layers, rather than being able to perform everything simultaneously.

If you're just discovering this series and want to start at the beginning, visit:  djbolivia.ca/audiorecording


Audio Recording Tutorial #03: Layered Multitracking part 1

In this video, we use Adobe's Audition software to record the tracks that we're going to be working with on this project. I recorded a Neil Young song (After The Gold Rush) with four parts: piano, strings, bass, and acoustic guitar. This video described the process of setting up the session, setting up individual tracks and arming them, recording the audio, and making sure the project was ready for editing.


Audio Recording Tutorial #04: Layered Multitracking part 2

In this video, I started to explain basic editing tasks such as using the razor/slice tool to cut a track up into clips, making changes to track volumes and panning, and adding volume and panning automation to individual clips. I also talked about Signal-To-Noise Ratios, the use of subtractive EQ'ing to give your instruments more space in a mix, and archiving.


Audio Recording Tutorial #05: Layered Multitracking part 3

We finished editing the individual tracks, I talked about snapping and zero crossings and cross-fade techniques, and then we bounced the edited tracks, did some EQ'ing, added reverb, and adjusted panning and volumes again. Finally, we bounced all the tracks to a single audio files, did some additional reverb and hard limiting/amplification work on it, and saved the final result to disk.


The Final Product: the song that was recorded

This is a very short video, just over three minutes long. It's the final edited copy of the song that I recorded, "After The Gold Rush." This song was originally written by Neil Young, and was the title track to his third album, released in 1970.


If you want to download the audio files that I was using in these videos, to better hear the audio (or experiment with it) in your own home studio setup, here’s a link to the two zipped folders containing the relevant files:

www.djbolivia.ca/tutorials/audiorecording03.rar

www.djbolivia.ca/tutorials/audiorecording04and05.rar


Once you've watched the two videos above, I'd recommend that you spend some time learning a bit more about a few of the things that I covered in this video:


Computer Technology: SSD's vs HDD's:


Fundamentals and Harmonics:


Zero Crossings & Snapping:


To see the rest of the tutorials in this Audio Recording series, visit:


Thanks so much for visit, and for your support!  I really appreciate the fan base that I've been able to build up over the years.

Also, if you want to visit any of my other sites, here are a few links:
    YouTube:  youtube.com/djbolivia
    SoundCloud:  soundcloud.com/djbolivia
    Blogger:  djbolivia.blogspot.com
    Main Site:  www.djbolivia.ca

Sunday, March 17, 2013

Digital DJ Publication

Some of my videos have just been featured in the "Digital DJ" publication.  Here's a link to the issue:


Check it out. There are a lot of good links there if you're interested in DJ'ing, especially with software like Ableton, Serato, etc.  There's a free subscription link up in the top right if you'd like Digital DJ delivered to your inbox.

Jay Brice (DJ Mongo) is the publisher of Digital DJ.  Jay is a lawyer in Las Vegas, but he's got a background in radio station management and is the co-host of The Lyons Den Radio Show, heard weekly on Sundays from 7-11pm PST on 91.5fm KUNV Las Vegas.


I'm Jonathan Clark, known online as DJ Bolivia.  Do you want to learn more about DJ'ing and music production?  If so, visit:


If you happen to enjoy techno tracks, most of my tracks are available as free downloads from this link:


Thanks so much for visit, and for your support!  I really appreciate the fan base that I've been able to build up over the years.

Also, if you want to visit any of my other sites, here are a few links:
    YouTube:  youtube.com/djbolivia
    SoundCloud:  soundcloud.com/djbolivia
    Blogger:  djbolivia.blogspot.com
    Main Site:  www.djbolivia.ca

Sunday, February 10, 2013

Learn How to Make a Ringtone

This afternoon, I decided that I'd teach you how to make a ringtone. We're the in middle of a large snowstorm here in Canada, and learning how to make ringtones is fairly easy for anyone who is moderately comfortable with computers and technology.

A ringtone is basically just a simple audio file, which plays on your phone when you get a phone call or text or instant message. So instead of a standard ringing noise, your phone might play the first thirty seconds of the theme from Seinfeld. I personally like to find songs that start relatively quietly for the first few seconds, in case you can answer your phone quickly, before they ramp up to full volume. Smartphones can also be set so there are different ringtones for different events, ie. one song for a voice call, another for a text message, and so on. Depending on the phone, you can sometimes even set your phone to play a unique song when a specific individual calls you, so you know who is calling without having to look at the call display.


If you'd rather watch a video to describe everything in this post, I have one ready. It goes through all the technical steps in enough detail that you should be able to figure out how to make your own ringtones and put them onto your phone. But I'll also describe the process in more detail below. Anyway, here's the video:


The first ringtones came out in the mid-1990's, and became really popular in the mid-2000's. Purchased ringtone sales peaked in 2007, but that's probably because people realized that you don't necessarily have to buy a ringtone to put on your phone. You can probably do-it-yourself. But of course, voice telephone traffic has also been dropping in the past couple years, thanks to the widespread use of texting, instant messaging, video chat, and other recent technologies. The rapidly increasing use of voice-over-internet is also cutting into traditional voice calling, because people can make free voice calls on their phones over wireless connections, through tools such as Facebook Messenger, Skype, Google Voice, and Bobsled (although not all of these platforms are available for every mobile platform). For example, I use my phone every day, but in the past six weeks I believe that I've only gotten phone calls from two people. Anyway, regardless of the slight decrease in importance of ring-tones in the past few years, it's still fun to have them.

There are several different ways to make a ringtone, including:
1. Using custom software designed to make them.
2. If you have an iPhone, it's easy to make them in iTunes.
3. You can use audio software to edit an audio file, then attach the phone to your laptop, and drag and drop the new clip into your ringtone folder on the phone, then turn it on in your cell phone preferences.

I'm going to show you each of the above processes, as quickly as I can.

If you're using either of the first two methods to make a ringtone, a lot of the technical stuff is taken care of for you. But if you're doing it yourself, you should be aware of a couple key points. First, the ringtone should be less than 40 seconds long. Some phones now allow longer files, so this rule isn't hard and fast. But you should also think about this: for most people, voicemail will kick in eventually, if you don't answer the phone. So with a long audio file, such as a full-length song, a lot of the file will never be played anyway because the phone will go to voicemail. For instance, my blackberry currently goes to voicemail after 5 rings, which takes about twenty seconds. So if I'm making a ring-tone, I'll always make sure it's only 25-30 seconds long, so I'm not wasting too much of my storage space. Of course, the way cell phones are advancing, storage space for a ringtone is essentially a non-issue now anyway.

There are a lot of different phones on the market today, and there are also a lot of different file formats that these phones expect for ringtones. Before you do anything else, you should do a Google search on your cellphone brand and model and find out what your specific phone requires. On a positive note, as smartphones get better, they're starting to take a much broader range of file types than a few years ago. Some example formats which are currently popular are 3GP (which is a video format), MIDI (a format used frequently quite a few years ago but much less popular now), MMF, AMR, M4R, QCP, and of course, a range of the "mainstream" audio file types such as WAVE, AIFF, MP3, AAC, and FLAC.

In the last example that I show in the video, I'm assuming that you've got a smartphone that accepts generic audio files, since that is becoming more and more common as technology advances. I've been able to use "normal" CD-quality audio files on some phones, ie. with specs where the sample frequency is 44,100 Hz and 16-bit sample size, in two channel stereo. But if you find that your phone requires a file with lower specs, it is easy when saving your edited ringtone to adjust the settings for a lower sample frequency, a lower sample size, or a conversion from stereo to mono (often not a bad idea, since your phone doesn't have stereo speakers).

I won't bother getting into a detailed explanation of our first option, using custom software to create ringtones. The software is pretty self-explanatory, and it has the advantage of knowing what format is necessary for tons of cell phone models out there. But you may wonder which software package is best to use. Rather than recommend a specific software suite right now, which could be irrelevant a year from now, I'm going to suggest that you do the following: first, do a google search on "toptenreviews.com" and "ringtone software." Top Ten Reviews is a pretty useful site which gives reviews on a ton of different product categories. If you find their current page, you'll see ten common software packages that can be used to make ringtones, along with a breakdown of specs for each package, pros and cons, and ranking details. For instance, right now, the top rated package is the MAGIX Ringtone Maker software for $19.95. All of the packages that you'll see on this site are for purchase, ranging from about $10 to $30 dollars, although you can also find free software if you look around carefully. Mind you, some of the free software comes with malware or limitations, so check it out very carefully before you install, and watch the install dialogues to see if the program is trying to sneak any toolbars or other crap onto your system.

The second option, which is specifically for iPhone users, is to use iTunes. Now you have to be careful because iTunes has a built-in ringtone maker, but that costs a couple dollars to turn a song purchased from the iTune store into a ringtone that you can use. However, if you've got any songs in your iTunes library that were NOT purchased from the iTunes store, ie. songs that you've ripped off a CD that you bought, or songs that you've purchased from an online retailer like Amazon, Rhapsody, or Songster, there is another approach. Basically, here are the steps in point form:

1. Pick your song and have it up on the screen in iTunes. Again, remember that it must be a song that you imported, not an iTunes purchase.
2. Right-click on the song.
3. Go to "get info."
4. Go into "options."
5. Select a start and stop time. Remember, about thirty seconds total is probably optimal, and as you can see, you don't necessarily have to use the first thirty seconds of the song. You can pick a section from the middle of the song.
6. Right-click and "Create AAC Version," NOT the "create ringtone option."
7. A copy will now be made in iTunes which is the section of the song that you specified between the start and stop times above.
8. Drag and drop that new piece of audio out onto your desktop, so you can play with it.
9. Delete the copy that is still in iTunes.
10. Go back into the info/options for the full song that you were working with in steps one and two, and change the start and stop times back to the beginning and end of the song, so the next time you play it in iTunes, you hear the whole song.
11. Go out onto the audio file on the desktop and change the extension from M4A to M4R. You'll have to confirm that you want to change the file type. Incidentally, if you're working on a PC and you can't see the extension, you can fix that in Windows 8 by going into Windows Explorer (window key + "E") and then click on the desktop in the left side preview plane, then click on the "view" tab and then near the top right of all the options put a check mark into the box that says "file name extensions." In windows 7/Vista/XP, click on this link for instructions.
12. Add the file back to iTunes, and make sure your iPhone is attached and visible in iTunes.
13. Click on the icon for your iPhone, then go into Sync and go into ringtones, and sync your device with the appropriate ringtone selected (same as syncing audio files, just a different tab).
14. Go into your ringtones on your phone and tell the iPhone to use the ringtone you just added for whatever its intended purpose is.

For the final option, I did a video demonstration of how to create a ringtone manually, using free software from Audacity. Since I didn't have an audio file on the laptop to work with, I grabbed a song from YouTube. Of course, for the purposes of the video, I used one of my own songs that I hold the copyright to. Here are the basic steps that I demonstrated in the video:

[Skip directly to step 5 if you've already got an MP3 or other type of song ready on your computer].
1. I downloaded a program called "YouTube Grabber" from download.cnet.com.
2. I used the YouTube Grabber to rip this video: http://www.youtube.com/watch?v=j3V9xJcC7ko
3. Incidentally, I used that video not because it was the best possible song for a ringtone, but because I own the copyright. And I am hereby giving everyone reading this my complete written permission to rip and use and share that song for your own non-commercial purposes, if you want. And if you know any famous people who do placements of music in TV and film, do me a favor and play the song, and suggest that they contact me for licensing it for their commercial use. It would probably work better in certain film/TV situations than as a ringtone.
4. If you don't already have VLC Media Player on your computer, it's a free program. Download it and install it. Use it to extract an audio-only file from the video file that you just created with YouTube Grabber. If you want more info about how exactly to do that, go to the 40min 41sec mark of this video. FLAC is fine for the file type right now.
5. Open this new audio-only file in Audacity.
6. Trim the edges to the proper length. In other words, if you're not starting at the beginning of the song, cut out the parts at the beginning that you don't need. And once you've done that, cut everything after about the thirty second mark.
7. Optionally, you can apply an EQ to trim a bit of the low-end and high-end, because the phone doesn't have a great set of speakers anyway.
8. Go to effects and "Normalize" the audio to bring it up to full volume, in case it isn't already.
9. Convert the audio to Mono, if your phone doesn't accept stereo audio files for ringtones.
10. Save the new ringtone that you've just create.
11. Plug in your phone, drag and drop your ringtone into the appropriate folder on the phone, then go into the ringtones menu on your phone and set your new ringtone to be used in whichever alerts you want it.

Fairly simple, although for this set of steps, it probably would be easier to follow along with the video.

Ok, that's about all there is to it. There's not much point spend a couple dollars to buy a custom ringtone, if you own music of your own and you can create a ringtone yourself!

Here's a free download link for the "When I Grow Old" ringtone (right-click to download):
http://www.djbolivia.ca/tutorials/whenigrowold_ringtone.wav

Here's a free download link for the "Global Underground" ringtone (right-click to download):
http://www.djbolivia.ca/tutorials/globalunderground_ringtone.wav

And here's a download link for my desktop wallpaper, if you like the photo. I took it in Mackenzie, British Columbia, Canada:
http://www.djbolivia.ca/tutorials/desktop_background.jpg


If you enjoyed this tutorial, and are interested in any aspects of Audio Recording and Editing, DJ'ing, or Music production, check out the Videos page on my DJ website at the following link, and share a link to anything that you enjoy there:

www.djbolivia.ca/videos.html


I'm Jonathan Clark, known online as DJ Bolivia.  Do you want to learn more about DJ'ing and music production?  If so, visit:


If you happen to enjoy techno tracks, most of my tracks are available as free downloads from this link:


Thanks so much for visit, and for your support!  I really appreciate the fan base that I've been able to build up over the years.

Also, if you want to visit any of my other sites, here are a few links:
    YouTube:  youtube.com/djbolivia
    SoundCloud:  soundcloud.com/djbolivia
    Blogger:  djbolivia.blogspot.com
    Main Site:  www.djbolivia.ca

Thursday, February 7, 2013

Plosives - A Background for Singers & Audio Engineers

Plosives are something that singers and audio engineers need to be concerned with. Well, especially audio engineers, although singers should understand the subject.

Basically, a plosive is like an explosion of air hitting a microphone during a recording process. Sing something like, "I'm on a Boat," with your hand about an inch in front of your mouth. Do you feel a sudden burst of air at some point? Try singing, "I'm on a plane." And then trying singing, "I'm in a car." Obviously, different sounds cause different amounts of that burst of air.

The worst sounds, ie. the ones that create the most significant plosives, are words that start with B's and P's. These are created by the lips. Nearly as bad are K and G sounds created by the body of the tongue. Also problematic are T's and D's, which are created by the tip (blade) of the tongue. And incidentally, some of those letters can be pronounced in different ways. For example, in English, the words "truck" and "the" both start with a T, but the T in "truck" causes more of a problem. I'm not entirely sure what the correct terminology for these different pronunciations is, but I personally call the sounds a "hard T" (in "truck") and a "soft T" (in "the"). I'm pretty sure those aren't the audiologically correct terms, but hopefully most people will understand what I mean.

All of the sounds that I mentioned above are caused by what are called the "stop consonants". That's because in order to make them, the flow of air through the mouth is temporarily stopped completely. In phonetic terms, this is also known as an "oral occlusive," a consonant in which the vocal tract is blocked so that all airflow ceases.

Are there other types of consonants besides stop consonants? Of course. "Fricatives" are partial occlusives which impede airflow in the vocal tract, but don't stop it entirely. And "nasals" are when the vocal tract is blocked, but air flows out the nose instead. Examples of nasals would be "m" or "n" sounds. Want to test those? Try placing your finger just under your nose and then say a phrase like "the bird flew over the lake." All of the sounds in that sentence can be produced in the mouth and vocal chords, and you don't need your nose. But if you try saying words like "motorway" or "nunnery" you're likely to feel some air coming out of your nose. It's faint, but it's there. Anyway, fricatives and nasals are not relevant to our intended topic for the day, so let's get back to plosives.

So why are plosives important? Well, as a singer gets closer to a microphone, the burst of air that comes out of the mouth will hit the microphone. Today's microphones are pretty sensitive. That burst of air hitting the microphone sounds different than the sound that should be hitting the microphone, namely the vibrating molecules that make a noise sound like it should. So instead of recording the proper sound, the microphone is partially recording the noise of air hitting the microphone, or essentially, a little wind-storm.

A secondary problem related to plosives is the fact that the closer a singer gets to a microphone, the better their voice sounds, in general. But as the singer gets closer, the plosives become more noticeable. A typical catch-22 situation.


So what is the solution? Well, I recommend that you try using a pop filter. Actually, every audio engineer will recommend that a pop filter the best solution for almost every vocal recording situation. But what is a pop filter? Well, it's a thin fabric similar to pantyhose, stretched over a frame. The pop filter is placed between the singer's mouth and the microphone, and it blocks the bursts of air from hitting the microphone, but the fabric is still thin enough that almost all of the sound of the vocalist come through (and you can boost the recording levels by a tiny amount to compensate, if necessary).

Here's a short thirty-second YouTube video to show you a pop filter:


Here are a couple of graphics that show what kind of difference you might see between a recording of a word without a pop filter (the first graphic), versus one with a pop filter (the bottom graphic). You can probably tell just from the visuals that the initial impact of the sound in the first recording is more harsh:


Now that you understand what plosives are, and how to reduce their impact with the use of a pop filter, it's time for further research. Tom Johnson writes a blog at I'd Rather Be Writing. He's got a post on it about plosives which is excellent because it has some accompanying sound files that help demonstrate what they can sound like. I'd recommend you check out his post, at this link:

Tom's Blog Post about Plosives


If you'd like to see my of my Understanding Sound tutorials, visit:


-----


I'm Jonathan Clark, known online as DJ Bolivia.  Do you want to learn more about DJ'ing and music production?  If so, visit:


If you happen to enjoy techno tracks, most of my tracks are available as free downloads from this link:


Thanks so much for visit, and for your support!  I really appreciate the fan base that I've been able to build up over the years.

Also, if you want to visit any of my other sites, here are a few links:
    YouTube:  youtube.com/djbolivia
    SoundCloud:  soundcloud.com/djbolivia
    Blogger:  djbolivia.blogspot.com
    Main Site:  www.djbolivia.ca