This is the music-related blog for Jonathan (Scooter) Clark, also known in the electronica world as DJ Bolivia, a producer and DJ from Atlantic Canada. I listen to (and produce) a lot of folk, indie, rock, and hip hop music too!
I also run a company (Replant.ca Environmental) through which you can sponsor the planting of trees to build forest reserves and community forests, which are protected from commercial logging. Please visit: www.replant.ca/environmental
Fifteen years ago, I published a post on my personal (non-music) tree planting blog, talking about how to solve distortion problems in Windows Media Player. Some people are still using this app on older operating systems, and continuing to run into problems, so I'm going to migrate that information to this music blog. But remember, this is for the Legacy player, not the new one!
----
Have you ever listened to songs in Windows Media Player and found them
to be distorted in places, so the sound quality is terrible? The same
files may play perfectly in all other programs - I've had files that
worked in WinAmp, RealPlayer, Quicktime, Nero, and a host of other
programs with no problems, yet Windows Media Player would not handle
them properly.
As it turns out, MicroSoft has a Creative
PlayCenter MP3 decoder resident in the operating system which (in many
but not all cases) is what causes the problem. Certain versions of
Windows Media Player use this decoder, but there are compatibility
problems. If you're not using that decoder file for whatever reason,
you probably won't run into the distortion problems.
The simplest
way to fix the problem, assuming that you're running on a Windows
operating system, is to go down to your start menu on the bottom left
side of the screen, click on it, then go into "search." You need to
search your C: drive (or whatever drive your O/S resides on) and look
for a file called "Ctmp3.acm" - if you can find that file, don't delete
it, just rename it to "Ctmp3.bak" instead.
If you can't see the
file extensions when you're doing searches (the default option on
Windows, but one which I detest and disable immediately whenever I set
up a new computer), I'll show you how to make your file extensions
visible. Go to Windows Explorer, either through your Start menu or by
holding down the "flying window" key (left of your left side alt key)
and then pressing the letter "E" at the same time. Next, go into the
Tools menu, and chose Folder Options in the drop-down Tools menu. In
Folder options, click on the "View" tab. The seventh or eight option in
that list usually says "hide extensions for known file types" and has a
check beside it. Uncheck this, then click OK. Now you'll always be
able to see file extensions in Windows Explorer and associated panels.
If you're quite computer savvy, you might also want to set the other
three options above and below that let you show hidden files, show O/S
files, and display the full path name in the Title Bar (although this is
only applicable if you're trying to conserve system resources by
switching to Classic View, such as for intensive audio or video
processing).
Anyway, now you know how to show file extensions,
and how to fix the distortion problem on Windows Media Player. This may
not be a problem on newer versions of Vista, but it certainly was on
certain versions of WMP running on XP.
If you want a different approach to disabling the problem codec, here's another set of instructions:
The
Creative Playcenter software rudely blocks the Windows MP3 codec. The
following instructions show how to unblock it on Windows XP system. The
instructions for other Windows versions are the same except the steps to
get to the audio codec area from the control panel varies. Note that
this will disable the MP3 capability of the Playcenter software. You can
re-enable using the same steps or replace the Playcenter software.
1. Go to the Control Panel 2. Double click on "Sounds & Audio Devices" 3. Select the "Hardware" tab 4. Double-click on "Audio Codecs" 5. Select the "Properties" tab 6. Double-click on ctmp3.acm 7. Select "Do Not Use this Audio Codec" 8. Then click on the "Apply" button
Edit, a few years later:
Please
note that there are a few posts online now from MicroSoft that might
give you additional insight into this problem. Here are the links:
Hopefully,
between my own suggested solutions, and the comments that MicroSoft has
brought forward, you'll be able to fix any issues that you might have.
I originally wrote and published the information on my main website in 2001, but then moved it to this blog post in 2015 because my website wasn't mobile-friendly at the time. Now that my website has been modernized (starting in 2024), you can find this turntables information there too. If I make any future updates, I'll be doing it on my main site rather than within this blog post. The graphics in this blog post are also quite old (back when rudimentary digital cameras struggled to do much more than 450x300 resolution) but I was able to use an AI to upscale the old imagery, so the images look much better on my main site. Visit the turntable info on my website at this link:
In this section, we’re going to discuss what happens when
you open your new turntables, and how to put them together and get them up and
running. We’re going to use as our example the Technics T1200 series,
which have been widely acknowledged as being the world standard in turntables
for a couple decades running. The T1200’s, also known as the “Tech 12’s”
or “Tech 1200’s,” are known as direct drive turntables. That is because
the motor that spins the platter is directly connected (via magnet) to the
platter on the turntable that spins around. There are other types of
turntables available, known as belt-driven turntables. A belt-driven
turntable still has a motor, but there is a belt that connects the motor to the
platter to spin it around, much like a fan belt on a car engine is used to turn
around the fan behind the radiator. Direct drive turntables are generally
priced higher and are more desired, because their design is far more sturdy,
and gives the user a more constant speed of revolution for the platter.
The Technics series of turntables currently have three main
sub-types, known as Mark 2’s, Mark 3’s, and Mark 5’s. These are
designated as T1200 MK2’s, M3D’s, or MK5’s. The MK5 has a designated
model number of T1210 instead of 1200, presumably to indicate that significant
improvements were made. The differences in the three types are fairly
minor. For instance, MK2’s have a pitch control slider that has a “click
spot” in the middle, whereas M3D’s have a smooth slider as you move through the
middle. MK5’s have a smooth slider than can be set for two different
adjustment ranges. We’ll get into these differences in more detail, later
in the video. For now, let’s just get right into the basics of opening
the box on a new “deck” (slang for turntable), and getting set up.
Setting Up a
New Turntable
When you open up your box containing a brand new turntable,
the first thing you’ll discover is the clear plastic cover. This is the
dust cover. When you’re not using your turntables, you should always keep
the dust cover on the turntables. Dust can get into the inside of the
turntable casing, and collect on the magnet, slightly reducing its
effectiveness over time. The covers can break pretty easily, so be sure
to put them somewhere relatively safe when you are using the turntables.
The next thing that you will find is a set of three
different items which are about the size of a large record (a circle that is
twelve inches in diameter). The first of these is called the “slip
mat”. It is probably made of a black material like felt, and is fairly
thin and flexible. The purpose of the slip mat will be explained shortly
in greater detail. The second item will look like a clear plastic version
of the slip mat, made of a material sort of like waxed paper. This is
meant to perform a similar function to the slip mat, although there is far less
friction involved. Scratch DJ’s and turntablists would be most likely to
use this item. However, many other people simply throw it out, or lose it
eventually. The final item will be the rubber mat which again is the same
size as the slip mat. However, this rubber mat provides a lot of
friction. Many DJ’s also throw out their rubber mats. The mat is
more useful for someone who is not DJ’ing, and who is setting up their
turntable for home listening use.
How Does a
Record Work?
When a DJ is playing records, he or she will want to be able
to control where the song starts and stops, and rarely plays a song through
from the beginning to end. To understand this section better, you have to
understand how a record works. People commonly refer to a record as
having a lot of grooves on it that contain the music. This isn’t entirely
true – there is actually only one groove for each song. However, it is
very thin, and spirals around the record sometimes as many as a couple hundred
times through the length of a single song, giving it the false appearance of
having a whole series of circular grooves. The DJ will set the needle
down at the beginning of the record (on the outside quarter inch) and as the
record revolves on the platter, the needle will fall into the beginning of the
groove containing the music. As the record continues to spin, the needle continues
to sit in the groove, and the whole tone arm assembly that holds the needle
will slowly move in toward the center of the record as it continues to revolve.
The needle is effectively stationary this whole time (except
for the gradual movement of the tone arm toward the center of the record),
while the playing media, the record, is moving underneath it. As the
needle “moves” through the grove, it is jostled up and down, but always (we
hope) remains in the groove. The tiny jostling of the needle directly
correlates to the vibrations which are interpreted by the human ear as sound,
therefore, the bumps on the vinyl are interpreted by the needle and transmitted
by the turntable to a mixer, and this tiny signal is amplified by the system
and comes out as music.
To move to a different point in the record, all a person has
to do is lift the tone arm with the needle, move it in or out on the record,
and then set it down again to start listening at a different point.
However, since the section of the grove that represents one full revolution of
the record can hold as much as two seconds worth of music, this is not accurate
enough for most DJ’s. What if you picked one point on the record, and the
place that you want to start comes half a second later? If you move the
needle “over” by another grove, to the next adjacent part of the spiral, you
have gone too far by about a second. This may be unacceptable.
Therefore, the DJ needs to have the ability to find the exact spot on the
record that represents the spot he or she wants to start the music at. To
solve the problem, the DJ may need to spin the record around to a different
part of the groove.
The Purpose
of the Slip Mat
If the record were to be securely attached to the platter of
the turntable, then the DJ would have to be able to spin the platter around to
find that spot he is looking for. However, that would be hard on the
motor. A motor is designed to spin constantly at a set speed, and
physically forcing it to spin more quickly or less quickly, or to hold it in
one place while the motor is straining, will eventually damage the motor.
This is why the slip mat was invented . The record sits on the slip mat, and
then the slip mat sits on the platter. There is a great deal of friction between
the record and the felt of the slip mat, so when the record spins, so does the
mat. However, there is only a very small amount of friction between the
felt of the mat and the steel surface of the platter, therefore, the DJ can
spin the record (and slip mat) around as much as he or she wants, while the
platter just keeps revolving underneath. This way, there is very little
pressure on the motor at any time. The DJ can stop the record in place by
applying gentle pressure to the surface of the record, and the friction between
the DJ’s fingers and the record keeps it from continuing to move, despite the
fact that the platter underneath is still spinning.
For this very reason, when you learn to DJ, you should
eventually learn to speed up and slow down your records using either the pitch
control fader on the deck, or by using your hands to temporarily speed up or
slow down the record. Some DJ’s will try to speed up or especially slow
down the record by putting their hands on the outside of the platter and using
friction there. This is a habit that you should try hard not to get
into. It makes sense for someone to want to do this. By slowing
down the platter itself, you avoid putting your fingers on the records, and
this keeps them cleaner. If you have dirty or sticky fingers (which gets
worse when you start to sweat) then you may also have problems where the record
“grabs” faster than you would expect, and thus you feel like you cannot control
the record as much. However, by using the platter itself to slow the
record, you are working against the motor, which goes counter to the whole
point of using the slip mat in the first place. Also, it is harder on the
motor, so you may run the risk of having to get the motors “reconditioned”
(having the motors calibrated or replaced) more quickly.
There are different types of slip mats available.
Scratch DJ’s and turntablists place the highest demands on their slip mats,
because they do far more cueing (sliding the record forward and backward) than
a club DJ would. For this reason, slip mats designed for turntablism are
usually the thinnest, and have the least amount of friction. Slip mats
designed for less technical DJ’s will usually be thicker and have a little bit
more friction. A tiny amount of friction is needed, after all, so that
when you let go of the record and slip mat, it “grabs” the platter and begins
to revolve. If you have a slip mat with practically no friction at all,
the speed of revolution is slightly less consistent, therefore a slip mat with
a bit more friction will let you “hold” a mix at a steady speed for a longer
period of time.
The Platter
The next item that you will probably find in the box is the
platter. This is a large circular metal plate, with a very smooth surface
on the top. The platter probably has three holes in it – one in the
centre that guides the platter down over the nipple (the motor spindle of the
turntable), and two larger holes elsewhere that are simply for convenience in
placing your fingers into, when mounting or removing the platter. The
platter will probably have a label with a set of pointer attached to it.
Read these carefully. They talk about how to treat your platter
properly.
Miscellaneous
Parts
As you continue to remove items from the box, you will find
things like the “random piece of white plastic” that has no apparent purpose, a
head-shell assembly, a counter-weight for the tone arm, a centre-piece for
seven-inch (“forty-five” rpm) records, and a grounding post for your
mixer. The piece of white plastic does actually have a purpose – once
your headshell and cartridge have been assembled, the round end of the white
plastic piece can slip over the round base of the headshell, and then the long
white part of the plastic will be in the right position to cover the needle,
preventing it from damage. The other miscellaneous parts will be
discussed shortly.
The Base of
the Turntable
If you remove the main housing of the turntable from the
packing material, and turn it upside down, you will see some cords and wires
protruding from the casing. There should be three in total. The
first is a thin grounding wire. The second is a paired phono (RCA plug)
cable, with red and white plugs for the right and left channels
respectively. The last is the power cord for the turntable. The
power cord is for obvious purposes. Don’t plug in your deck yet, if you
are setting it up right now.
The reason that your turntables have a grounding wire is
that an immense amount of static electricity is built up from the constantly
rotating wire. On top of this, the felt of your slip mat can build up
additional static electricity as it rotates in harmony with the platter, or as
it is cued back and forth. The ground wire coming from the turntable goes
to the mixer and allows for an exit for the static electricity, so it does not
remain built up in the turntable. This minimizes the crackle and popping
noises that you sometimes hear when playing a record (which are sometimes due
purely to static electricity buildup, and sometimes due to the surface
condition of the record). In addition, if the turntable is ungrounded,
the static electricity might exit through the phono signal cords into the
mixer, giving what is known as a ground “hum” that sounds very obvious,
especially during quiet parts of your records. This ground hum is often
reinforced when the bass of the record is heavy. As a side note, it IS
possible to “self-ground” your turntables so you don’t have to worry about that
annoying grounding wire, which incidentally can be ripped off quite easily if
you aren’t careful. That process is fairly easy if you are handy with
tools, and ends up having the same result as if your turntable was properly
grounded to the mixer. A video tutorial which shows you how to
self-ground your turntable can be seen at the bottom of this page.
When plugging the turntable into your mixer, make sure that
you plug it into a channel input that is labeled as “phono”. The reason
for this is simple … a turntable (originally known as a phonography, hence the
popularity of the term “phono”) puts out a different strength of signal than a
conventional piece of electronic equipment like a CD player. A turntable
derives its noise signal from the vibrations of the needle as it runs through
the groove on the record. That signal is much weaker than the signal that
comes out of a CD player or anything else. Therefore, the mixer knows
that it has to amplify any signal coming into the phono ports, by about thirty
decibels, to bring it up to the same strength as regular line or CD signals.
If you make the mistake of putting a phono signal into a line input, you will
probably hear almost nothing, because the signal is too weak. If you make
the mistake of putting a CD player into a phono input, you will get an
incredibly loud and distorted signal, because it is much more powerful than the
mixer expects.
The base of your turntable has four feet that the turntable
rests upon. You’ll notice that the feet on the Technics 1200’s have a
special mounting mechanism that allows them to swivel. In addition, they
have a screw that allows them to be raised or lowered as need be. You
should take advantage of this to ensure that the surface of the platter is as
level as possible. If the platter is tilted, even by a fairly small
amount, your needle is much more likely to skip out of the groove.
The Top of
the Turntable, and Orienting Your Turntable
There are lots of parts visible on the surface of your
turntable. When you first set it down, the writing should be easy to read
on things like the “start/stop” button. If the writing does not appear to
be in the correct orientation, you have the turntable facing in the “wrong”
direction. Technically, there is no such thing as the “wrong”
direction. You should orient the deck however you feel comfortable.
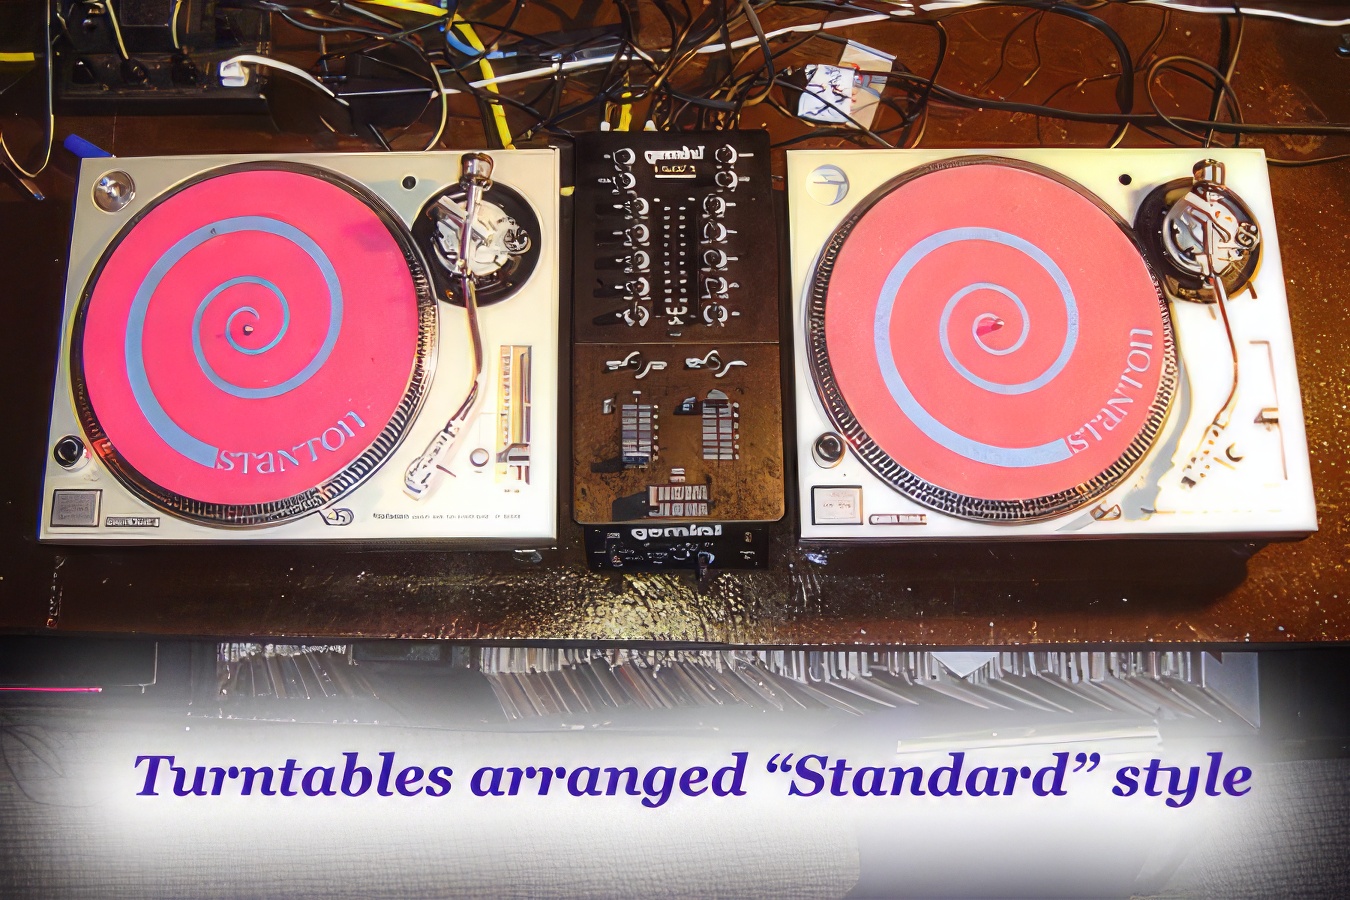
The orientation described above will be used as “standard” in this video.
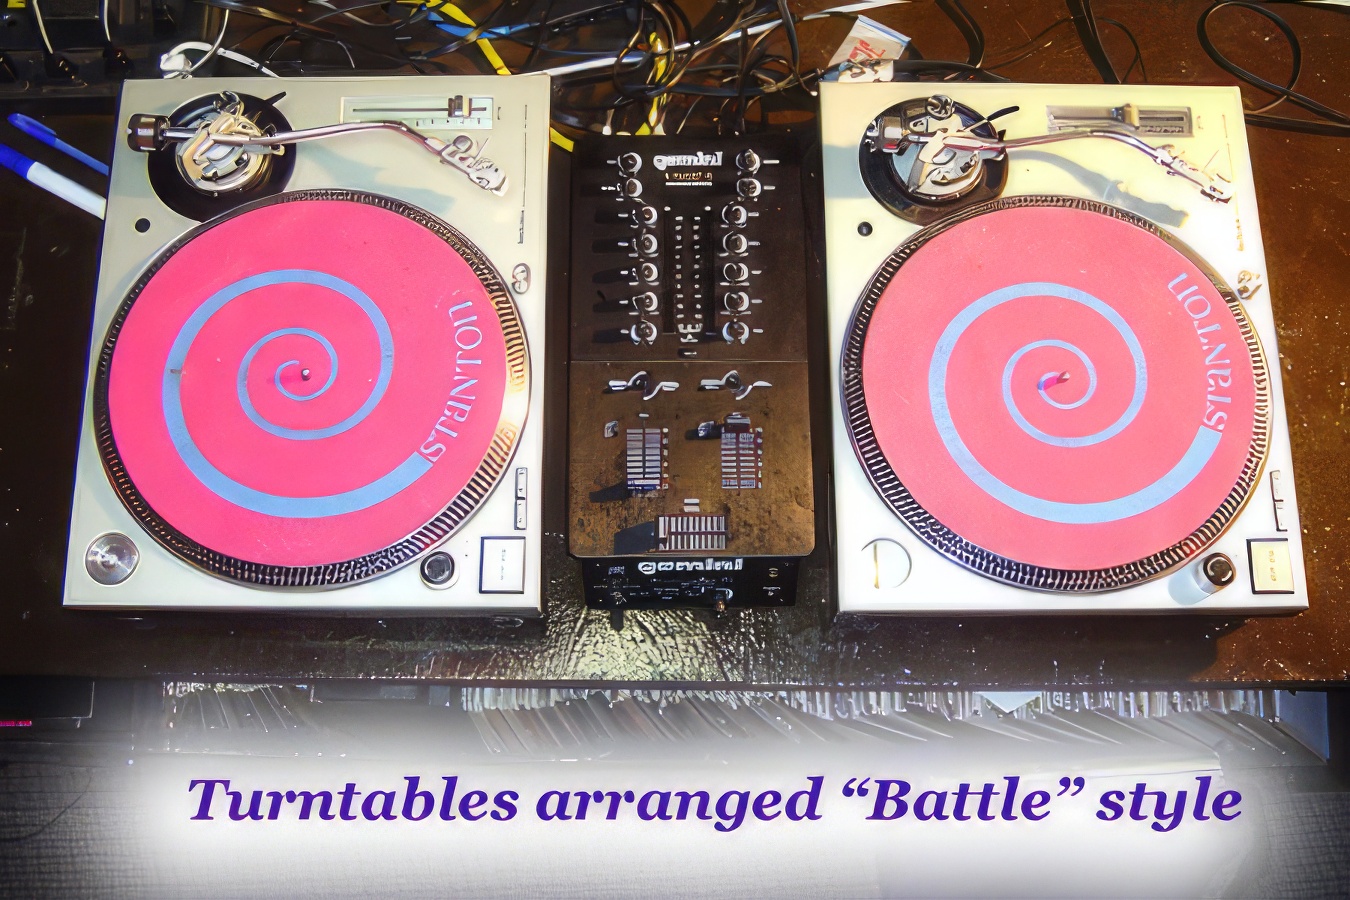
However, if you are a turntablist, you will probably want to orient your decks
so they are placed in “battle” style rather than “standard” or “club”
style. Battle
style means that the left end of the deck is facing you, and the right end,
with the pitch fader, is away from you. The advantage of this layout is
that turntablists, who spend a lot of time cueing their records, do not have to
reach over the tone arm to do so, and thus are far less likely to hit the tone
arm and skip the needle inadvertently.
Anyway, let’s get back to standard orientation for the sake
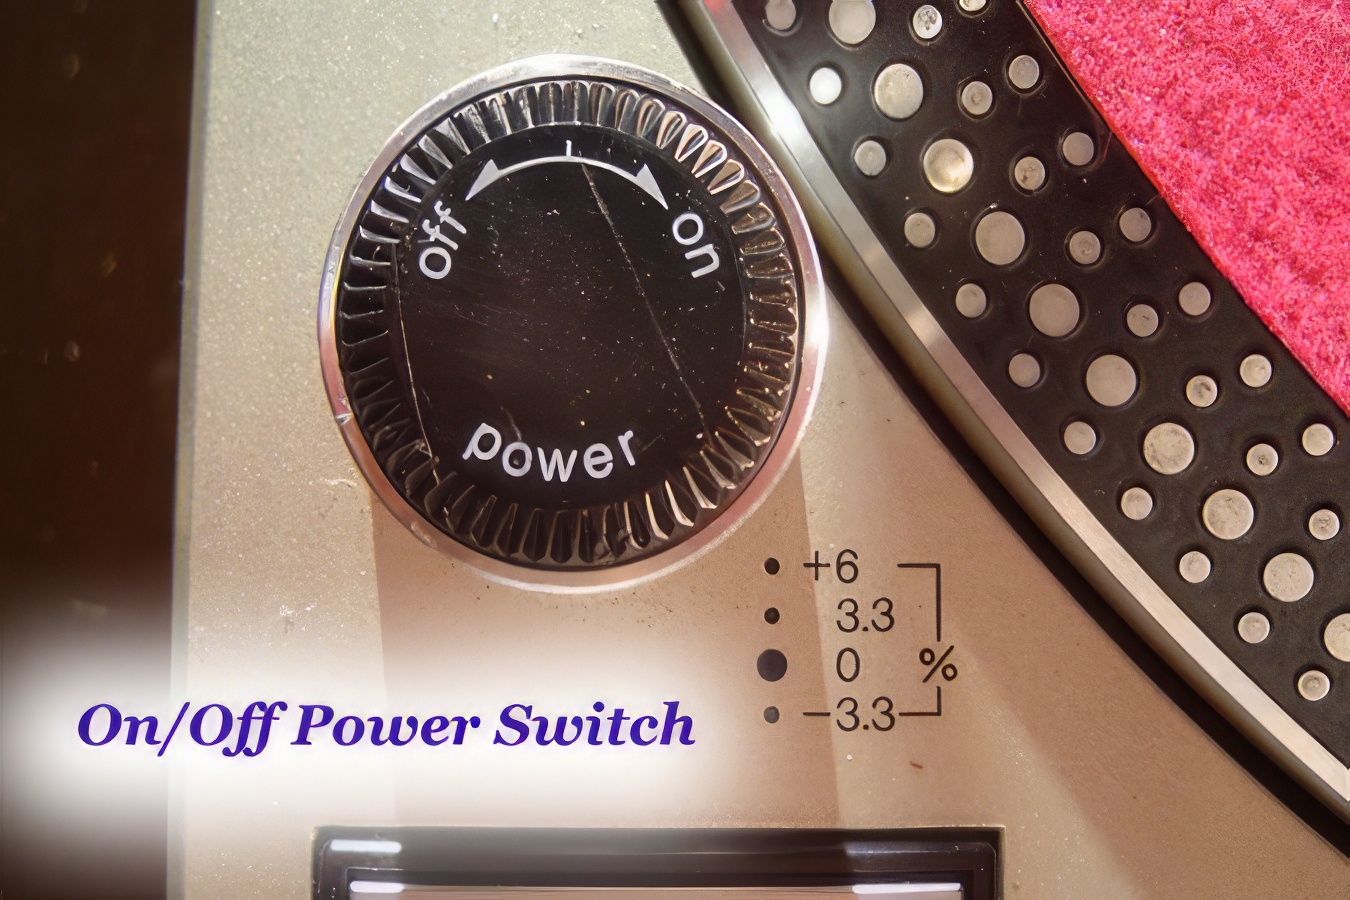
of simplicity. You will find the on/off button on a raised cylinder on
the lower left corner of the deck. This button rotates and has two
settings, on and off. Usually, unless the LED indicator is burned out, a
little light will turn on to show that the deck has power. There are
slight differences between the MK2 and the M3D versions of the Tech 12, when it
comes to this on/off switch. The MK2 is unprotected at the top, so it is
fairly easy to accidentally hit the switch and turn the deck off,
unintentionally. That engineering issue has been resolved with the M3D,
where the cylinder is higher and surrounds the on/off switch. It is
fairly hard to turn the M3D off, unless you do it on purpose. Sometimes,
if a promoter is setting up for a party and is using MK2’s, he or she will turn
the decks on and then put a piece of electrical tape over it, so the DJ’s can’t
turn the decks off by mistake.
The start/stop button is located in front of the on/off
switch. This switch will start or stop the platter revolving, so it is
pretty basic. To the right of the start/stop are the buttons to switch
between 33rpm and 45rpm. RPM stands for revolutions per minute. If
the platter is going 33rpm, it spins about 33 times each minute, or once every
couple seconds. If the platter is going 45rpm, it spins 45 times each
minutes, or about once every 1.3 seconds. Most records have a marking on
them to indicate whether they should be played at 33 or 45. If you play a
33 record at 45rpms, it will sound very high-pitched and sped up, like an “Alvin and the Chipmunks”
song. If you play a 45 record at 33rpms, it will sound very slow and low
in pitch, and seem to drag.
You’ve probably heard the term “45” used before, which is
slang that refers to a certain size of record, namely one that is seven inches
in diameter. This isn’t exactly accurate all the time. It is
possible, although extremely rare, to get a 7” record that is supposed to be
played at 33rpm. Also, there are a lot of large single track 12” records
that are designed to be played at 45rpms. I would estimate that about
30-50% of all 12” records are meant to be played at 45rpms. Several
decades ago, when phonographs were first becoming common, there was a third
speed setting on most phonographs for 78rpms. Records that are meant to
be played at that speed are pretty rare nowadays.
One of the miscellaneous piece of equipment that comes with
your turntable is a round aluminum disc, about an inch and a half in diameter,
that can be stored in a recessed hole in the top left of the turntable
housing. Most 12” records have a very small hold in the center, which is
about a third of an inch in diameter. This hold fits over the “nipple” in
the center of the platter, so that the record does not wiggle back and
forth. However, older 45’s had a much larger hole in the center of the
record, so they didn’t fit tightly over the nipple. The aluminum disc is
essentially an adapter, which fits properly in the hold in the center of a 45,
and allows it to be held securely in place by the small nipple on the
turntable.
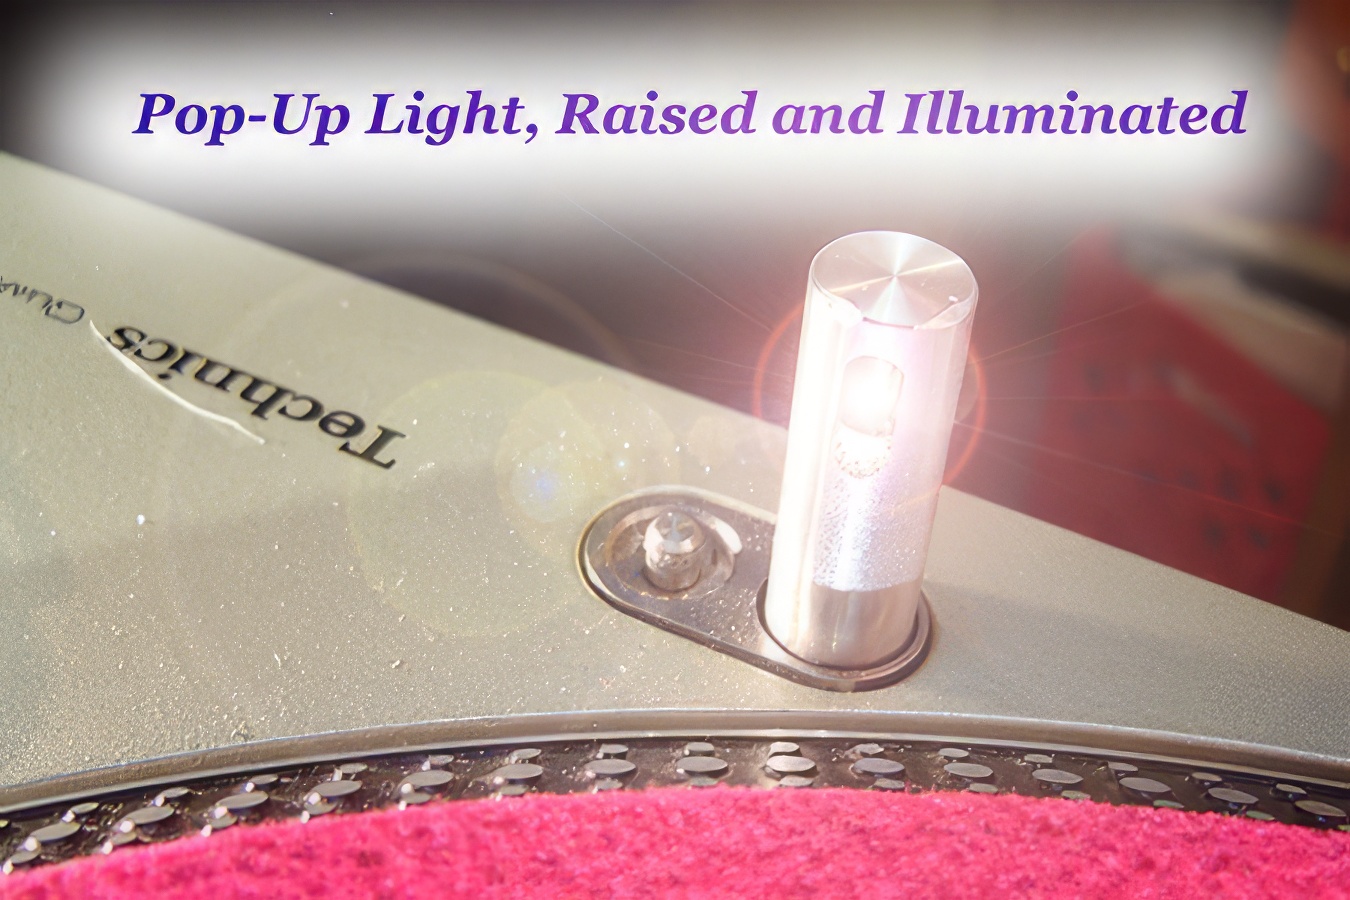
Near the front and center of the turntable, there is a
pop-up LED light post. This light post can be pushed down into the table
when it is not in use. To release it, so that it pops up and the light
turns on, press the tiny button to the right of the post.
Installing
the Platter
The next thing that you need to know about is the platter,
and how it attaches to the rest of the deck. The turntable should never
be plugged in when the platter is not installed. The reason for this is
that plugging the turntable in will energize the motor, and the magnet can
start attracting tiny particles of dirt, especially those containing iron,
which will reduce the effectiveness of the motor. With enough dirt, it
can actually affect your speed of rotation.
The shaft of the turntable is another thing to be very
careful of. When the platter is not installed, the shaft can be bent
fairly easily if another solid object hits it. If you shaft ever gets
bent, you are going to be looking at major repairs.
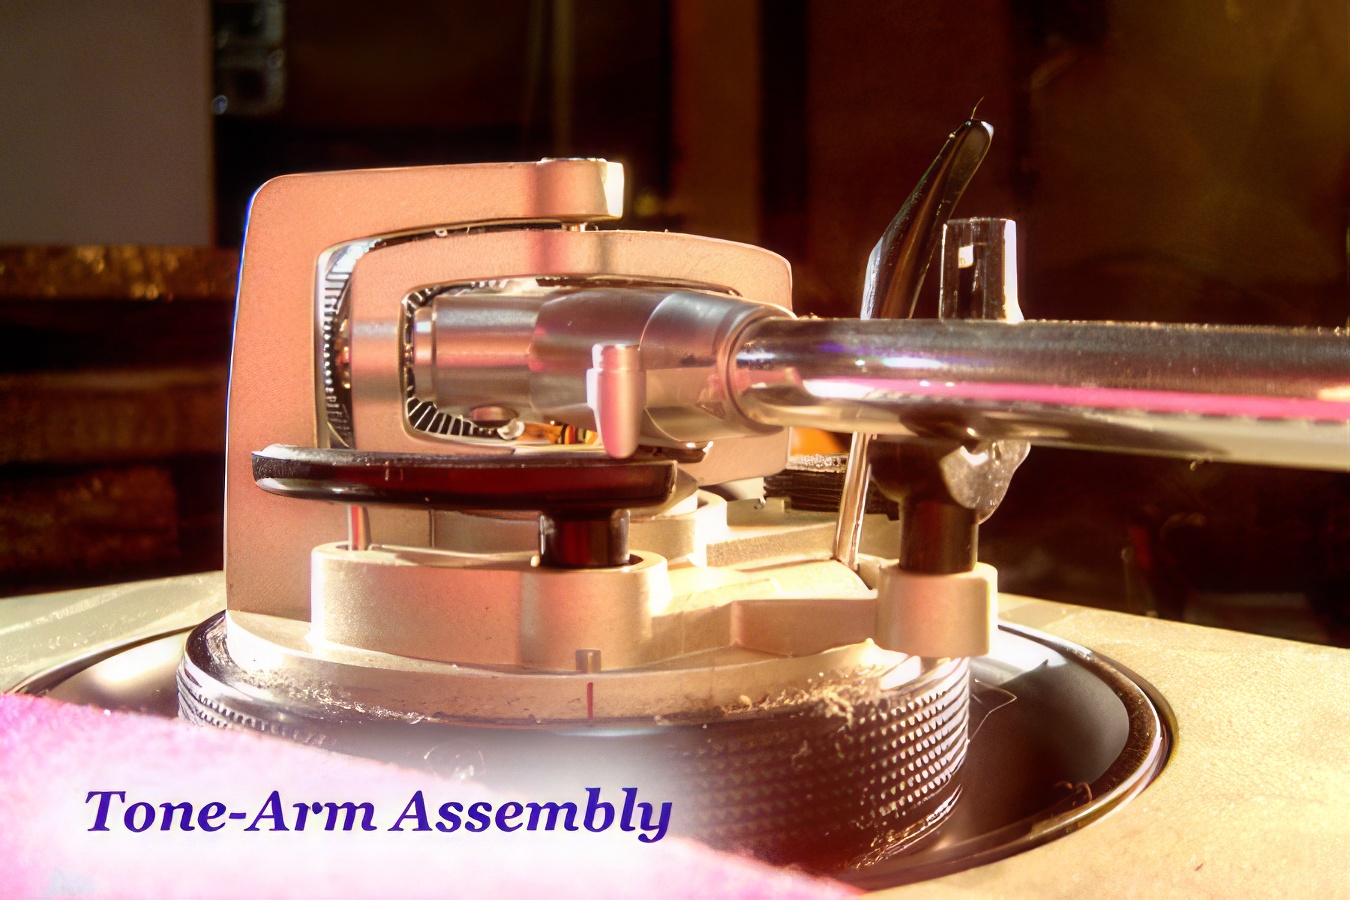
The Tone Arm
Assembly
The next area that we will examine is a group of parts that
are collectively called the tone arm assembly, in the back right corner of the
deck.
The tone arm is the long arm which reaches out from the base
to extend over the record. The needle itself is attached to a headshell
or cartridge, which in turn twists into the end of the tone arm.
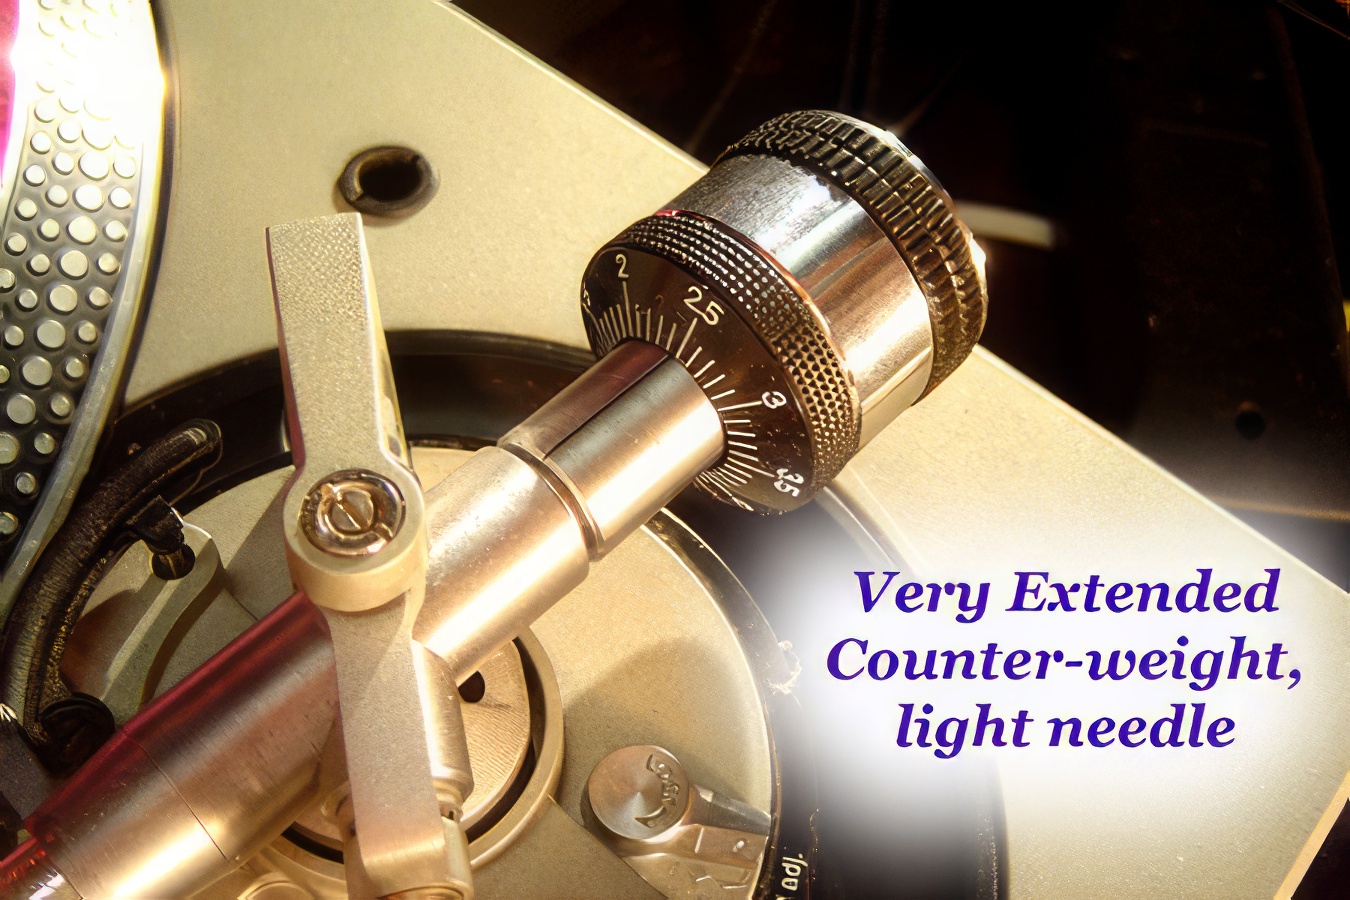
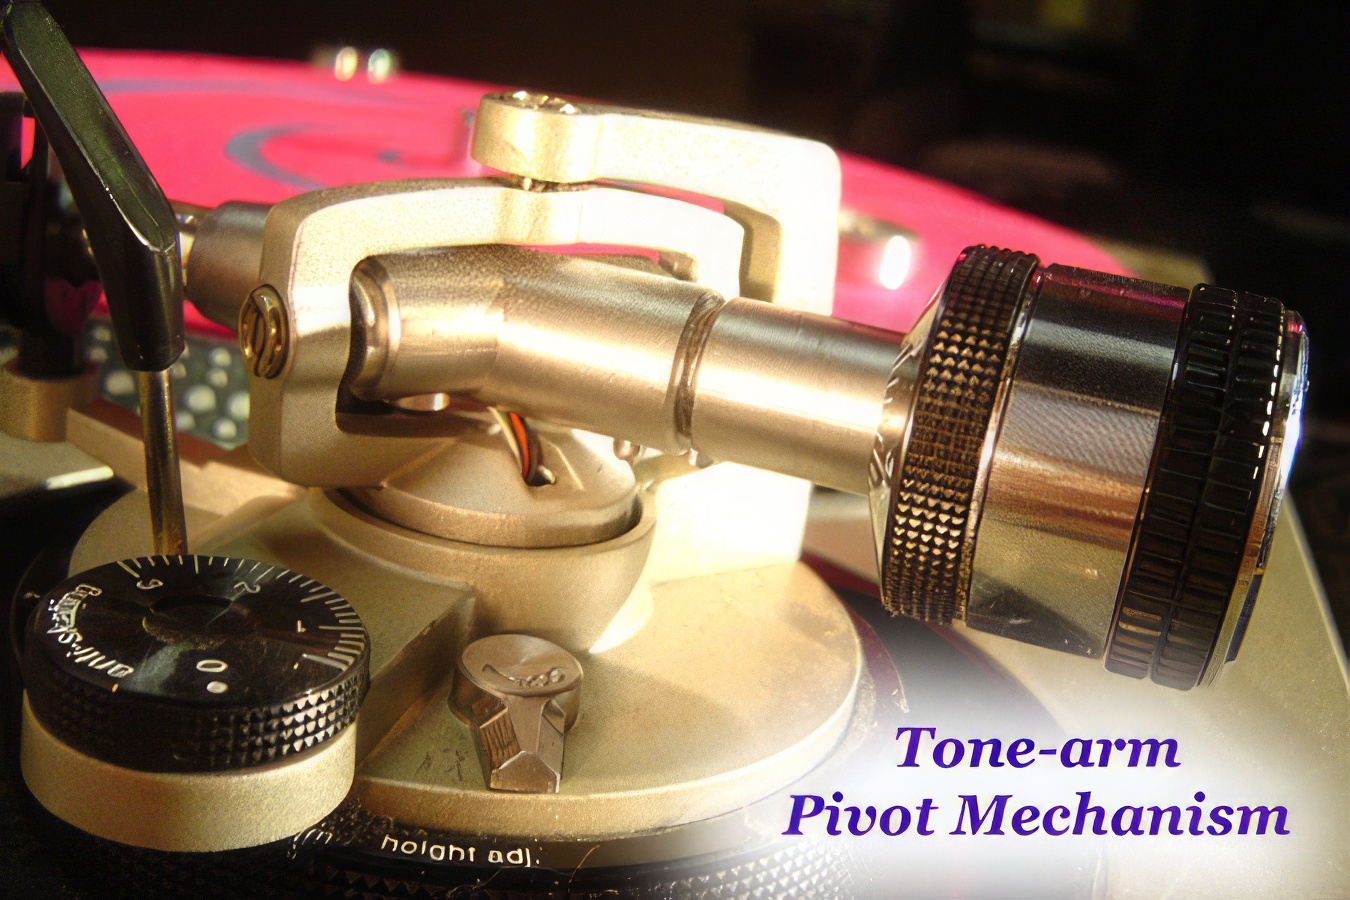
There is a pivot and swivel combination near the end of the
tone arm, although the tone-arm extends back behind this pivot, so that a
counter-weight can be attached. The counterweight can then be adjusted in
or out so that the whole tone arm mechanism balances fairly nicely. The
ultimate goal is to have the needle end of the tone arm to be the heavy end of
the “see-saw”, so that the needle rests on the record. You don’t want the
needle end to be too heavy, because it wears your record out more quickly, but
at the same time, you don’t want it to be too light, because then it skips more
easily. A moderate amount of downward pressure on the needle is the happy
medium that you have to find, and if you switch to a different type of needle
or cartridge, you will probably have to readjust your counterweight to find the
same overall balance for the tone arm and needle.
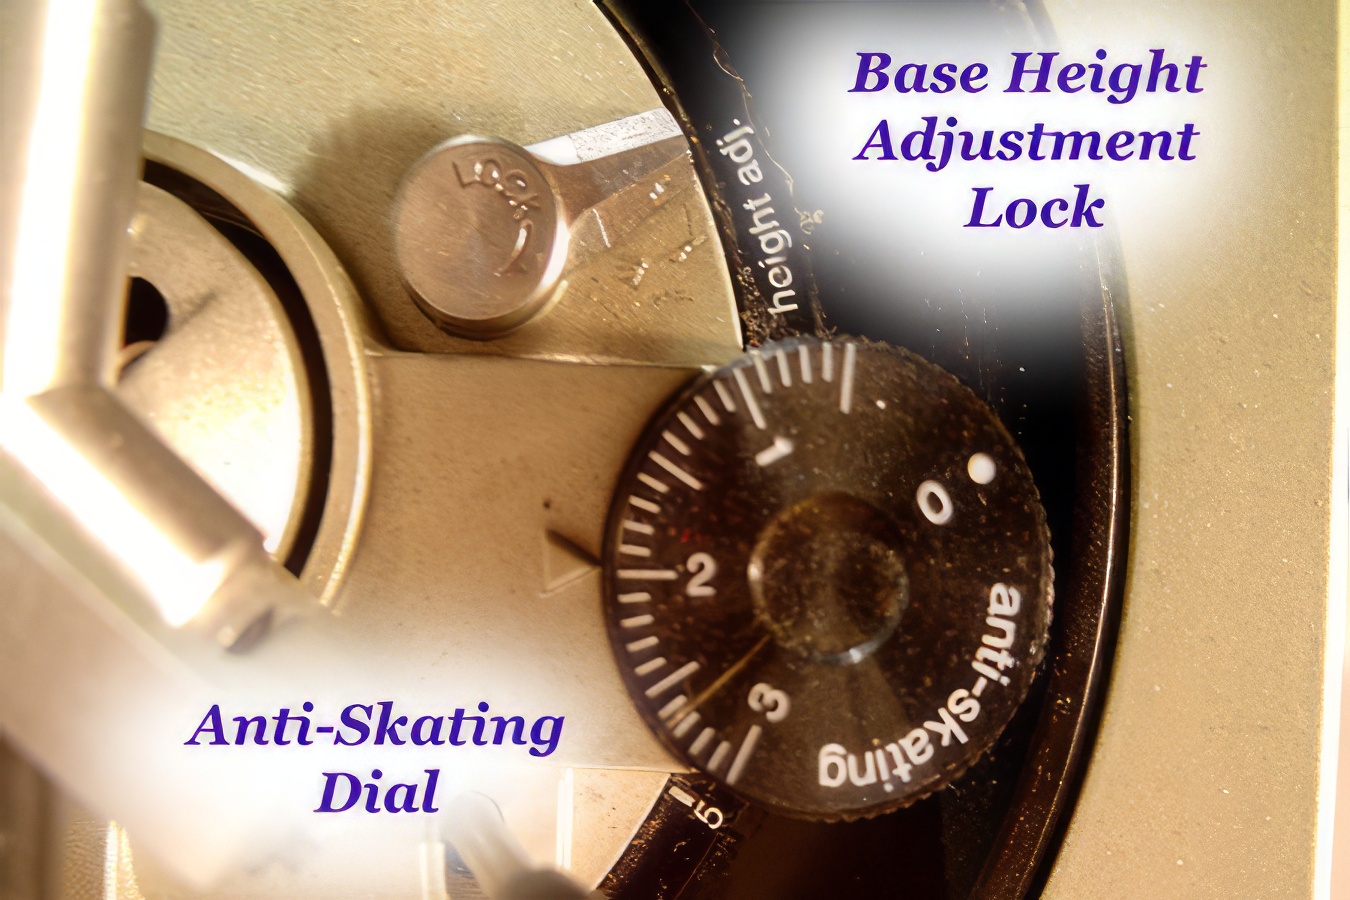
The whole swivel and pivot mechanism is mounted on a
base. This base has a round dial which can either raise or lower the
whole tone arm by a moderate amount, or about six millimetres. The point
of this is to change the angle at which the tone arm is being held compared to
the record. In general, you should raise or lower this base so that the
tone arm ends up being perpendicular to the surface of the record. There
is also an anti-skating dial on the base of the record, which adjusts the
likelihood that the needle can skip over the record. Higher settings
(numbers) on the anti-skating mechanism usually translate to a lower chance of
the needle skipping. You might think that you should automatically set
the anti-skating to the highest possible setting, to minimize skipping.
However, if you have a record wherein the centre hole is not punched in the
middle, the tone arm will tend to wobble back and forth quite a bit as the record
plays, and a lower anti-skating setting might be more appropriate. Most
DJ’s just set this in the middle and ignore it.
There is a “lift lever” near the anti-skating
mechanism. If that lever is fully depressed, the tone arm can drop down
low enough that the needle can make contact with the record. If the lever
is raised, it lifts the tone arm high enough that the needle cannot touch the
record. The lift level is hydraulically (liquid) based, so the power does
not have to be on for the lift lever to work. By the way, if your tone
arm ever doesn’t seem to have quite enough weight to keep the needle on the
record, and the counter-weight is at the closest setting, check your lift
lever: it may appear to be down, but if it is up even just a
couple millimeters from the down setting, it raises the tone arm just slightly
so the needle cannot make constant contact with the record.
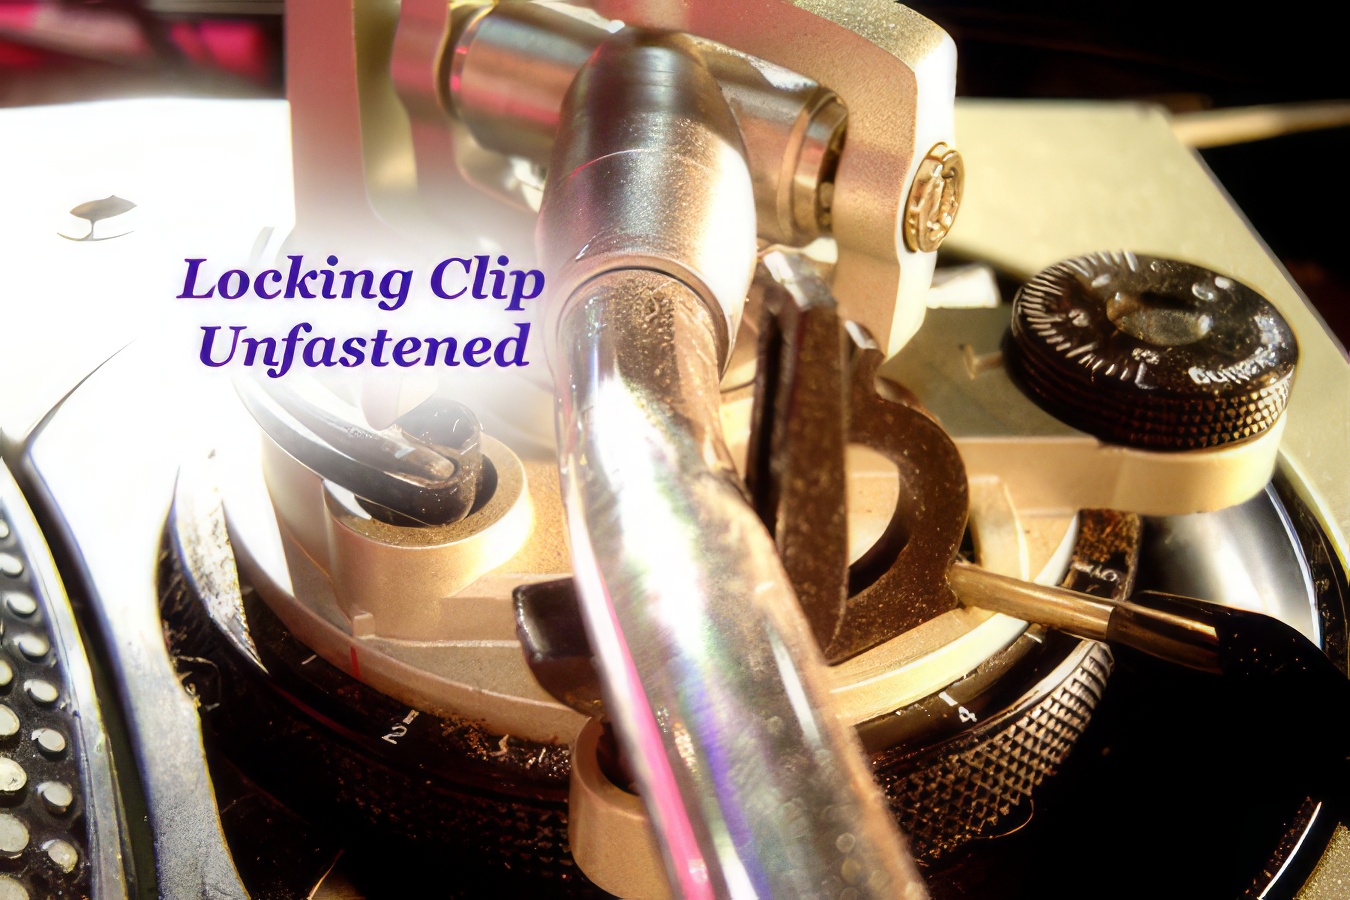
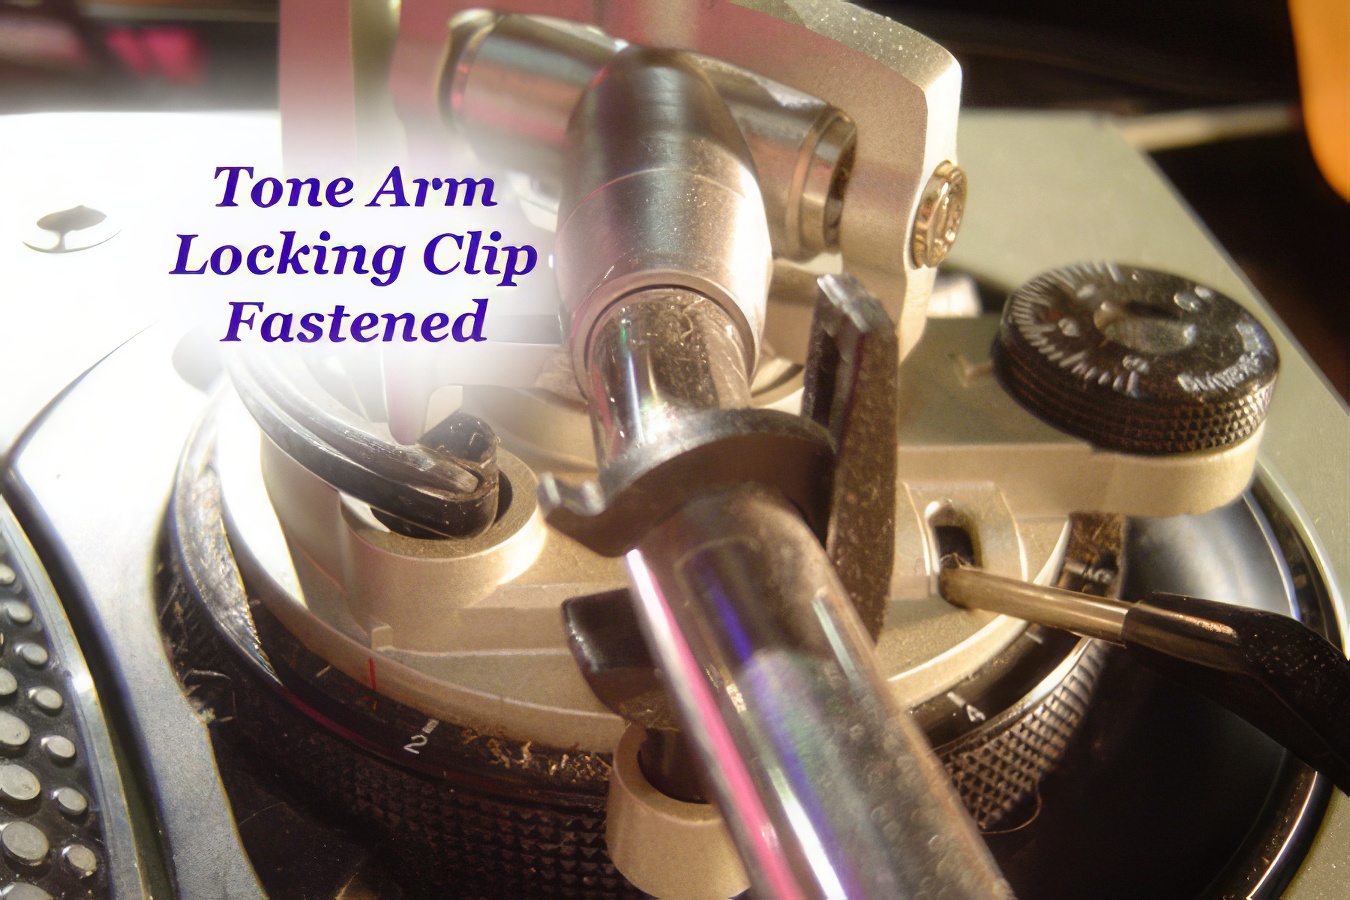
There is also a tone-arm “lock clip” that can be flipped
over the tone arm when the arm is in the rest position, away from the record,
to keep the tone arm from swinging around when the turntable is moved. As
the end of the night, to properly protect your equipment, you should first move
the tone arm to the rest position, then raise the lift level to elevate the
tone arm, then lock the tone arm into place with the lock clip, then turn off
the power switch and replace the dust covers on the tables.
The needles are probably the easiest thing on the turntable
to damage quickly. Needles wear out on a regular basis over time, and
playing with them on a “heavy” setting on the record will wear them out more
quickly. Bumping the tone arm and having it scratch sideways across the
vinyl is also very hard on the needle.
In terms of major damage, the entire tone arm assembly is
your biggest worry. The vast majority of damaged decks have damaged tone
arms. Always lock it away into position when you aren’t actually playing
on the decks. More importantly, do not allow cords (ie. Microphone cords)
to rest on the platter or near the tone arm. It is very easy for someone
to quickly grab the microphone, not realize that a loop of the mic cable is
under the tone arm, and rip it up and bend it. If you want three
rules to protect the life of your turntable, they should be as follows:
1. Buy flight cases if you intend to move them around
much.
2. Always be aware of the tone arm, and don’t let
things catch in it and bend it.
3. If you aren’t storing the decks in flight cases, at
least keep the dust covers in good shape, and use them when the table is not
being used.
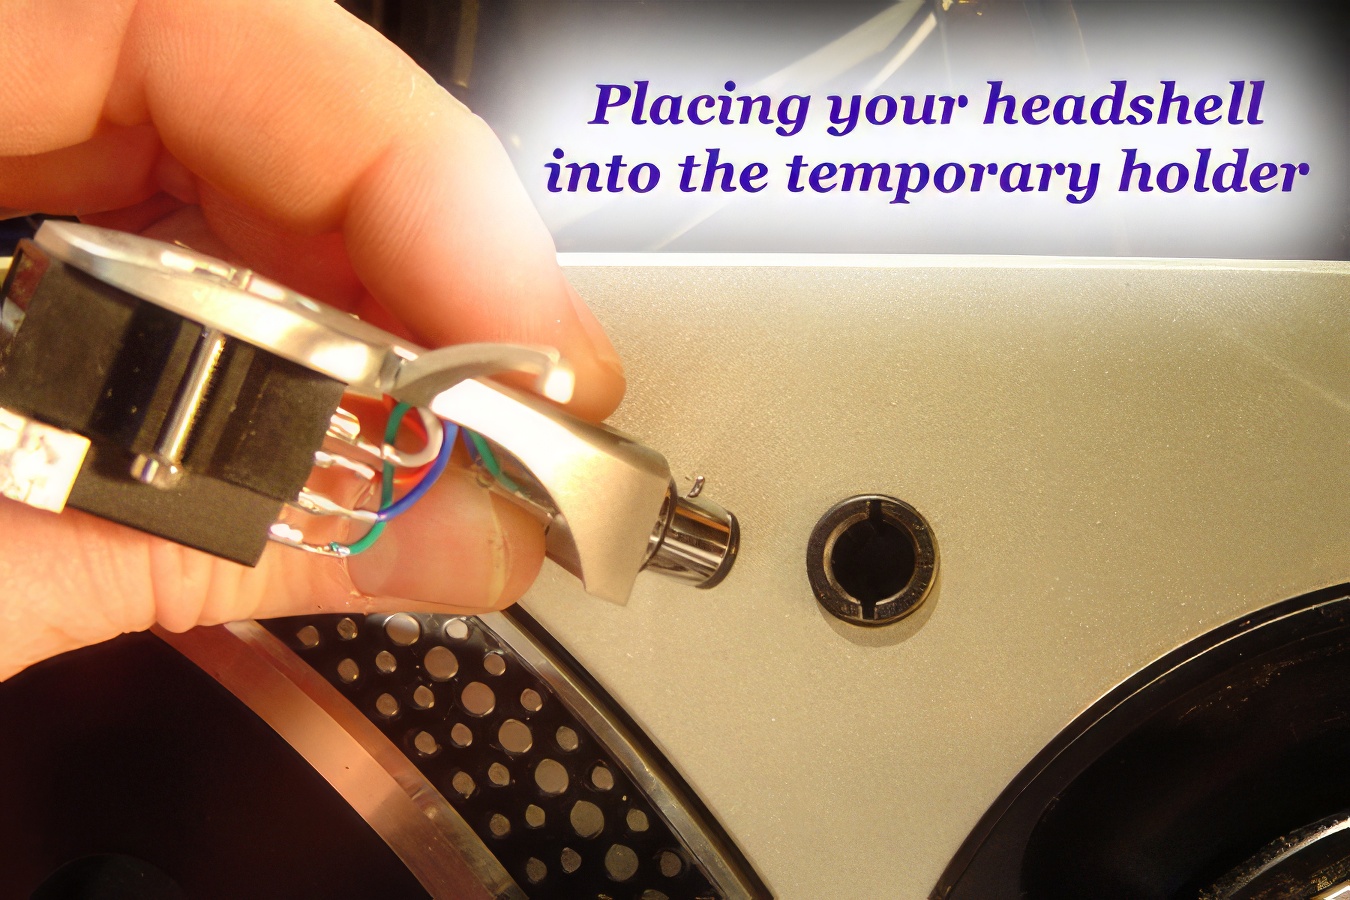
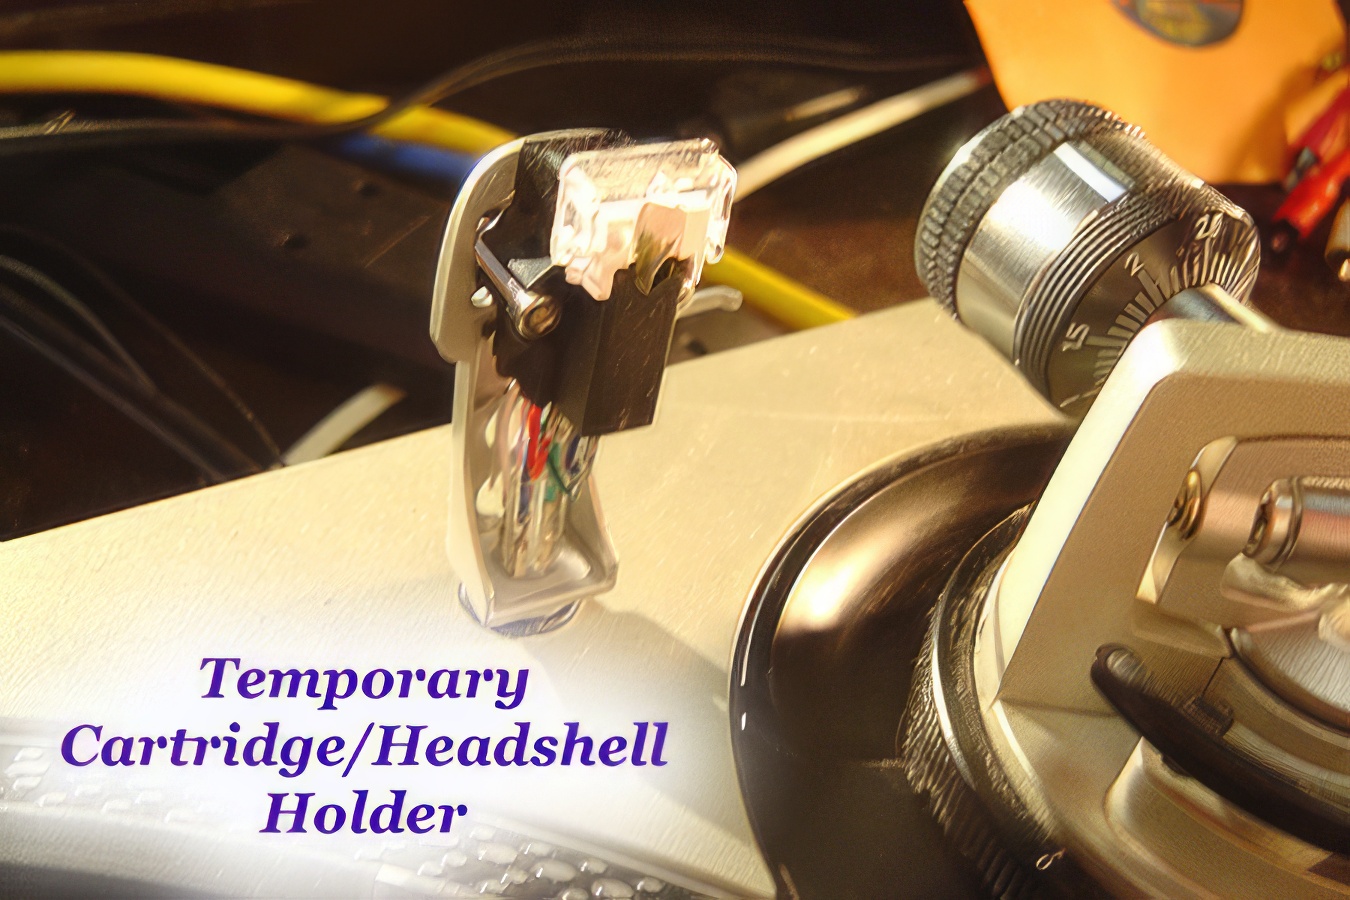
By the way, there is also a little hole in the top of the
turntable housing on M3D’s that a lot of DJ’s don’t pay attention to, because
they do not know what it is for. If you
are playing on someone else’s decks and you bring your own “needles”
(headshells/cartridges), it is common courtesy to treat the needles that come
off the deck with the utmost of care.
The M3D has a hole which allows you to temporarily store another
headshell out of harm’s way during your set.
The last important part of the turntable is the pitch
fader.
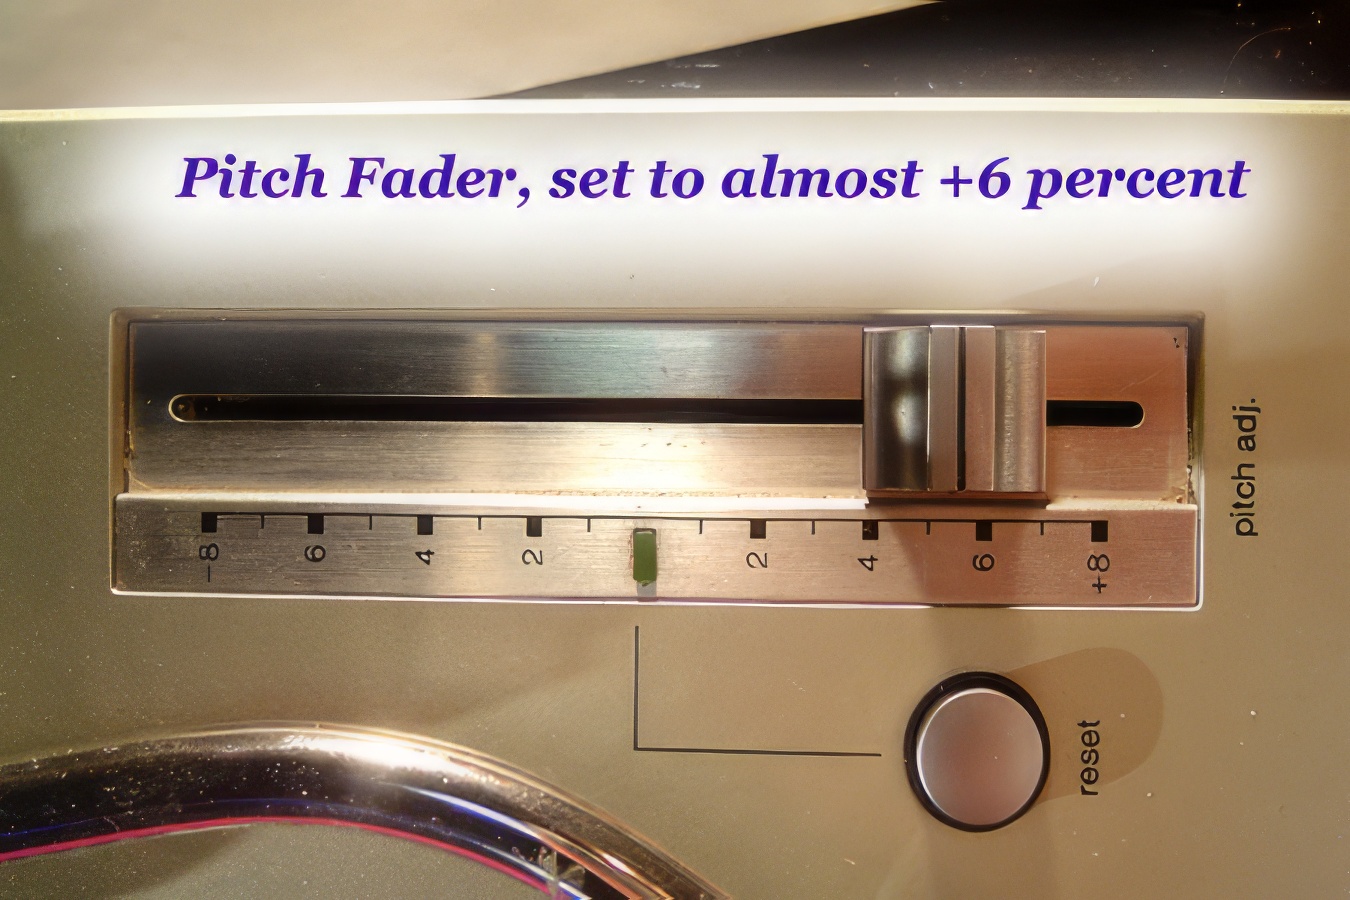
The tech 12’s come with a factory-installed fader that
allows you to speed the record up by 8%, or slow it down by 8%. Changing
the speed at which the record plays will also change the pitch of the
music. Playing faster makes the pitch higher, while playing slower makes
the pitch lower. Some beginners get confused by the numbers on the fader,
and think that they correspond to the beats per minute (bpm) on the BPM
counters. This is not the case: remember that this is a percentage
increase. Therefore, if your record plays at 132 BPM and you speed it up
by six percent, your speed will increase by eight BPM to 140 BPM. You can
also think of this in terms of RPM’s, although to be honest, it is kind of
useless. For instance, a record that normally goes round at 33
revolutions per minute, which is sped up by three percent, will then be going
34 revolutions per minute. The BPM and the RPM numbers do not have a
constant correlation across all records, as the BPM depends on how the song was
recorded. For instance, several 12” records that all are supposed to be
played back at 33 RPM may have arbitrary speeds of 120, 128, 134, and 145
BPM’s. It all depends on what the musicians produced. Of course,
speeding up any one of these records increases the RPM’s and BPM’s of that
particular record by the same percentage, as indicated on the pitch fader.
The only reason I mentioned the effects on the final RPM’s
was not because DJ’s ever consciously think about this, but to illustrate a
point which you will need to learn eventually when you are beat-matching.
There are some combinations of records that simply cannot work together.
For example, if you are trying to match a track that runs at 96 BPM’s with one
that runs at 120 BPM’s, you cannot make them go the same speed. You can
speed up the slow one by 8%, bringing it up from 96 to 103.7 BPM’s, and you can
slow down the fast one by 8% on your second turntable, bring it down from 120
to 110.4 BPM’s, but as you can see, the two speeds are still not close enough
to match. In more general terms, with speeds of 33 and 45 rpm’s on your
deck, and a +/- fader of 8%, you can play records at speeds varying from 30.36 RPM
to 35.64 RPM, and also from 41.4 RPM to 48.6 RPM. However, there is
always a gap between the most you can speed up a record playing at 33 RPM, and
the most you can slow down the same record playing at 45 RPM.
Some turntable manufacturers have addressed this “problem”
by using faders that range more than +/- 8%. For instance, any fader than
can range by more than =/-15.4% has enough range to “overlap” between 33 and 45
RPM’s, by using the edges of the ranges. However, most DJ’s don’t like
adjusting the speeds of their records by more than +/- 5%, because the changes
in pitch make the records sound too “pushed” and unnatural.
The pitch faders on the MK2’s have a “quartz lock” spot in
the middle. If the slider is in the exact middle, so the record is not
being sped up OR slowed down, then the LED indicator light comes on.
Also, there is a sort of click as the slider moves into that position.
This is useful to let the DJ who is moving a fader know when they’ve moved
through the middle without looking. However, it is very awkward when you
want to make a very tiny pitch adjustment for a record playing at 0%, because
it takes a fairly significant movement to get the slider out of the “click
spot.” To simplify, you might be able to say that it is easy to play at
0.0%, or at 0.2% and above, but that tiny bit around 0.1% is hard to achieve,
because it is like standing on the very edge of a slope. Your slider
almost wants to fall into the center. The M3D’s have addressed this issue
by removing the click spot. You can slide smoothly from the positive to
negative pitch adjustments. The one drawback to these new faders was that
it was difficult for the DJ to tell when the record was playing exactly without
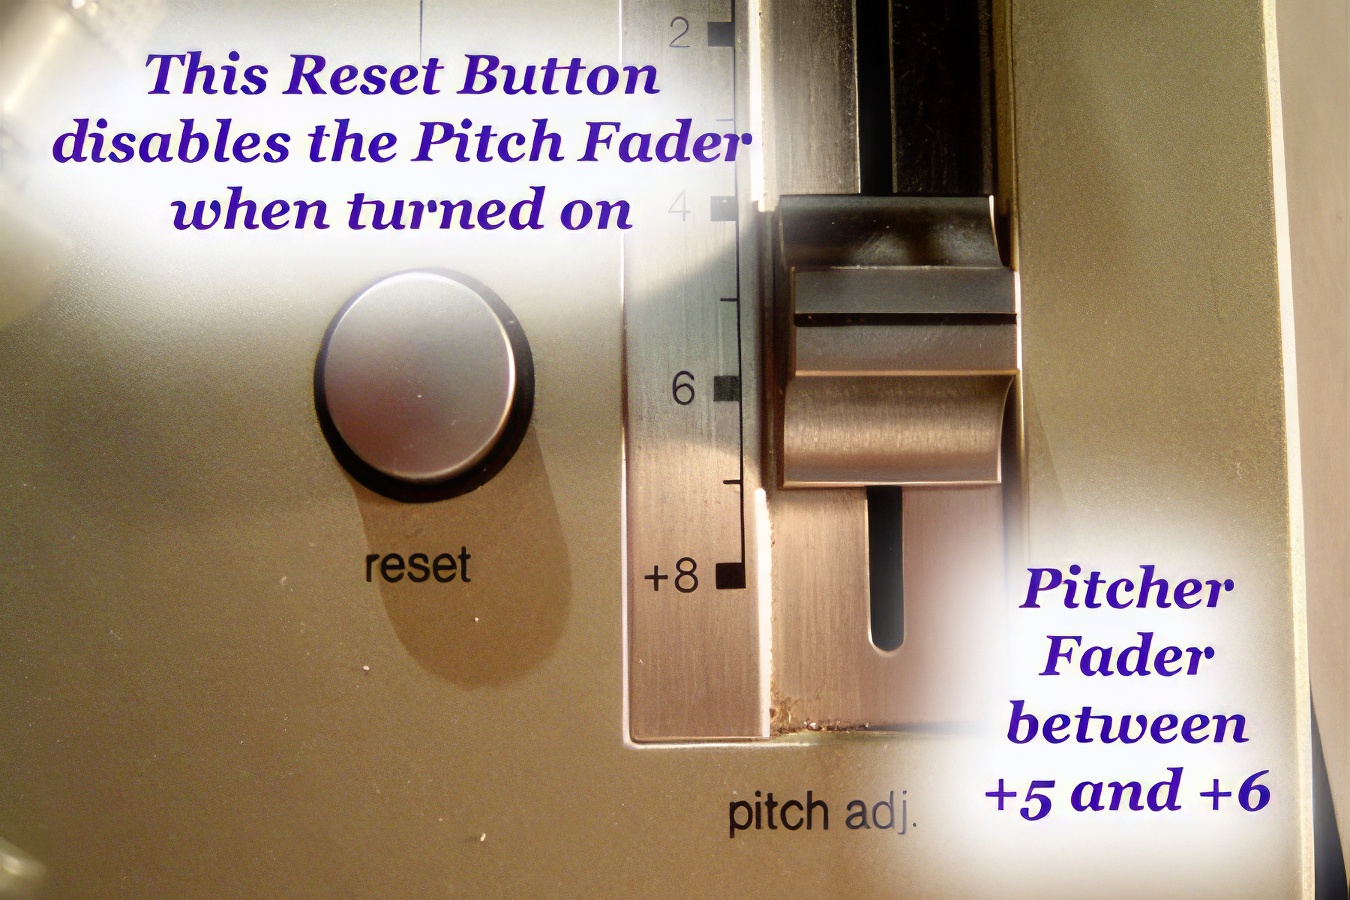
any pitch adjustment, so a reset button was added to the M3D’s. Whenever
the reset button is pushed in, the LED comes on to indicate that the pitch
fader is completely disabled, and the record is playing as if it was at the
standard speed with 0.0% adjustment.
To make things even worse, the click spot has a feature
whereby the pitch fader is actually disabled at that point. However,
let’s assume that your fader had decayed in performance, so the entire thing
puts out a signal that is 0.2% faster than you expect. Therefore, at the
-0.2% position, you are really getting output for 0.0%. This is bad and
is another reason why it is often hard to match beats properly at the center of
the fader: you might actually have TWO places where the fader is outputting at
0.0% - the spot on the slider which gives 0.0%, and the click spot. In
theory, these two spots should be lined up with each other, but that is not
always the case on older decks!
The M3D faders have another advantage and that is in
longevity. Because the slider isn’t constantly moving through the center
click point, the pitch fader should be more accurate and should last a lot
longer. Quite often, DJ’s with MK2’s will take their faders out and
replace them with the newer smooth faders designed for the M3D’s.
Interestingly, however, the M3D is not superior in every respect. For
instance, the motors are slightly weaker, so many DJ’s will prefer, for a very
high end turntable, to get an MK2 and put an M3D fader into it. Of
course, this “fine tuning” isn’t necessary for beginning and intermediate DJ’s.
Final Set-Up
So now that you have your decks sitting and hooked up to
your mixer, you want to make sure they are completely ready to go. To do
this, make sure you’ve gone through the following basic set of steps:
1. Make sure the ground wire is grounded to the mixer.
2. Make sure the phono plugs go into phono (and not
line) inputs on the mixer.
3. Make sure your platter is attached.
4. Make sure your deck is plugged in (preferably to a
surge-protected power bar).
5. Make sure the tone arm counter-weight is attached.
6. Attach a cartridge and needle to the end of the
tone arm.
7. Check the balance of the tone arm by moving the
counter-weight. There should be a slight downward pressure on the needle
as it sits on the record.
8. Set the anti-skating somewhere around the middle,
and the height of the tone arm around the middle (unless you are an advanced DJ
who knows how to set these for personal preference).
9. Drop the lift lever, and undo the tone arm lock
clip.
10. Turn the turntable on, and you should be ready to
start using it.
It is always good to check the left/right balance on each
turntable, to ensure that both channels are coming through the mixer.
Sometimes you will find that only one is coming through. If that is the
case, check the cartridge first and make sure it is firmly attached, as that is
the usual culprit. If that doesn’t work, make sure that the phono leads
are plugged into both channels (red and white) on the back of the mixer.
Model
Numbers and Serial Numbers of the Technics SL-1200
There is a good discussion of the history of model numbers
and serial numbers of the Technics SL-1200 available online at Wikipedia, at
this link: http://en.wikipedia.org/wiki/Technics_SL-1200
Other Brands
Besides Technics
There are several other world-known turntable manufacturers,
including Stanton, Vestax, Gemini, and Numark.
Each of these manufacturers makes a variety of models, many of which are
decent direct-drive models. We recommend
that you stay away from belt-driven turntables at all costs. Technics has been the undisputed world leader
in turntables for decades. The Technics
1200 series is going to be the table of choice at well over ninety percent of
the clubs and parties that you might play at, anywhere in the world. However, that does not mean that they are the
only good model out there. The other
manufacturers have improved their models greatly over the past five years or
so, and to be honest, have a lot to recommend them to beginning DJ’s. Older DJ’s will often suggest that this
advice is somewhat scandalous, and will argue strongly against buying anything
but Technics. However, the truth is, the
Technics decks are only slightly better than the rest, but the competition has
much more attractive pricing. If you’re
getting into the industry and need to buy equipment, you’re looking at spending
a lot of money on decks, mixers, amps, speakers, headphone, needles, and
vinyl. Buying a mid-model turntable from
one of Technics’ competitors is a good way to save you some money at the
start. If it is any consolation, should
you decide to upgrade to Technics decks a year or so down the road, you can
always sell your low-end used decks to another beginning DJ. Of course, if you decide to splurge and buy
Technics decks right away, and then decide later that DJ’ing is not for you, at
least the Technics decks have very high resale value and are highly sought
after. It is not uncommon for year-old
decks in good shape to be resold for 60-70% of the original purchase price,
whereas you might only be able to get 40-50% of the original price for
competing brands.
Some competing models have some strange features compared to
the tech 12’s. Pitch faders are often
slightly different, with range from +/- 6% to +/- 50%. Sometimes, the faders work in reverse, with
“faster” being away from the DJ, and “slower” being toward the DJ. Some decks have a “reverse” button that
starts the platter spinning backwards (of limited use). Other decks have straight rather than curved
tone arms. The theory behind that is that
a straight tone arm is more useful for high-end turntablists due to the altered
tendency to limit skipping. Finally, the
strengths of the motors of different models (even within each company) can vary
widely, and in some cases, the stopping and starting power (the torque) can be
adjusted with a level on the side of the deck.
No two models of turntable are exactly the same, BUT if you become
familiar with the Technics 1200’s, the industry standard, you will quickly feel
comfortable playing on any other type of turntable with just a few hours
practice.
The following series of photographs (illustrating some of
the features on Numark and Vestax decks) will convince you that even though
there is a great deal of variety on the surface between different brands of
decks, they usually offer the same basic features, so you shouldn’t be too
disoriented when moving to a different brand than you are used to. The major differences (which are reflected in
price) will become evident in the long-run, in terms of how long your equipment
(motors, etc.) lasts.
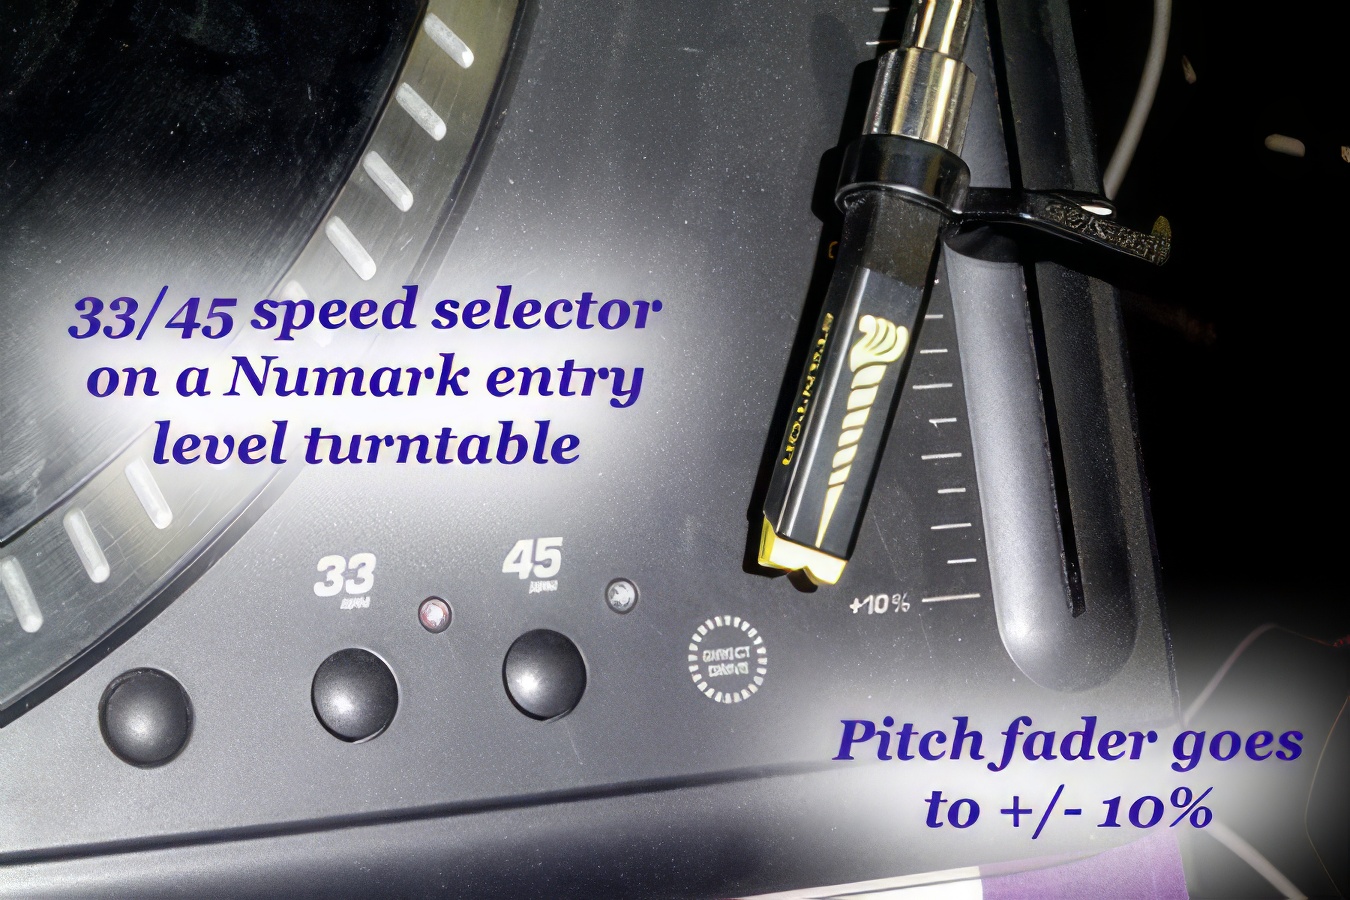
This shows the speed
selectors and pitch fader on an entry-level (low price) Numark deck.
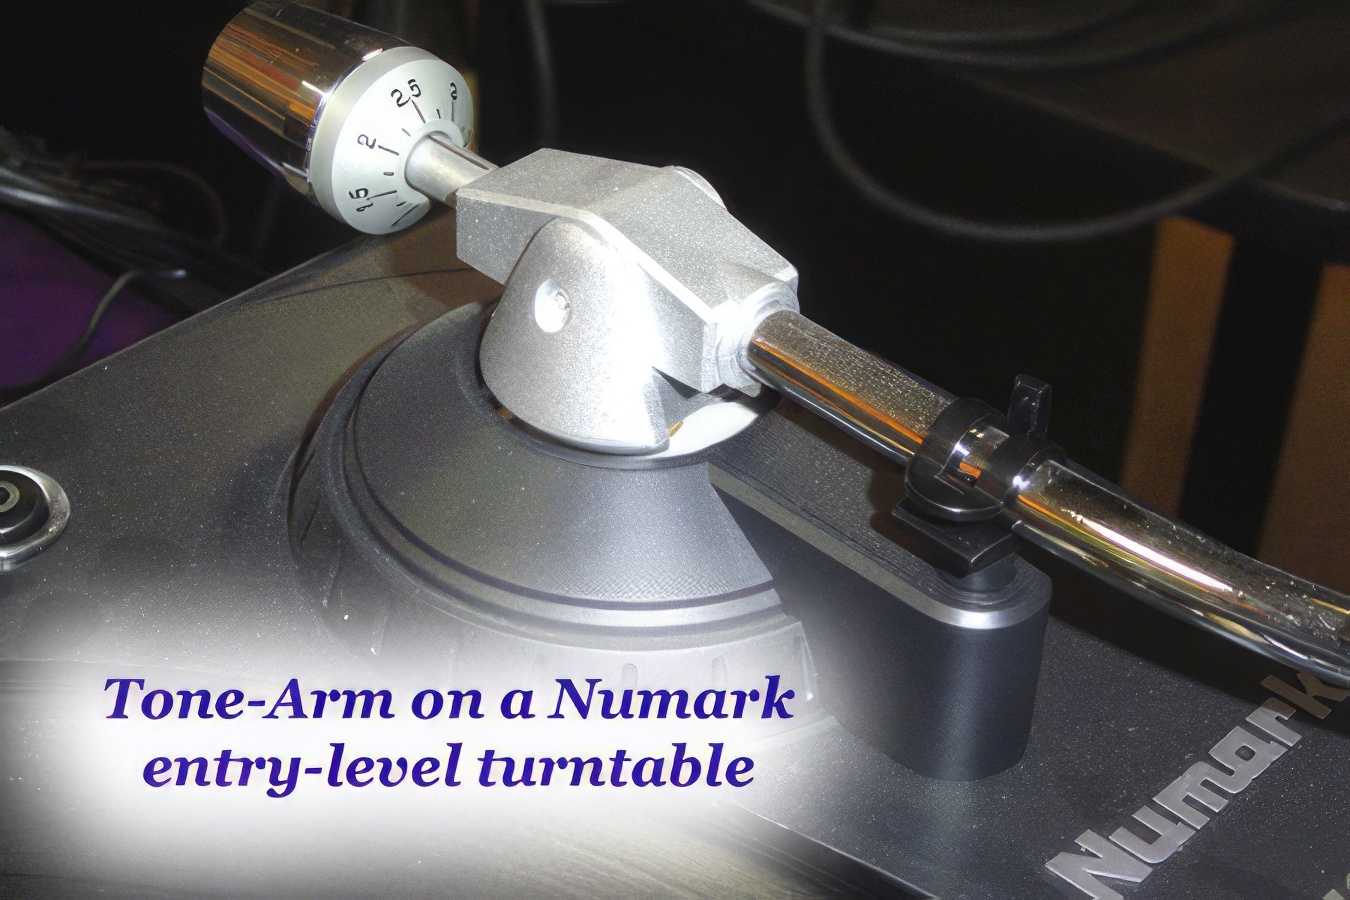
The tone-arm assembly
on this Numark deck is quite basic.
One feature of this
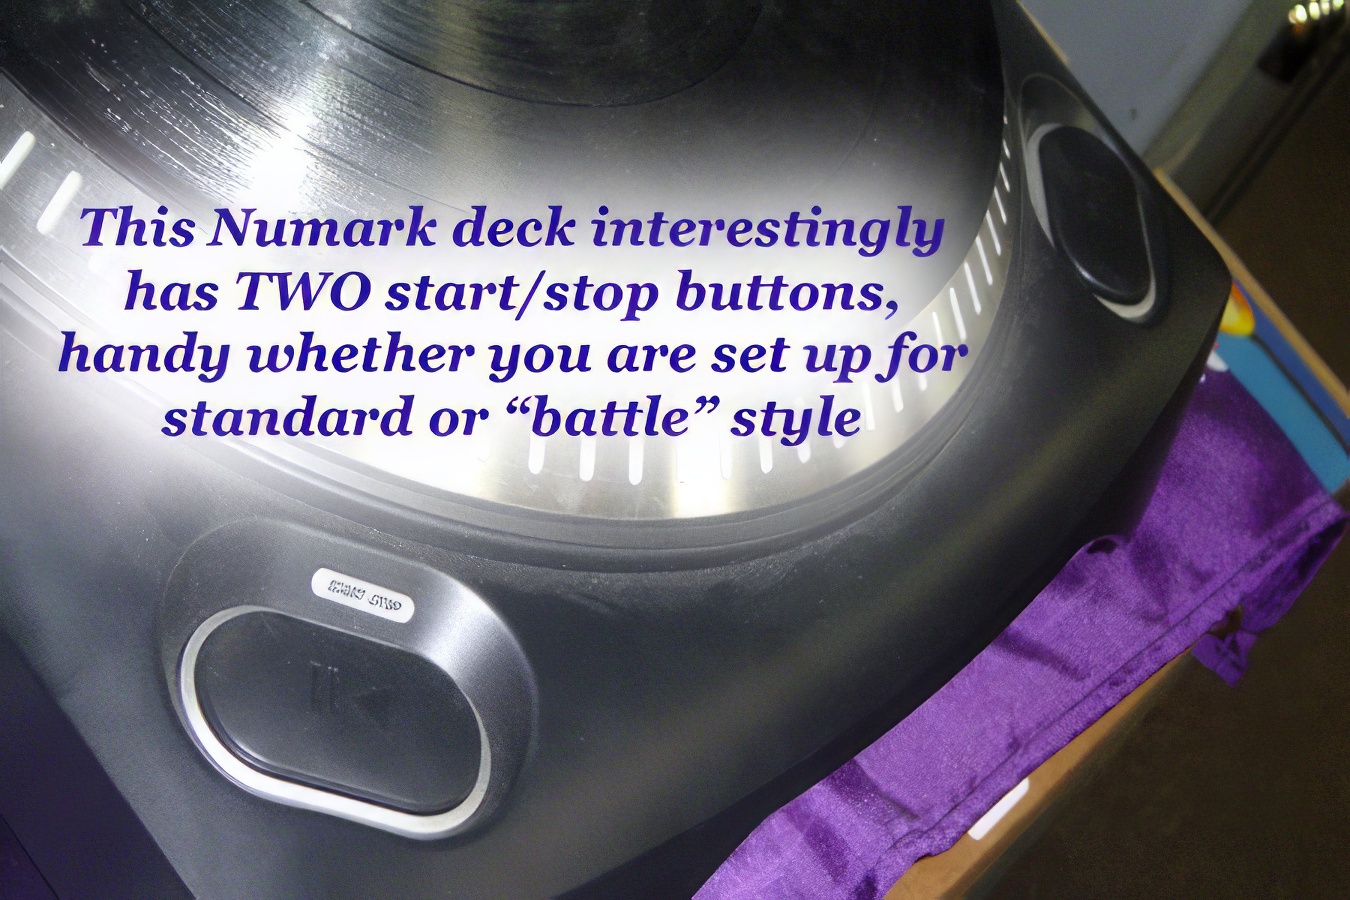
Numark deck that is NOT often found on more expensive models is dual start/stop
buttons.
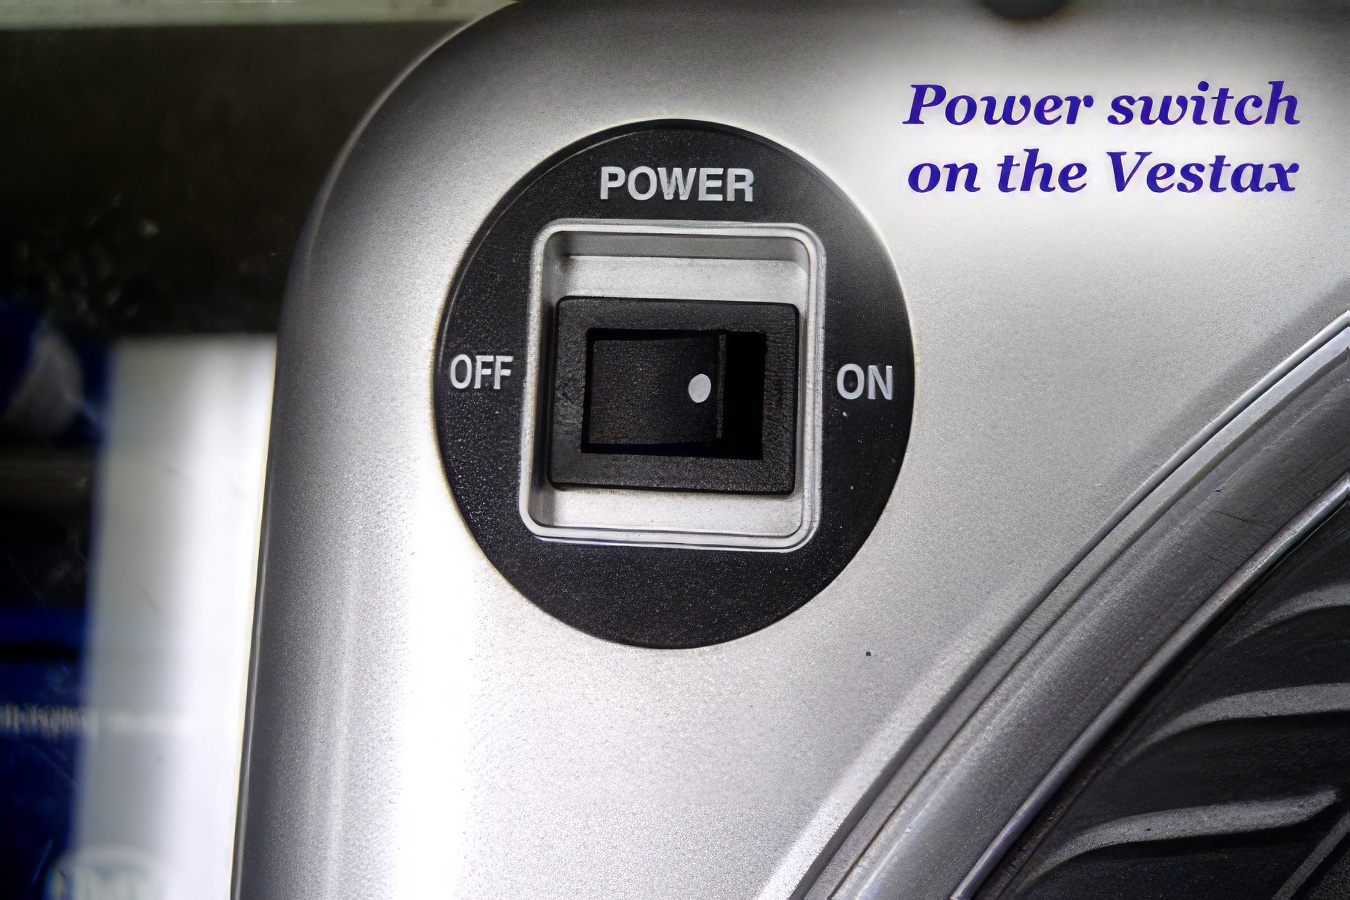
Moving to a Vestax
model, the power switch (top left corner) is harder to hit accidentally.
The start/stop and
33/45 speed selector buttons on a Vestax model.
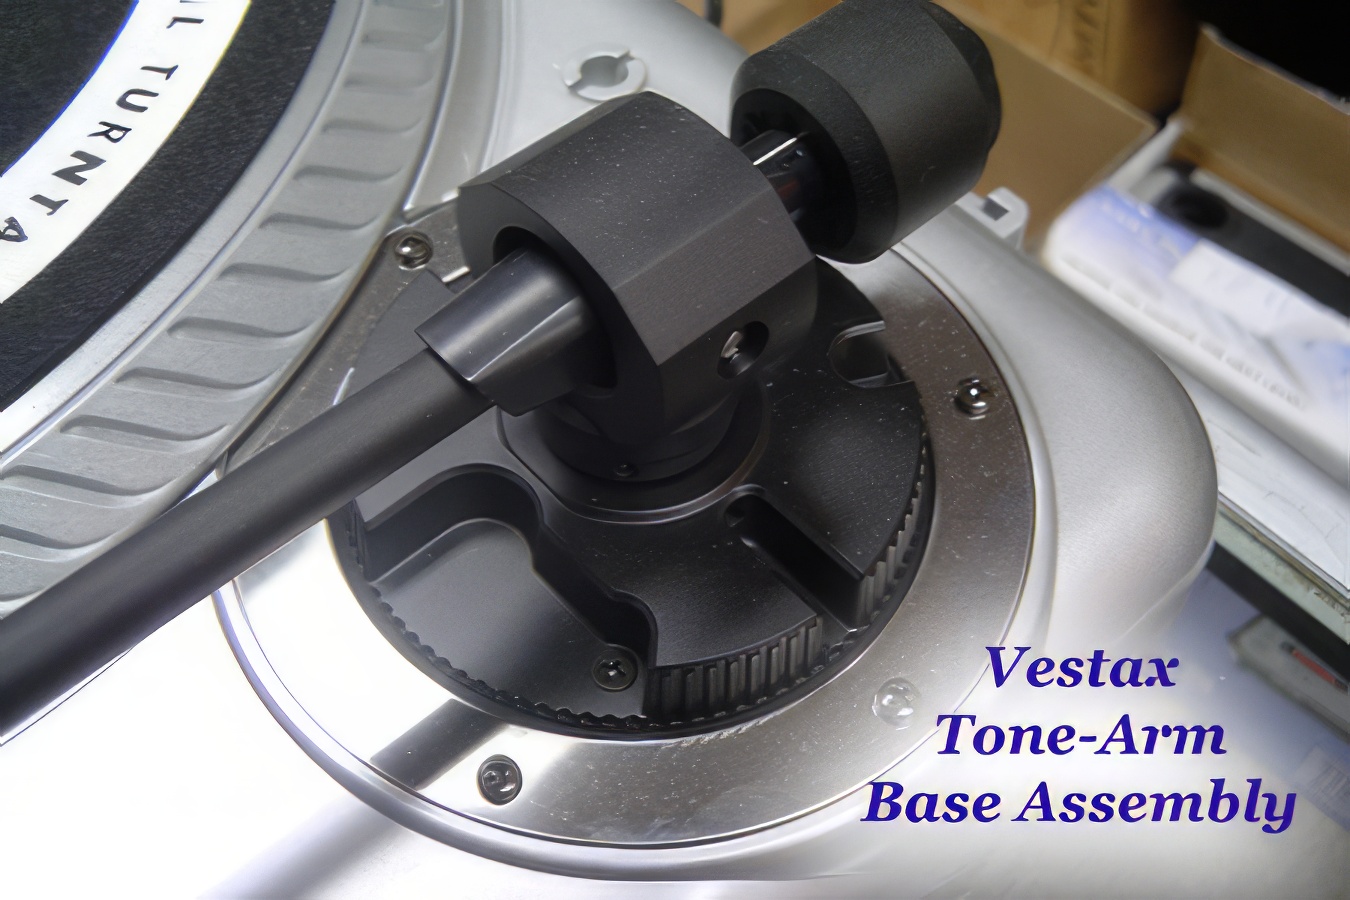
The base of the tone
arm assembly on the Vestax, again more simple than on a Technics.
The straight tone arm on this Vestax is now favored by some
turntablists and scratch DJ’s.
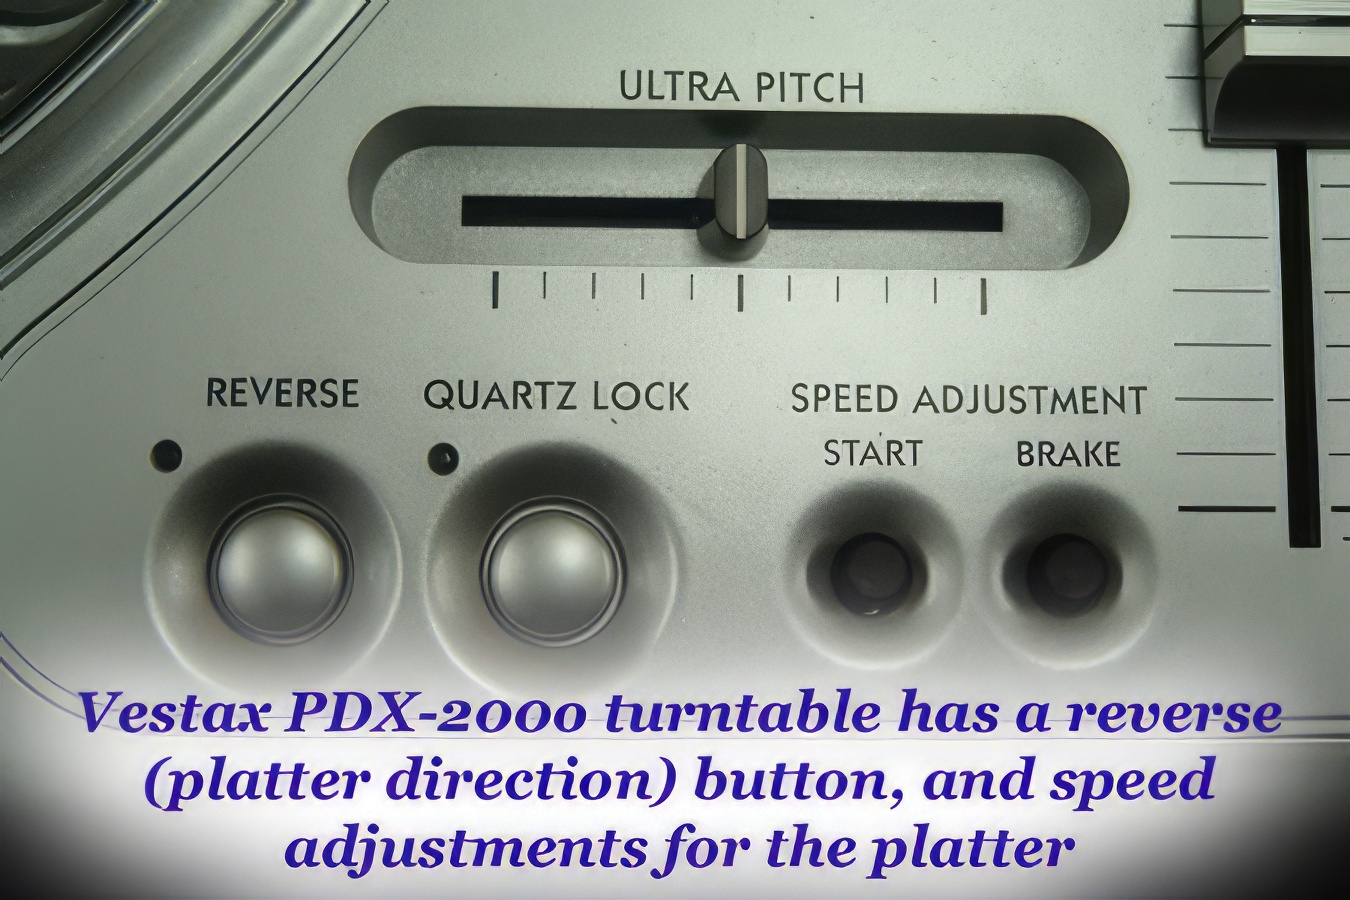
The Vestax features a
reverse button for the platter, ultra pitch adjustment, and motor braking
adjustments, none of which are available on the Technics 1200 series.
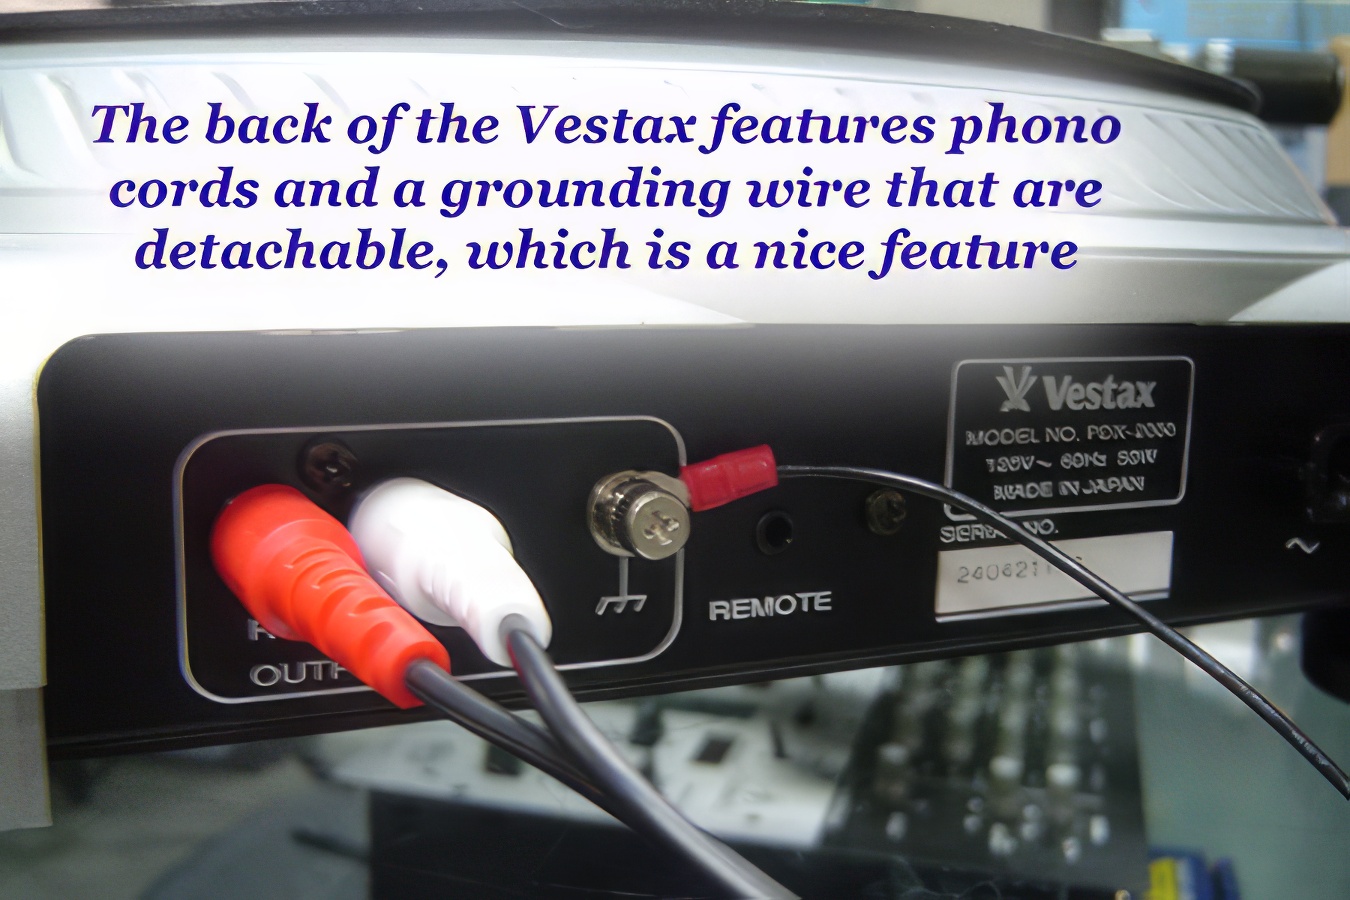
Another nice Vestax
feature is the detachable signal (phono) cords and grounding wire.
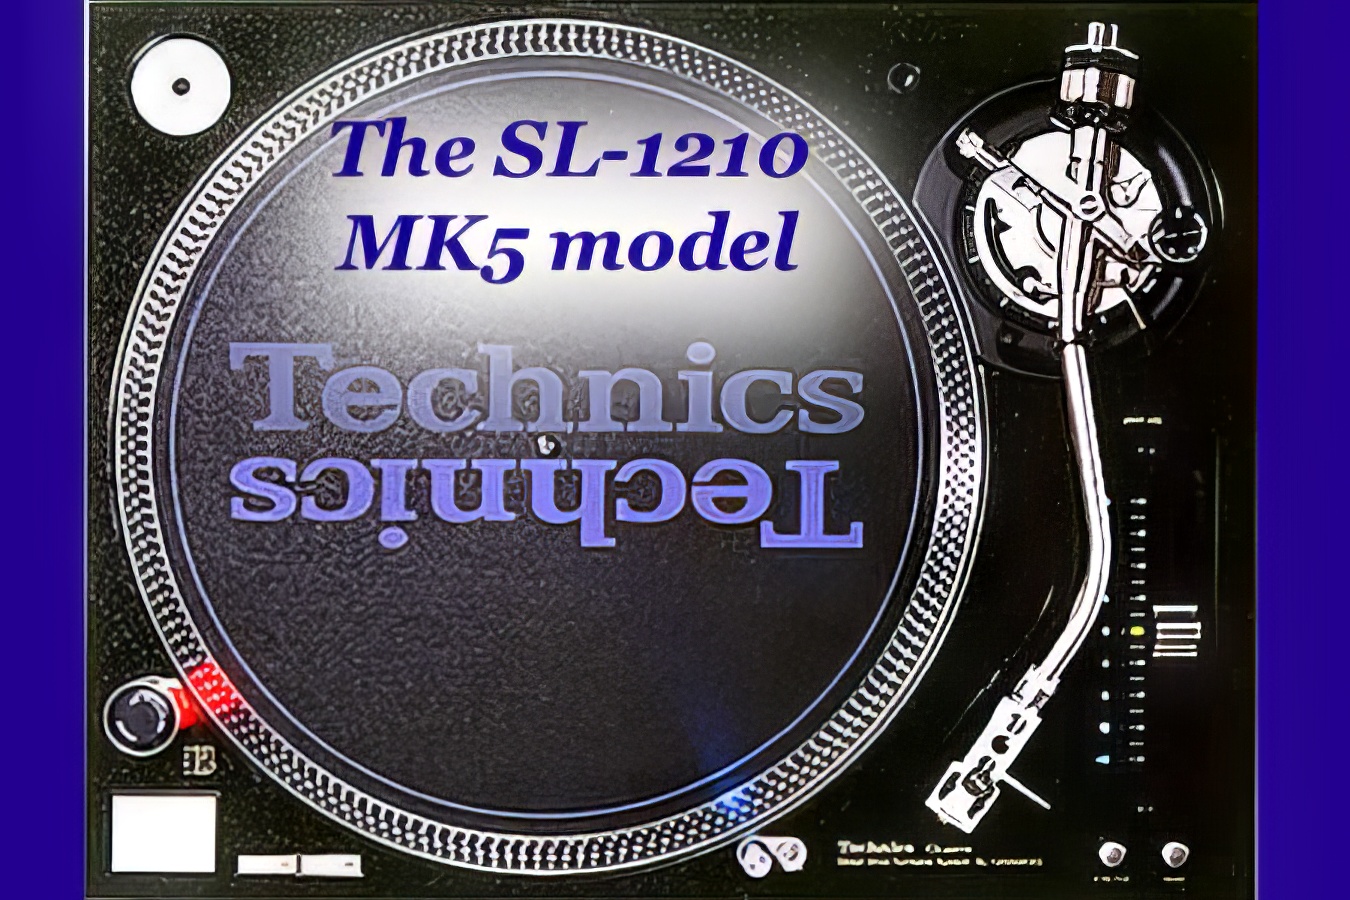
Back to the Technics
1200 series – this time the newer SL1210 MK5 model. Looks pretty.
Video Tutorials
I have a handful of video tutorials on YouTube that relate to various aspects of using turntables. Here are the links:
Learn to DJ - Setting Up Turntables (old):
Tutorial for Beat-Mixing on Vinyl Turntables:
How to Modify Pitch Faders on a Technics 1200:
Self-Grounding a Technics 1200 Turntable:
A Sample DJ Mix Recorded on Turntables:
Parting
Thoughts
That’s about all you need to know as far as the basics
go. To check up pricing on different turntables, look at a number of
online equipment stores. The price you
pay will usually reflect the quality of the gear. To sum up, Technics 1200’s are the industry
standard, and are built to last. If you
can afford them, they are recommended by the majority of DJ’s. They also have great resale value. If, on the other hand, you are just starting
out, don’t feel like you are committing a sin if you elect to buy a pair of
cheaper starter decks – you can always resell them and upgrade later if you
want. My only advice would be to stick
to lower-end decks if you’re trying to save money by getting a starter
deck. If you’re looking at buying a mid
to mid-upper range deck right now, but think you might upgrade to a Technics
deck later, then you’re probably better off spending the extra money right
at the start. After you’ve bought your
decks, and are putting the system together, get another experienced DJ to look
over your equipment after you’ve set it up if you still feel uncomfortable.
If he or she makes changes to what you’ve done, ask why. The best way to
learn is to experiment. Have fun!
I'm Jonathan Clark, known online as DJ Bolivia. Do you want to learn more about DJ'ing and music production? If so, visit:
Are you interested in learning more about basic DJ’ing? Well, I just finished another video for my “Learn to DJ” series. This one isn’t for absolute beginners, but it will be good for people who have already decided that they want to be DJ’s, and who have decided that they want to learn to beat-mix their music on CD players or even on turntables.
This video specifically targets people who are interested in learning to beat-mix or beat-match music on CD players in the traditional style, rather than using computer software to assist you. The majority of the video also applies to people wanting to learn to beat-mix on turntables, although I have a separate short video coming in a few days that explains some extra considerations for turntable beat-mixing.
When a DJ gets ready to perform, they basically have two choices:
1. Perform using computer-assistance, ie. with software packages such as Ableton, Traktor, Serato, or Virtual DJ.
2. Perform using physical equipment, such as playing vinyl records on turntables, or playing CD’s or USB-based audio on CD players.
My Videos Page on my main website has tutorial videos about quite a few of these branches of DJ’ing, so bookmark it and check out some of the other videos.
Vinyl is a more traditional media than CD’s. People were DJ’ing on vinyl and cassettes in the 1970’s. Technics came out with the SL-1200 turntable in around 1972, and it became very popular among DJ’ing over the subsequent several decades. CD players started to come into use in the mid-1980’s. Surprisingly (for many of today’s younger DJ’s), cassettes were more popular than vinyl or CD’s in the late 1980’s.
I’ve heard that turntables originally had pitch adjustment controls due to inconsistencies in the pressings of records, to “fix” mistakes in some pressings. I don’t know if that’s actually true, but DJ’s quickly learned that the pitch controls allowed them to adjust tempos, to match the speeds of different songs to each other. DJ’s realized that most of the time, if people were going to walk off a dance floor, it was at the end of a song. Beat mixing was born in an attempt to keep people on the dance floor, by eliminating the periods when a song ended and tricking dancers into sticking around for another song.
CD players with pitch controls came out in the late 1990’s. The Pioneers CDJ-500 was released around 1997. A few years later, the CDJ-1000 was released, and that eventually became an industry standard. CDJ-1000’s can still be found in clubs all over the world. A few years ago, the CDJ-2000 was released, which is the model that I used in this video, although not too long ago it was replaced by the CDJ-2000 “Nexus” variation, which among other things, has a much better display panel, and also allows DJ’s to play songs wirelessly from a nearby smartphone.
A big question that people frequently ask me is to make a recommendation about whether a new DJ should learn on computer software or on traditional equipment. The answer to that depends on the person. Mixing on a laptop allows you to bring more music, and the versatility of having software to assist you is helpful. If you don’t have to worry as much about beat-mixing, you can focus more on programming and stage presence. And buying a laptop is generally cheaper than buying all the rest of the traditional DJ gear that you might want.
However, there are drawbacks to laptops. You have to make sure you have a decent machine that doesn’t crash, with enough storage space, lots of memory, and a fast enough hard drive that you don’t get lags in the music during your performance. Some fans and purists look down upon laptop DJ’s because they have less versatility and skill than DJ’s that mix on vinyl or CD’s. And one thing that I think is really important to remember is that DJ’ing on a laptop isn’t nearly as fun!
But of course, CD’s and vinyl have drawbacks. For instance, you have to learn to mix. It’s not easy. Some people pick up the basics in a single evening, and others need a couple weeks to get comfortable with simple mixes. But after that, you still need months of practice to really get good at smooth-sounding mixes. The equipment is also fairly expensive, and not everyone can afford to have a full DJ setup in their own house or apartment. Also, a problem that many beginning DJ’s don’t think about is that after they get comfortable on their own equipment, they go to play at a club and they’re in a totally unfamiliar environment, perhaps with a completely different mixer and players and monitoring system, and it feels impossible to mix again. Until you start playing in top clubs that can afford high-end equipment, a DJ will have to get used to lots of different equipment configurations, and will have to get used to playing on different brands and models of equipment.
But the most important thing to remember about learning to beat mix on vinyl or CD’s is that it’s fun. So let’s learn.
There are two distinct styles of mixing CD’s (and vinyl). The first is what I call “radio style,” or a basic fade-in/fade-out approach. As one song starts to end, you start a second song on the other player, so the two songs overlap. In this style, you probably make no effort whatsoever to sync tempos, although with some songs, you might try to time the first beat of the new song to hit at a very specific time.
Beat Mixing (also referred to as Beat Matching) is the other approach, where you take songs with similar tempos and sync them so they sound like a continuous track. Beat mixing is the predominant style in clubs, parties, and at electronic festivals. It works with a lot of different styles of music, such as hip hop, house, techno, trance, breakbeats, dubstep, drum ‘n’ bass, electro, and mainstream pop/dance. Within some of those styles, there are massive numbers of sub-genres. For example, with house music, you’ll common find DJ’s segmented into deep house, tech-house, disco house, vocal house, progressive house, tribal house, and probably thirty or forty other subtle variations that I could list.
It’s probably useful for you to understand the distinctions between the various main styles, if you don’t already. Of course, that could take weeks to learn, but it’s kind of fun. A good resource that I’ll recommend you check out eventually is Ishkur’s Guide To Electronic Music. It’s tongue-in-cheek most of the time, but still contains a massive amount of useful information, and even experienced DJ’s and EDM fans can spend hours flipping through descriptions of various styles and listening to samples.
It’s also good to understand tempo ranges. It’s best to mix tracks within a fairly tight range. For example, no matter what your typical tempo is for a style, it can often be pretty challenging to beat-mix a track with another track that has a tempo difference of more than 10% from the preceding track. In fact, I’d say that a range of around 5% on either side of an “average” tempo for a genre is typically easiest. Of course, it helps if you know the typical tempos for various genres. Let me list a few:
Hip Hop – 60bpm to 105bpm
House – 115bpm to 135bpm
Techno – 125bpm to 145bpm
Trance – 130bpm to 145bpm
Dubstep – 135bpm to 145bpm
Drum ‘n’ Bass – 150bpm to 180bpm
Electro – 125bpm to 135bpm
Mainstream Pop/Dance – 118bpm to 132bpm
These are all my opinion only, and you’ll sometimes find tracks outside these ranges. But I feel fairly confident that 95%+ of the music in each genre lays within the ranges that I listed above. You’ll notice that Hip Hop has the biggest range. I actually think it’s by far the hardest type of music to mix because of that. You really have to know your music, and to go from a song in the lower part of that range to one in the upper, you probably need to play several other songs in between, gradually ramping the tempo up to where it needs to be.
Before I can demonstrate beat mixing on the equipment, it’s important to look at it from a theoretical point-of-view. There are two things that you need to understand about the speed of a record: the tempo, and what I loosely call the acceleration. If you know how a pitch control works, you’re probably really confused right now. There’s only one thing that you can adjust – the tempo! But you have to realize that you’re introducing another dimension into the equation when you start DJ’ing, and that’s the dimension of “time.” To change from one tempo to another takes time. It might seem almost instantaneous, if you move a pitch fader quickly, but it’s still a finite amount of time.
Let me use two airplanes that are trying to fly beside each other as an analogy, and let’s assume that one of the two (which I’ll call Plane “B”) is flying “behind” the other in its parallel flight path. What does Plane B need to do to start flying beside Plane A? Well, it needs to make not one but TWO speed adjustments. First, it needs to change its speed so it is flying faster. But before long, Plane B will catch up to Plane A, and unfortunately, if you don’t make a second adjustment, it will quickly get ahead of Plane A. So merely speeding up Plane B didn’t synchronize the two planes. The pilot had to speed up to catch up AND then make a second speed (tempo) adjustment in the opposite direction to slow down to the same speed as Plane A. A DJ has to make a similar pair of adjustments to match a lagging beat (Plane B) to the beat that’s going out to the dance floor (Plane A). But the DJ may have an additional challenge – he or she might not know exactly how fast Plane A is going, which means you don’t know exactly how much to slow back down to stay beside Plane A. Sounds confusing? Yes, it is.
I just illustrated the most common way for experienced DJ’s to beat-mix. There is a second way. Let’s say that you’re flying Plane B and you’re a little bit behind Plane A, but you realize that you’re flying at exactly the same speed, because you’re neither catching up nor falling further behind. This is good! This gives you information that you need – you now know exactly how fast Plane A is travelling. The corollary when DJ’ing is that if your incoming track is off-beat but it’s not falling further behind or catching up (it’s staying exactly off-beat), then at least you know what your final tempo on the new record needs to be once you’ve caught up. In this situation, you just need to catch up and then at the very instant you are caught up and beside Plane A (or the beats are synced with the two songs), you immediately cut back the speed on Plane B to what you have already learned is the correct speed (tempo).
For people beginning to learn to beat-mix, this is the way that they usually find easiest to learn, which is fine. They focus on trying to make sure that their incoming track is the right speed as the biggest priority, regardless of whether or not the songs are synced. Once you know that your two tempos are the same, you can quickly and temporary “pump” or “suppress” the beat to make it match that of the audible record. Of course, you can’t quite do that in aviation, so my analogy falls apart there. If an analogy was still possible, it would be like if Plane B was going the right speed but was behind Plane A, and a giant flyswatter gave it a smack and pushed it up beside plane A.
The problem that you’ll probably see with the first approach is that when you’re speeding up Plane B to catch up to Plane A, and then you suddenly have to guess at a slower speed to stay beside Plane A, you’ll probably guess too slowly, or too quickly. In that case, your plane either starts to slowly fall behind, or slowly get ahead. This is normal. You’ll think about things for a minute and try to figure out how quickly you’re falling behind or getting ahead, and then make a decision to make another pair of adjustments. You might have to do this several times. With each successive set of adjustments, you’ll hopefully get a better idea of what the proper speed needs to be, so you’ll get closer and closer to matching the speed of the first plane (or song). In scientific terms, when you’re trying to match the tempo of the first plane, you can think of that plane’s tempo and you’re trying to figure out what you need to do to make your speed revert to the mean. Sometimes you’ll undershoot, and sometimes you’ll overshoot, but with each adjustment you should be getting closer to knowing what to do to match the tempos perfectly.
It’s pretty hard to explain this stuff on paper. You should really watch the video, if you haven’t already. Hopefully it will make a bit more sense when I demonstrate rather than try to write it all out.
In this video, I was using a Pioneer DJM-600 mixer, and a pair of Pioneer CDJ-2000 CD players. These aren’t great pieces of equipment for teaching beat-mixing to beginners, for two reasons. First, beginners tend to be intimidated by all the buttons and knobs. Remember that most of them are just extra “fancy bells and whistles.” Don’t feel like you’re going to learn less if you’re learning on very simple equipment compared to these units. Simple is better, because you’ll focus more on actually figuring out how to sync the tempos of music (ie. beat-mixing) instead of focusing on the extra options on the mixer.
One additional problem with these units is that both the CD player and the mixer have displays which tell a DJ what the approximate tempo is. This is a terrible thing for beginners!! Don’t learn to rely on the BPM counters on your equipment when you’re learning to beat-mix. If you’re going to do that, you might as well just learn to play on a laptop. I highly, highly recommend that the first thing you do if you’re practicing on high-end equipment is to put a small piece of masking tape over every single BPM display! You need to be able to figure tempo differences out by ear. It’s frustrating, and it will take time before you’re comfortable with it, but you MUST figure this out on your own. I feel that relying on BPM counters is a terrible habit to get into. You’re only cheating yourself if you learn to DJ this way.
I didn’t use the cross fader in this video, and I explained why in the video. Basically, the cross fader is a useful asset, and is quite important in some styles. However, in terms of actual relative control during everything but a basic A to B mix, using the channel faders gives you a lot more flexibility.
You can improve your mixing skills by learning to use the EQ buttons while mixing, if that’s an option on your mixer. It usually is. Many mixers have three EQ buttons per channel (low frequencies, mids, and highs) but some low-end mixers might only have two, and other good mixers might have four or more. Rather than getting into this in detail, I’ll just say that when you’re mixing two tracks and they are not perfectly synchronized, it is usually the overlapping bass frequencies which sound most obviously out of sync, sort of like shoes in a dryer. So typically, if I’m mixing two tracks, I’ll bring the highs and mids of the incoming track up a bit so I can hear it better in the headphones and the dance floor can hear more clearly that a new track is coming in, and I’ll mix with very little bass in the incoming song until a point (usually on the first beat of any eight-group bar grouping). At that point, I’ll cut the bass from the outgoing song and bring in the bass of the incoming song.
You should also try to pay attention to the underlying rhythm structures of each song when you’re mixing. Synchronizing beats from one song to another is good, but it is much, much better if you can synchronize bars and sections too. Most types of dance music (drum & bass and break-beats are exceptions, and dubstep seems like an exception although it’s just half-time tempo signatures) are based on an eight-bar or sixteen-bar 4/4 time pattern. I can explain this better in the video, but essentially, if you’re working with a house/trance/techno track, listen for a point which seems like it’s intuitively the “beginning” of a section of the song. Often this is when a beat comes back in with significant other changes to the music, or after a breakdown. Treat that as beat one of bar one. Now start counting along with the beats in groups of four (each group is called a “bar” in music). You’ll essentially count the following pattern: 1 2 3 4, 2 2 3 4, 3 2 3 4, 4 2 3 4, 5 2 3 4, 6 2 3 4, 7 2 3 4, 8 2 3 4. The interesting thing is that when you get to the next beat, which would be the first beat of bar nine, you’ll often notice that the music changes. Neat, eh? Most good dancers and DJ’s already know about this phenomena, even if it’s intuitive and they don’t realize that they know it. A DJ will get to the point where they are always counting bars and beats in the back of their mind. It actually gets frustrating at times when you’re out relaxing at a club and you can’t stop yourself from counting beats, even though you wish you could forget about the counts and just enjoy the music.
In the video I also went into a brief explanation of Groove Riding, which is what many professional DJ’s end up doing because they’re extremely comfortable with beat-mixing. Basically, groove riding is using the same techniques that I’ve already described in order to figure out how to mix two tracks, but instead of ever matching tempos perfectly and then giving the CD or turntable platter a “push” or a “drag” to match it to the other song, the DJ does absolutely everything to sync the records without ever taking his/her hand off the pitch fader. I demonstrated this in the video.
In conclusion, if you want to get good at beat-mixing, you need to do three things: practice, practice, and practice. More importantly, don’t focus too much on the technical aspects at the expense of programming. Someone who mixes perfectly but plays bad music will be far less popular than someone who just does quick radio-style mixes but plays songs that the dance floor loves.
Last minute advice?
1. If you do get a gig in a venue where the dance floor will expect perfect mixing, be ready for it. Practice constantly before your show. Go into it assuming that you’ll have a few bad mixes, so you don’t get flustered when you make those mistakes, because once you start to get nervous or flustered, it’s really hard to recover. A calm DJ always does a better job.
2. Don’t play the same track twice in a night.
3. Don’t ever DJ when you’re drunk or stoned. If you want to become an above-average DJ, treat it as a profession, not just a party.
4. Check out some of the other tutorials on my Video Page, and follow me on Twitter to see updates about other videos that I’m about to put up on YouTube.
Here's the companion video, about beat-mixing on vinyl. But you should watch the CD beat-mixing video first.
I'm Jonathan Clark, known online as DJ Bolivia. Do you want to learn more about DJ'ing and music production? If so, visit: