Showing posts with label audio. Show all posts

Tuesday, February 20, 2024

Distortion in Windows Media Player

Fifteen years ago, I published a post on my personal (non-music) tree planting blog, talking about how to solve distortion problems in Windows Media Player.  Some people are still using this app on older operating systems, and continuing to run into problems, so I'm going to migrate that information to this music blog.  But remember, this is for the Legacy player, not the new one!

----

Have you ever listened to songs in Windows Media Player and found them to be distorted in places, so the sound quality is terrible? The same files may play perfectly in all other programs - I've had files that worked in WinAmp, RealPlayer, Quicktime, Nero, and a host of other programs with no problems, yet Windows Media Player would not handle them properly.

As it turns out, MicroSoft has a Creative PlayCenter MP3 decoder resident in the operating system which (in many but not all cases) is what causes the problem. Certain versions of Windows Media Player use this decoder, but there are compatibility problems. If you're not using that decoder file for whatever reason, you probably won't run into the distortion problems.

The simplest way to fix the problem, assuming that you're running on a Windows operating system, is to go down to your start menu on the bottom left side of the screen, click on it, then go into "search." You need to search your C: drive (or whatever drive your O/S resides on) and look for a file called "Ctmp3.acm" - if you can find that file, don't delete it, just rename it to "Ctmp3.bak" instead.

If you can't see the file extensions when you're doing searches (the default option on Windows, but one which I detest and disable immediately whenever I set up a new computer), I'll show you how to make your file extensions visible. Go to Windows Explorer, either through your Start menu or by holding down the "flying window" key (left of your left side alt key) and then pressing the letter "E" at the same time. Next, go into the Tools menu, and chose Folder Options in the drop-down Tools menu. In Folder options, click on the "View" tab. The seventh or eight option in that list usually says "hide extensions for known file types" and has a check beside it. Uncheck this, then click OK. Now you'll always be able to see file extensions in Windows Explorer and associated panels. If you're quite computer savvy, you might also want to set the other three options above and below that let you show hidden files, show O/S files, and display the full path name in the Title Bar (although this is only applicable if you're trying to conserve system resources by switching to Classic View, such as for intensive audio or video processing).


Anyway, now you know how to show file extensions, and how to fix the distortion problem on Windows Media Player. This may not be a problem on newer versions of Vista, but it certainly was on certain versions of WMP running on XP.


If you want a different approach to disabling the problem codec, here's another set of instructions:

The Creative Playcenter software rudely blocks the Windows MP3 codec. The following instructions show how to unblock it on Windows XP system. The instructions for other Windows versions are the same except the steps to get to the audio codec area from the control panel varies. Note that this will disable the MP3 capability of the Playcenter software. You can re-enable using the same steps or replace the Playcenter software.

1. Go to the Control Panel
2. Double click on "Sounds & Audio Devices"
3. Select the "Hardware" tab
4. Double-click on "Audio Codecs"
5. Select the "Properties" tab
6. Double-click on ctmp3.acm
7. Select "Do Not Use this Audio Codec"
8. Then click on the "Apply" button


Edit, a few years later:

Please note that there are a few posts online now from MicroSoft that might give you additional insight into this problem. Here are the links:

     answers.microsoft.com suggestion (June 2010)

     support.microsoft.com suggestion (September 2011)

Hopefully, between my own suggested solutions, and the comments that MicroSoft has brought forward, you'll be able to fix any issues that you might have.

Thursday, March 9, 2017

Understanding Gain-Staging

If you don't understand what gain-staging is, it refers to the process that audio engineers and producers and DJ's deal with in order to ensure that when they're playing audio through a system with several different places to change the volume, that the final signal that comes out of the system is as clean and strong as possible, without exceeding the "maximum" 0 dB level that marks the beginning of distorted audio signal.

Putting this another way (from Wikipedia):  "Gain staging is the process of managing the relative levels in a series of gain stages to prevent introduction of noise and distortion.  Ideal gain staging occurs when each component in an audio signal flow is receiving and transmitting signal in the optimum region of its dynamic range."


The 0 dB level confuses many people.  That sounds like it should be a level with absolutely no signal, not a level with a high amount of signal.  Well, that's a long and complicated topic, so you'll just have to trust me on this for now.  Think of 0 dB as being the highest "good" signal strength, and signals that are weaker than that (or "quieter") have negative numbers going down as they get even quieter.  If you want a detailed explanation of that, and have some time, you can watch this video that I produced:


In some systems, moderate amount of distortion isn't bad.  A bit of warm distortion on a nice crunchy electric guitar can sound pretty good.  But in other situations, especially when dealing with a digital audio signal, distortion can sound bad almost immediately.

Imagine this situation that a DJ might face:
- Sound signal comes out of a piece of line level equipment such as a pitch-controlled CD player.  Or it might alternatively come out of a turntable, which will mean that the signal will need to be boosted by a pre-amp before being processed through a mixer or mixing console (usually, this is built into the console).
- Entering the "back" of the mixing console, the usual path for signal flow is "top to bottom" or "back to front" (although not always).
- The signal coming in from the equipment goes through a "gain" or "trim" knob on the channel strip.
- The signal then gets affected by the position of the Volume Fader on the channel strip.
- The signal then leaves the channel strip and goes to the Master Bus (often just called master).  The signal might get borrowed on the way by booth monitors, headphones, etc.
- On the master, the signal can be amplified (increased) or attenuated (decreased) by the master volume fader.
- The signal then leaves the mixer and often goes to an amplifier, which has another volume control.
- The signal leaves the amps and goes to the speakers.

Incidentally, sometimes the signal leaving the mixer will go straight to a speaker, because some speakers are called "powered speakers" and have their own amplifiers built right in to the speaker.

At any place that the signal is "low," there's a greater amount of background/system noise being introduced to the signal, RELATIVE to the overall strength of the signal.  This is called the Signal-To-Noise ratio.  Higher numbers are useful, because you want a greater amount of signal compared to the background noise level.

Of course, if the signal is too high and exceeds the 0 dB level, distortion can be introduced, so we try to avoid that.

Although different engineers and producers and DJ's and musicians will have different views on the matter, which can legitimately vary depending on the work that they're doing and the system they're using, a good general rule is that a signal should be moderately close to 0 dB at its peaks, but to still leave a gap.  This gap is called the Headroom.

If I'm producing music, I often try to have the smallest headroom gap (the peaks of the audio signal) to be several decibels (dB) below the 0 dB mark, but the valleys where the signal is weaker can be much lower than that.  So my average signal strength may end up being possibly at -12 dB or -10 dB. It varies.

If I'm DJ'ing and paying attention to the signal levels flowing through my system, the same approach is valid.  My peaks will be close to 0 dB (which is sometimes indicated by a red light on the VU level meters of the equipment).  My average will be a bit below that, but not too low.

As your signal passes through each of the various volume points in the system, it's great to have them all consistently treated roughly the same.  I'd rather see a lot of "strong but not too strong" signals at different points in the system, rather than some extremely weak (low/quiet) and some extremely strong (hot/high/loud).  The end result may be the same in both cases, but in the system which has a lot of "too weak" and "too strong," there's going to be more background noise AND more likelihood of distortion.  It's like Goldilocks and the Three Bears.  You don't want your porridge to be too hot or too cold ... you want it to be "just right."


Ok, now that you have a basic understanding, here are links to several pages which will give you more information:

  Sweetwater:
www.sweetwater.com/insync/gain-staging

  Sound On Sound:
www.soundonsound.com/techniques/gain-staging-your-daw-software

  Home Studio Center:
www.homestudiocenter.com/gain-staging

  Gearslutz:
www.gearslutz.com/board/rap-hip-hop-engineering-production/589213-proper-gain-staging-thread.html


And finally, here a video about Gain Staging that seems to have gotten a lot of positive comments:


Good luck with your DJ'ing, audio setups, and production projects.  If you'd like to find more information in my Understanding Sound tutorials, visit:


I'm Jonathan Clark, known online as DJ Bolivia.  Do you want to learn more about DJ'ing and music production?  If so, visit:


If you happen to enjoy techno tracks, most of my tracks are available as free downloads from this link:


Thanks so much for visit, and for your support!  I really appreciate the fan base that I've been able to build up over the years.

Also, if you want to visit any of my other sites, here are a few links:
    YouTube:  youtube.com/djbolivia
    SoundCloud:  soundcloud.com/djbolivia
    Blogger:  djbolivia.blogspot.com
    Main Site:  www.djbolivia.ca

Friday, February 17, 2017

Finding Royalty-Free Samples for Music Production

Are you looking for sounds to put into music that you're producing?  If so, I have a video that I think will help you out a bit.

This video is about a service called Splice Sounds, from splice.com.  It's a great place to find samples and loops and sounds for your own productions.


If you're creating a song or producing a track, and let's assume that you're working on electronic-based production rather than traditional instrumental music, then you're probably looking for sounds for your track.  One source of these sounds is any instruments that might be within your DAW (Digital Audio Workstation, or audio editing/production software).  Most DAW's come with various built-in instruments, which are sometimes called VSTi's.  This stands for Virtual Studio Technology Instrument.  Examples of DAW's that come with built-in VSTi's include Ableton, Pro Tools, Cubase, Sonar, Reason, FL Studio, Logic, and several others.  The VSTi's in these various programs can produce sounds ranging from the various pieces of a drum kit (kick, snare, hi-hats, tom, crash, ride) to miscellaneous percussion instruments (shakers, sticks, tambourines, etc.) to traditional instruments like basses, guitars, pianos, and synths.

I should point out that a VSTi is a bit different than a VST (virtual studio technology plug-in).  VST's are more likely to be apps or plug-ins that affect that sound, rather than create a sounds.  For example, VST's might add things like reverb or delay or chorus or equalization or filtering to your sounds.

The only drawback with these VSTi's is that they're limited in what they can produce.  Some are pretty versatile and can produce thousands of different sounds, but more frequently, you're limited to only a few dozen sounds from a single VSTi.  Some VSTi's can only produce a single sound!  Eventually, you're going to start getting bored with the sounds from your existing VSTi's, and you'll start looking externally for additional sounds.

When you get to this point, the common practice is to go online and to start looking for things called Sample Packs.  A sample pack can contain several sounds or several dozen sounds.  These are called samples.  They're short audio clips that contain things like a note or a drum hit or a spoken word, or several of any of those things.  I've seen samples that were as simple as a single hit of a stick on a block of wood, or as complex as three or four lines of a singer's vocals.

Some samples are designed as one-shot samples.  These are intended to be played once, without repeating.  Even though it's called a one-shot, there may be more than one sound in the sample.  For example, I've seen one-shots that were a single hit on a hi-hat, and I've seen other one-shots that were sixteen consecutive hits on a hi-hat.  The main defining characteristic of a one-shot is that it's made to be played one time, rather than repeated constantly.

The other common type of a sample is designed as a loop.  Again, a loop sample can be as simple as a single sounds, but more frequently, it's a series of related sounds, such as four hits on a kick drum.  But the key thing with a loop is that it is designed to be played over and over and over again, constantly, in a repetitive motion.  And the way that it's designed, quite often, the intent is that it sounds "continuous" so that you can't really tell where the loop is starting or stopping.

Traditionally, there have been a lot of websites designed to supply loops to producers.  Some well-known examples are:

and dozens more

These sites all offer sample packs that producers can buy and use in their own music.

An important definition here is "royalty free."  You're probably going to want to make sure that all the samples you buy are designated as royalty-free.  This means that you can use them in your own music that you re-distribute, either for free or for sale, without having to pay further expenses based upon the frequency of use of the samples.  In other words, a royalty-free sample is a one-time purchase that legally lets you share the sample in your song forever, with no extra expenses owed in the future if your song becomes popular.

If you buy a sample pack, you may be paying anywhere between perhaps ten and thirty dollars.  Or less, or more.  That sample pack will contain a handful or maybe a few dozen samples, which are sometimes all fairly related, and intended to work together in the same key.  But your sample pack may also contain some diversity, such as some bass notes, some drum hits, some keyboard notes, etc.  The problem though is that you may not end up using all of those sounds.  You may end up buying a sample pack just because you like two or three specific sounds in the pack, and you ignore the rest.  In that case, those samples that you liked will be pretty expensive for you, several dollars apiece.  That doesn't sound like much, but if you do a lot of production work, you can easily go through hundreds or even thousands of samples in a busy month.

That's where Splice comes in.  Splice has several different sections.  Although we're going to focus on Splice Sounds, here's what else it includes:

Splice Studio - Collaborate remotely with other producers, using the Cloud.  Sort of like a real-time collaboration over Dropbox or Google Drive, if you can envision that.

Splice Community - Share your productions with the Splice community, which has hundreds of thousands of other producers.  Sort of like a SoundCloud meets a PHPbb message board concept.

Splice Sounds - Your source for Samples, as we'll discuss shortly.

Splice Plug-Ins - Buy or rent professional VST's and VSTi's, or download a number of free plug-ins too.

Splice Blog - Information about various topics associated with audio, music, production, etc.

If you want a full run-down of each of those sections, you can find info in the video.  But let's talk specifically about some features of the Splice Sounds section:

- Cost effective:  A subscription is either $8 or $13 USD per month, but allows you to download either 100 or 300 samples per month.  If you don't use up all your credits, they roll over into the future, so you don't lose them.  This works out to pennies per sample.
- Wide selection:  They have literally millions of samples to chose from, royalty-free.
- Easy filtering:  Sort samples by key, tempo, type, instrument, and other criteria, before you start browsing, to be able to find what you're looking for very quickly.
- Audio previews:  High quality audio preview to see if you like the sample.
- And lots more, as the video will show.

The best thing is that you can get a free test account that lets you download about a hundred samples, which lets you go through the service and realize exactly how useful it is.  And you will DEFINITELY realize that if you produce music even on a very casual basis, Splice is well worth the subscription.

If you want to skip the preamble in the video (all the stuff that I just described here), skip ahead to the 9minute 12second mark of the video, and begin playing it there.  From that point on, you'll see the screen shots as I'm describing everything.


Good luck with your music productions!

- Jonathan Clark (DJ Bolivia)
www.djbolivia.ca


PS:  Here's an example of a track that was produced predominantly with samples from Splice, plus a few stock Ableton Live sounds included:


I'm Jonathan Clark, known online as DJ Bolivia.  Do you want to learn more about DJ'ing and music production?  If so, visit:


If you happen to enjoy techno tracks, most of my tracks are available as free downloads from this link:


Thanks so much for visit, and for your support!  I really appreciate the fan base that I've been able to build up over the years.

Also, if you want to visit any of my other sites, here are a few links:
    YouTube:  youtube.com/djbolivia
    SoundCloud:  soundcloud.com/djbolivia
    Blogger:  djbolivia.blogspot.com
    Main Site:  www.djbolivia.ca

Wednesday, December 14, 2016

Learn to Fly in Canada

I think a lot of kids wish that they could be a pilot when they grow up.  Unfortunately, many never decide to follow that dream.  I myself wasn't the same.  I can't really remember any specific career that I wanted to have as an adult, but I'm pretty certain that being a pilot definitely wasn't even on my radar.  It wasn't that I wasn't familiar with aviation ... I read tons of books about aviation, planes, rocketry, aviation, and that sort of thing while growing up.  But it was only about a year and a half ago that I decided that I wanted to learn how to fly.

People who think about getting a pilot's license are often deterred because of the challenges.  There are a definite a couple obstacles.  First, the cost is not insignificant.  It's possible to get a basic regular PPL (private pilot's license) in Canada for perhaps as little as $15,000.  But I'd recommend that students budget closer to $20,000, unless you've done a lot of studying in advance, and you're able to do it in a fairly short calendar time frame (a few months).  Otherwise, you'll end up wanting to do refresher flights quite often, because you'll forget things if you're not practicing regularly.


Another challenge is that the material is not easy.  Most of the material covered in a Canadian private pilot license is not terribly difficult, but there is a lot of memorization, and parts of the flight theory, navigation, and meteorology sections can be tricky.

In addition, depending on where you live in Canada, it can be difficult to find instructors.  Weather is also an issue - although a plane flies much more easily in cold weather in winter, many students try to avoid lessons when it's cold out.  And finally, if you're a bit nervous of planes or heights, or get nauseated easily, your first couple of flights might be tricky (don't worry, all of those minor problems start to disappear quickly after half a dozen lessons!).

I can't help anyone with money, finding an instructor, or a fear of heights.  However, I can help with the theory and memorization part!  As I was working on my PPL license, I made pretty extensive notes to help myself study, and I'm posting them here so they're free for anyone to use.  Please be aware that these notes are not a suitable replacement for the training that your instructor will do with you, nor as a replacement for going through ground school!  This is just some of the important information, laid out in a format that I hope will make it easier for you to study.

My notes were broken into seven sections.  I have both PDF versions of the notes, and audio (mp3) recordings, in case you want to listen rather than read.  The fastest way to download any of the items is through my public Dropbox account.  Go to this link:

www.djbolivia.ca/dropbox


Then look in the "Canadian Aviation" folder.  You'll see different sub-folders full of things, including my PDF study notes, my audio versions of my study notes, a folder full of posters and charts, and another folder full of public domain reference guides and materials.

I also have the study note PDF's available if you click on these links:


When you first go visit a flight school, you'll go on what's called a Discovery Flight.  This is a quick flight of about an hour, to let you get a sense of what it's like to be up in a small plane.  You may feel a bit nervous, but don't worry!  Your instructor may actually let you take the controls and fly the plane a little bit while you're up there on your first flight.  All training aircraft have two sets of controls, so don't worry, because the instructor will be able to override you if you do anything wrong.

For those of you who are nervous about being up there in a small plane, you've probably heard lots of statistics about how much safer airplanes are than cars.  It's true.  But here's one other thing that helps put safety into perspective.  You're used to driving a vehicle on the road, I assume?  Well, if you make a bad mistake with a vehicle, you could end up in the ditch, crashing, in about three to four seconds.  However, with a plane, it would probably take a couple minutes for you to get down to the ground.  This was one of the most memorable lessons that I learned quickly.  Even if you make a mistake and the plane starts to "fall out of the sky," you have TONS of time to think things through and react appropriately.  The only time you need to react fairly quickly is if you're diving at the ground, and that's simple enough to fix by slowly pulling up so you're in level flight again.  Incidentally, most people do their PPL training in Cessna airplanes, which are incredibly forgiving.  When you make a mistake, they're designed to usually return to a safer configuration on their own, without you touching the controls.

Anyway, some people approach their lessons differently than other.  Remember that there's the hands-on physical training, in the aircraft, but there's also a lot of theory involved (this part is called Ground School).  And there are a couple other side requirements (passing a basic "PSTAR" multiple choice exam, getting your medical done, and getting your radio license).  If I was going to recommend an order to approach everything, here's one possible way of doing it:

1.  Do your Discovery Flight, just so you feel what it's like to be in the plane in the sky.

2.  Spend a couple days reading and learning my "Beginner's Aviation" study notes.  You don't have to memorize it all, but this will give you a good base so you'll understand a lot more things when your instructor starts doing your flight lessons.

3.  Start with your regular lessons.  I'd try to go through at least two or three.

4.  Get your medical done.  Your instructor will tell you the requirements.

5.  Ask your instructor to get you set up for the P-STAR exam and the Radio License exam.  Once you have the study materials for those two exams, set of goal of something like two weeks to memorize it all and take your exam.  But keep flying while you're doing this!

6.  Once you have your P-STAR and Radio License, you need to really start learning the ground school material.  I'd recommend doing all the Air Law & Miscellaneous, and the Flight Theory & Aircraft sections first.  As you're still going through basic lessons, before you're allowed to try a solo flight, it's those two sets of study notes that will be most applicable to the hands-on learning that you're doing.  I should make a note here that if you're doing regular ground school in a classroom, you won't have much choice about timing of lessons.  If you're doing it through an online school, with videos and online testing, you proceed at your own pace.  I wouldn't recommend one approach over the other.

7.  Eventually, you'll be allowed to do your first solo.  This is a pretty significant milestone.  But before you do that, spend a day or two studying my Pre Solo Flight Basics study notes, and make sure that everything makes sense.  If it doesn't, review the appropriate manoeuvres with your instructor before you do a solo, even though your first solo will probably just be a couple of simple circuits around the airport.

8.  You still have a bunch of flight lessons to go through, but at this point, I would really take a couple weeks to go hard at learning the Navigation and Weather/Meteorology study notes.  But don't do this at the expense of continuing to fly.  You'll get rusty if you don't practice, so if it takes you more than two weeks to learn all of the Navigation and Weather/Meteorology, make sure that you keep doing at least one flight per week, to maintain your comfort level.

9.  Once you've learned Navigation & Weather/Meteorology, you need to go through the rest of your flight lessons.  While you're doing this, refer occasionally to the Abbreviations & Acronyms study notes.  That one is pretty much pure memorization, and I find that it's nice to review one or two pages each night.

10.  Now comes the big decision.  You're getting close to being ready for both your written final exam and your flight exam.  Which one do you do first?  Do you try to do them simultaneously?  Well, I wouldn't do them simultaneously.  There's a lot of last minute review that you'll probably want to do for each.  When you do the written exam, it takes a few weeks for you to get your mark back, so you might want to do that first.  With your flight exam, if you pass, you're basically going to know immediately.  But it can be tormenting if you pass the flight exam, but still need to go on to do the written exam, because that means that you can't fly your friends around for several more weeks!


Going into the flight exam, your instructor will basically take you up on mock flight tests, and make sure you're really at the point of being able to pass, before he gives you a recommendation to book an examiner.

For the written final exam, there's a really great study guide that you should pick up.  This is what it looks like:


You can find it by going to the www.VipPilot.com website, and searching for "Private Pilot Exam Prep Guide."  Worth every penny.

Incidentally, there's one more book that I haven't mentioned yet, which is pretty much "The Bible" for people who are learning to fly.  It's called, "From The Ground Up," by Sandy AF MacDonald.  A classic.  It's available from Amazon, and it also has a companion Workbook that you can buy.  I'm not sure what to recommend insofar as the "best point" in the learning process to read this book.  I didn't even start to read it until I was done ground school, and long after my first solo flight.  But it could be equally productive to read this entire book as the very first thing you do, even before your discovery flight.  It's gold Jerry, gold.


Here are links to a few websites that you might find to be useful:


By the way, don't forget to look those that reference material in my public dropbox at www.djbolivia.ca/dropbox - here's a partial list of some of the contents:

AIP Canada
Aeronautical Information Manual (AIM)
Aviation Weather Services Guide
Canada Air Pilot (CAP)
Canada Flight Supplement (CFS) sample version from 2009
Designated Airspace Handbook (DAH)
Flight Training Manual, Transport Canada, 4th Edition
Manual of Word Abbreviations (MANAB)
PPL Flight Test Study Guide
PPL Written Exam Study Guide
PSTAR Exam Study Guide
Radio Operator's License Study Guide
VFR Phraseology
Weather Report Acronyms
Canada's Airspace Poster
Cessna 172M Pilot's Operating Handbook (POH)
Environment Canada Clouds Poster


Oh, and if it's more convenient, I also posted the audio versions of my study notes on Soundcloud, and you can download them individually that way too.  I'll keep updating these same widgets any time that I revise any of the material in the notes.


Finally, learning about various types of clouds is a challenge for some students.  If you want to know about the definitive source for information on clouds, it's the World Meteorological Organization's "International Cloud Atlas."  Here's a link:


That's all for now.  Maybe some day I'll open a flight training school (although I still have a long way to go before that could ever happen).  In the meantime, enjoy learning to fly!  But be careful, it's pretty addictive ...


I'm Jonathan Clark, known online as DJ Bolivia.  Do you want to learn more about DJ'ing and music production?  If so, visit:


If you happen to enjoy techno tracks, most of my tracks are available as free downloads from this link:


Thanks so much for visit, and for your support!  I really appreciate the fan base that I've been able to build up over the years.

Also, if you want to visit any of my other sites, here are a few links:
    YouTube:  youtube.com/djbolivia
    SoundCloud:  soundcloud.com/djbolivia
    Blogger:  djbolivia.blogspot.com
    Main Site:  www.djbolivia.ca

Thursday, February 25, 2016

Some Of My Favorite Quiet Songs

Someone asked me the other day what some of my favorite songs were. That’s a pretty hard question to answer, since it depends on my mood. When I’m DJ’ing, I usually play techo house or techno, or occasionally top40 and pop, depending on the venue.  But if I’m listening to music on my own, I rarely listen to dance music, except as research. If I had to pick my favorite upbeat music to listen to, and I was limited to something like a set of five bands that I had to listen to over and over again for the next twenty years on a deserted island, I’d go with Led Zeppelin (first four albums only), Rush (early albums up to Power Windows), The Tragically Hip (from their second album up until Phantom Power), Neil Young (acoustic and electric both), and Genesis (from the “Foxtrot” to “Abacab” albums only). You’ll notice that those five groups and artists have released a tremendous amount of music, and they have a huge variety of styles, both as individual picks, and as a group.


However, the question wasn’t what my favorite bands are; it was to pick a list of my favorite songs. That list changes all the time, but for today, I’m going to come up with a top ten. These songs are mostly acoustic – it’s not that I like quiet music more, but if I’m going to pick a song by any artist that stands out, I find it is usually the quieter songs that really make an impact. For instance, the Hip and Led Zeppelin have dozens of unforgettable rock hits, but I find it hard to pick a “best track” from either group. Also, it's 6am here, so I have some quiet music on at the moment.

Here’s my list. I’ve picked some songs for their specific lyrics, some for their guitar or piano work, and some that aren’t even really outstanding songs, they just happen to be ones I like to listen to over and over:

1. Motorcycle, “Imagination” – The first couple picks are easy, trying to find the songs I love listening to the most right now. This track is actually by Gabriel & Dresden (of dance/electronica fame) with Jes Brieden singing. The acoustic version of this song is has an extremely simple musical backbone, but if you listen closely, the production work behind it is fairly complex, and I absolutely love Jes’ voice. I haven’t actually met her in person, but I’ll never forget her voice.

2. Blue Rodeo, “Dark Angel” – This one is sung by Greg Keelor, with Sarah McLachlan doing backing vocals. From the “Five Days in July” album. Very moody, very introspective, very free-wheeling timing and chord changes on the piano.

3. Neil Young, “Crime In The City” – There are a ton of quieter Neil Young songs that I could have picked, such as “The Old Laughing Lady,” “Thrasher,” “Needle & The Damage Done,” and “The Campaigner.” The reason I like “Crime In The City” best right now is partly because it is a long song (eight or nine minutes, I think), and partly because of the way he intermixes the acoustic guitar and sax solos (I’m talking about the acoustic version from the “Freedom” album, not the electric version from “Weld”), and mostly because of the sexy drum beat.

4. Snow Patrol, “Chasing Cars” – Another Gabriel & Dresden tie-in, since they’ve done a dance remix of this (I think it was them) which I’ve heard them play in a few of their sets. I think this was also featured in Gray’s Anatomy. Anyway, it’s a pretty powerful song (although to be honest, I like the G&D remix better than the original).

5. Kansas, “Dust In The Wind” – This is the first “adult” song that I consciously ever remembering hearing on the radio when I was young, if you disregard children’s songs such as “Puff the Magic Dragon” and “The Candyman,” and disregard Christmas music. I remember a friend (Douglas Killam) and I riding in the back of my father’s pickup truck, moving a bed from my grandmother’s house in Tatamagouche to our house in Truro, and the two of us trying to sing this song. Gabriel & Dresden did a dance remix of this one too, but I’ll be honest – I prefer the original. Some songs are just timeless.  The lyrics for this song are the type of lyrics that are hard to forget because of their outlook on life. This is the kind of song that I wouldn’t normally pick to listen to anymore, off the top of my head, but when I hear it, I definitely say “that’s going on the top ten list.”

6. Mike Allison, “Leavin’ In The Morning” – Yes, I’m including a song by my friend Mike Allison, because I’ve always thought this track should be known internationally. I’ve even thought about asking him if I could re-record it and release it, but I could never do the vocals justice.

7. Matt Minglewood, “Can’t You See” – This song was originally by Toy Caldwell, I think, and has also been covered by Waylon Jenning, but I like Matt’s version the best. Matt Minglewood is from Cape Breton, Nova Scotia (not too far from where I grew up), and I’ve heard him perform this song live several times at the local tavern in my town. Someday, I’m going to record an entire album of covers of some of my favorite songs, and with multi-track recording I can play the drums, bass, guitar, and piano on each track (although I will probably ask someone else to do the lead vocals). This song is definitely going to be on that album. This song was originally written as a country/Deep South song, but the way Matt sings it, it seems like it was originally written about “a farm boy from Cape Breton, Nova Scotia.”

8. Jonathan Clark, “When I Grow Old” – I may be cheating to put this particular song on my list, since I wrote it myself. Usually, with songs I’ve written or DJ mixes that I’ve put together, after I’ve recorded them, I never want to hear them again. This song is an exception. I wrote it back in 2007, and Mike Allison recorded a version for me, and I still can’t forget it or get it out of my head.

9. Stan Rogers, “Forty-Five Years” – Well who doesn’t like Stan Rogers? Stan was from Ontario, but he’s a Maritimer at heart. It seems that if you really want to go down in musical history, you need to die in an airplane crash (think about them all: Buddy Holly, the Big Bopper, some members of Lynyrd Skynyrd, Jim Croce, Ritchie Valens, Patsy Cline, Aaliyah, and John Denver). Stan Rogers died in an airplane accident, although the plane was actually on the ground at the time (I guess most planes eventually are, if they crash). Anyway, his plane caught on fire at the Cincinatti Airport – he was 33 at the time. Stan is also famous for his recording of Barrett’s Privateers, a fine Nova Scotian drinking song (I think I first learned this while heavily intoxicated on a Saturday afternoon at Peddlar’s Pub in Halifax).

10. Eagles, “Wasted Time” – I think Don Henley wrote this after he ended an affair with Lorree Rodkin, if I remember correctly. Anyway, it’s one of my favorite piano tracks of all time, with pretty complex chord changes and progressions, and it’s a song I’ve always loved to play on the piano as an instrumental (I find that I can’t sing the words properly at the same time, for some reason, because my mind wants to go in two different directions with the timing). And it’s a good bit of advice – even experiences that don’t turn out the way you expect can usually teach you something positive, which means that they weren’t really a waste of time.

Well, that’s my “top ten favorite songs” list for today. Some of these tracks will remain on it for years, and others may be replaced next week.  Here's a link to Mike's version of "When I Grow Old" on SoundCloud:


And here's a link to "Leavin' In The Morning," also by Mike:


Also, I had this discussion a few years ago elsewhere, and my good friend Mark Thibodeau sent a reply at the time with some of his favorites.  They definitely have a different level of energy, but I thought I'd share his feedback here too, in case it lets some of my own readers discover some great new music.  After all, it illustrates just how diverse different peoples' taste in music can be ...

Hey Scooter! In the spirit of your latest post, here are my own Top 13 Songs of All Time!
13. Ace of Spades, Motorhead - One of a tiny handful of perfect songs ever written. It's Motorhead making the kind of noise that might have gone through a Viking's noggin as he lapsed into a murderous berserker fury, if only Motorhead had been around back then. And who knows? Maybe they were.
12. When the Levee Breaks, Led Zeppelin - Yes, it's true… this song is the redheaded orphan bastard of a thousand ripped-off bluesmen. But I still fall into a dervish-like hypno-trance whenever I hear Page's shimmering power chords and Plant's otherworldly harmonica washing over that thunderous Jones/Bonham rhythm section like hot blood splashing across the killing floor.

11. The Man Comes Around, Johnny Cash - Using the biblical Book of Revelation as a starting point, the Man in Black's final original composition is also one of the best he ever wrote.

10. Carpet Crawlers, Genesis - The best song off Genesis' best album -- the psychedelic progressive rock masterpiece The Lamb Lies Down on Broadway -- Carpet Crawlers features an atmospheric arrangement, haunting production, cryptic but compelling lyrics, and a catchy refrain.

9. War Pigs, Black Sabbath - The greatest heavy metal protest song of all time. War Pigs transcends genre with its utter lack of pretense and the sincerity of its howling outrage. That it written by a barely-educated, perpetually drunk 19-year-old Ozzy Osbourne makes it all the more incredible. Bono could take a cue from this most righteous and unambiguous of all anti-war songs. It would be playing in churches around the world, if only Christianity hadn't mutated into the safe haven for thoughtless pack animals that it is today.

8. Bobepine, Plume Latraverse - A rollicking, surrealistic French Canadian rocker about a party girl who's addicted to cigarettes and wears turpentine as perfume. You've never heard it, and you probably never will.

7. Paranoid Android, Radiohead - With this song, Radiohead lyricist Thom "Nostradamus" Yorke predicted the terrorist attacks of 9/11 four years before they happened. Don't believe me? Read along with the lyrics as it plays. Do they make sense in any other context? No. It's fuckin' spooky, is what it is.
6. Lakmé Flower Duet, Léo Delibes - A ridiculously beautiful operatic piece featuring alternately delicate and powerful intertwining and overlapping vocals. You may have heard a version of it on a British Airways commercial a few years back.

5. Miserlou, Dick Dale - Say what you will about Quentin Tarrantino's cinematic aesthetics, but his taste in music is incontrovertible. Using the King of Surf Guitar's take on this ancient Middle Eastern folk tune in Pulp Fiction remains one of his best ever decisions, and the song itself remains one of the most kick-ass pieces of guitar music ever recorded.
4. Moonlight Sonata, Ludwig von Beethoven - Another one of those perfect songs. Every time I hear it, I remember that incredible scene from Immortal Beloved where Beethoven, having long since gone deaf and unaware that he is being watched, presses his ear to the piano and begins to play those delicate, mournful opening notes.
3. Starless, King Crimson - After midwifing the sinister musical hybrid known as progressive metal with their triumphant album Larks Tongues in Aspic, Fripp, Wetton, Bruford and guests proceeded to perfect their prodigious progeny on Red, a collection of angular, high-octane, guitar-driven math-rock which, to this day, has no parallel. With Fripp's otherworldly guitar ululating over the melotronic color washes and its terrifying five-minute one-note solo, Starless is the shiniest gem in a particularly rich treasure trove.

2. Echoes, Pink Floyd - From the opening sonar ping, the listener is taken on an audio-cinematic journey to the bottom of the oceans, where Life Itself began, and left to ruminate on the meaning of the literal commonality of our origins. What other band besides early post-Syd Barrett Pink Floyd could create a piece of music about biological evolution and have it turn out so incredibly beautiful? That it syncs up perfectly with the final chapter of 2001: A Space Odyssey -- itself another monumental and majestic meditation on human evolution -- only adds to its mystique.

1. Inca Roads, Frank Zappa and the Mothers - I could have chosen any number of Zappa tunes for the Number One slot, really. King Kong, Peaches En Regalia, Black Napkins, Outside Now, Outrage at Valdez, Dio Fa… the list of amazing music created by Zappa and his countless cohorts over the years goes on and on and on. However, Inca Roads is perhaps the most fun of them all.
Cheers!
Yer old pal Tibby


I'm Jonathan Clark, known online as DJ Bolivia.  Do you want to learn more about DJ'ing and music production?  If so, visit:


If you happen to enjoy techno tracks, most of my tracks are available as free downloads from this link:


Thanks so much for visit, and for your support!  I really appreciate the fan base that I've been able to build up over the years.

Also, if you want to visit any of my other sites, here are a few links:
    YouTube:  youtube.com/djbolivia
    SoundCloud:  soundcloud.com/djbolivia
    Blogger:  djbolivia.blogspot.com
    Main Site:  www.djbolivia.ca

Sunday, January 17, 2016

Collaborating with Remote Artists

In today's world of bedroom studios and global collaboration, it's not uncommon to find musicians working with friends who are based in other towns or cities, or even in distant countries.

If you're a producer who has a friend in another location, and you'd like them to record some instrument or vocal tracks for one of your projects, the process is not that difficult.  However, it can be intimidating for a musician who has never tried it before.  This video should help.

In the video, I've tried to explain how a musician with a basic (but good quality) portable audio recorder can lay down some tracks for a producer, check on a laptop that the recording levels were appropriate (using free software called Audacity), and then share the audio files with a producer using Dropbox or a similar service.

The target audience for this video is producers who need to coach musicians through the process of creating and sharing such a recording, and for musicians who want to record their instrumental or vocal performances to be used in professional-sounding music.  Total run-time on the video is about forty minutes.


I'm Jonathan Clark, known online as DJ Bolivia.  To see the rest of the tutorials in my Audio Recording series, visit:


Thanks so much for visit, and for your support!  I really appreciate the fan base that I've been able to build up over the years.

Also, if you want to visit any of my other sites, here are a few links:
    YouTube:  youtube.com/djbolivia
    SoundCloud:  soundcloud.com/djbolivia
    Blogger:  djbolivia.blogspot.com
    Main Site:  www.djbolivia.ca

Sunday, January 10, 2016

Detailed Clickable Index for Jamstix Drum Software Tutorials

About a year ago, I put together a series of four videos teaching people the basics and some moderately in-depth tricks about using the Jamstix drum production software, produced by Rayzoon. I had a request in the Jamstix forums to create a clickable index, so I went through the four videos this evening and created an index.

If you're looking for all of the Jamstix videos and my notes, visit:  djbolivia.ca/jamstix

 
Part 1 of 4 - Jamstix, an Easy Way to Create Drum Tracks

00:00 - Introduction to myself and to my tutorial channel.
02:45 - Who is Jamstix for? What does it do?
10:38 - A simple demo, and a basic sample song.
14:57 - Intended uses. Why use Jamstix instead of a different drum production package?
21:09 - Slightly technical stuff, plus DAW's and plug-ins.
24:10 - How it works. General concepts, the brain, drum modules, more DAW stuff.
34:25 - Controlling the brain. And overview of styles and drummers.
39:46 - Understanding songs, parts, and bars.
42:58 - How does Jamstix compose? The groove layer, the aspect layer, and the fill layer.
50:31 - Three ways to approach composition.
52:38 - A quick overview of the Jamstix User Interface, plus a basic screen tour.


Part 2 of 4 - Covering All the Basic Operations

00:00 - Introduction, topics in this part of the series.
02:41 - A few quick notes about Cubase.
07:23 - Using the Song Builder: Presets, or build your own. Picking the style, drummer, kit, and song layout.
22:38 - Simple routing to an external drum module (ie. Addictive, BFD, EZDrummer).
25:34 - Song Sheet, part 1: An in-depth examination.
33:48 - Drum Kits: An in-depth examination.
42:08 - Setting output routings (this is in the middle of the drum kits section).
42:57 - Back to the drum kit in-depth examination.
46:50 - Editing a piece of your drum kit.
48:50 - The Mixer: An in-depth examination.
52:55 - Using an external MIDI controller.


Part 3 of 4 - Intermediate and Advanced Editing

00:00 - Introduction, topics in this part of the series.
05:43 - A few quick notes about the using Reaper as a DAW or Audio Editor.
08:15 - Reaper set-up and technical notes.
11:51 - The Transport: An in-depth examination.
21:54 - Dragging and dropping MIDI data from a previous performance into your DAW.
25:29 - Using live loops while performing in real-time.
28:08 - Song Sheet, part 2: More stuff that I missed earlier, including bars and parts.
35:56 - The Brain, part 1: An in-depth examination.


Part 4 of 4 - Options, the Bar Editor, and Final Thoughts

00:00 - Introduction, topics in this part of the series.
01:07 - A few notes about using Ableton Live, and a few cool tricks.
09:28 - Brain Controls, part 2: More in-depth stuff.
12:48 - Bar Editor: An in-depth examination.
27:23 - Style and Drummer models, and the Brain's approach to composition.
30:55 - The Options Menu.
36:20 - Time Signature changes.
37:51 - Jamming along with audio.
38:57 - Using Restore Points.
39:40 - My final thoughts and comments.


Alright, that should help some people out. 


I'm Jonathan Clark, known online as DJ Bolivia.  Do you want to learn more about DJ'ing and music production?  If so, visit:


If you happen to enjoy techno tracks, most of my tracks are available as free downloads from this link:


Thanks so much for visit, and for your support!  I really appreciate the fan base that I've been able to build up over the years.

Also, if you want to visit any of my other sites, here are a few links:
    YouTube:  youtube.com/djbolivia
    SoundCloud:  soundcloud.com/djbolivia
    Blogger:  djbolivia.blogspot.com
    Main Site:  www.djbolivia.ca

Friday, January 16, 2015

Review of ShuttlePro V2 Control Device

For users who do a lot of video or audio editing, especially with programs that take advantage of "scrubbing" within their editing capabilities, the ShuttlePro V2 can be a nice complement to your existing way of controlling your workflow.  It has a jog wheel, a shuttle control, and fifteen separate user-controllable buttons.  Designed to be used in conjunction with a mouse or similar device, this device will reduce your reliance on the keyboard and keyboard shortcuts.


Here's a review video about this device:


A couple of the key points that I love about this Control Device are:
- Appears to be built solidly.
- Doesn't slide around on desk.

One thing I didn't like about the ShuttlePro V2 was:
- I'm just not accustomed to working with a device like this!  But that's a personal shortcoming, not a problem with the control device itself.


ShuttlePro has presets in the control panel for the following long list of programs in a variety of styles:

Adobe Flash
Adobe Acrobat
Adobe After Effects
Adobe Audition
Adobe Encore
Adobe Illustrator
Adobe Lightroom
Adobe PhotoShop
Adobe Premiere Pro
Adobe Soundbooth
Avid Liquid
Avid MC Adrenaline
Avid Media Composer
Avid Pro Tools
Avid Xpress
Boris Keyframer
Boris Red
Cakewalk Guitar Tracks
Cakewalk Home Studio
Cakewalk Music Creator
Cakewalk Plasma
Cakewalk Projects
Cakewalk Sonar
Canopus DV Rex
Canopus Sonar
Canopus Edius
Discrete 3DS Max
Discrete Combustion
DPS Velocity
Easy Prompt
Finale
In-Sync Speed Razor
Magix Samplitude
Magix Sequoia
Media 100 iFinish
Media Studio Pro
MicroSoft Access
MicroSoft Excel
MicroSoft Outlook
MicroSoft PowerPoint
MicroSoft Word
Pinnacle Commotion
Pinnacle Edition
Pinnacle Studio
Sony Acid
Sony Cinescore
Sony Screen Blast
Sony Sound Forge
Sony Vegas
Steinberg Cubase
Steinberg Nuendo
Steinberg WaveLab
ULead Video Studio
and many others

And of course, the presets are just there for convenience.  You can program your own for any software package that you own.


I'm Jonathan Clark, known online as DJ Bolivia.  Do you want to learn more about DJ'ing and music production?  If so, visit:


If you happen to enjoy techno tracks, most of my tracks are available as free downloads from this link:


Thanks so much for visit, and for your support!  I really appreciate the fan base that I've been able to build up over the years.

Also, if you want to visit any of my other sites, here are a few links:
    YouTube:  youtube.com/djbolivia
    SoundCloud:  soundcloud.com/djbolivia
    Blogger:  djbolivia.blogspot.com
    Main Site:  www.djbolivia.ca

Sunday, January 11, 2015

Jamstix Software - Part 2 of 4 - Covering All the Basic Operations

This is the second in a series of four tutorials about the Jamstix drum track creation software.  However, before I go any further, I made massive updates to my website in early 2024.  All of my Jamstix info is available there too, and I'd recommend that you move over there, unless you like the format of my blog better.  The info on my website is more up-to-date.  Here's the link:


Jamstix is pretty amazing, as I have already said in the first video in this series.  After I'm done this series, I'll do a set of videos where I create two complete songs from scratch.  If you want to see the way I work, you'll be able to watch just as if you were sitting beside me at the computer.  But first, let's start to go into more depth with the software now that you know what it's all about.  We'll begin by taking a closer look at the Song Wizard.

In case you'd rather just watch the full video that matches this blog post, here it is.  I used Cubase as the host in this part of the tutorial:


The Song Builder

Ok, so when you first open Jamstix within your host, you'll see the "Song" section of the upper right side main menu.  On the left side, you'll see a ton of choices of "Quick Start" songs.  There's a lot of variety there, based on different music styles mixed with various drummer personalities.  Some examples:
- Twelve bar blues
- Disco track using "Chad" (probably Chad Smith of the Red Hot Chili Peppers?)
- Generic jam sessions
- Jamcussion songs
- Motown using "Phil" (probably Phil Collins of Genesis)
- Reggae with Stewart (probably Stewart Copeland of The Police)
- Standard song
- Lots of others

Let me just interrupt my own train of thought for a second to mention Jamcussion.  It's not available in the most basic version of Jamstix, but it's in a lot of the other more comprehensive versions.  Basically, it's a percussion add-on.  Think of latin instruments, hand drums, etc., all the sort of rhythm section instruments that aren't part of a normal drum kit.  If you are using Jamcussion, it runs in conjunction with (but sort of as a separate unique identity to) the main drum kit.

On the right side of the Main Menu you'll see the Song Builder.  This lets you set the rules.  Start with laying out the structure in terms of parts.  Each part has a unique initial.  Here's a list:
- I = Intro
- V = Verse
- P = Prechorus
- C = Chorus
- B = Bridge
- D = Drum Solo
- S = Solo
- E = Ending

I'm hoping that the next version of Jamstix adds some extra choices, such as a Silent section, Breakdown, and Refrain.  But those aren't critical, there are ways to emulate all of those concepts.  As it stands now, you can easily make anything work.  You might have to get a bit creative, ie. for a Verse/Refrain song, you might want to build it as Verse/Chorus.  That doesn't matter.  You can adjust the lengths of each part no matter what you call them.  As Shakespeare once said, "What's in a name?"

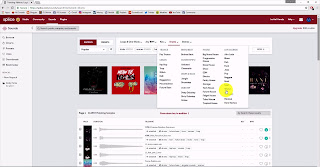
Next comes the Style.  It may say "8th Rock" as a default.  Go in and explore some of your own choices.  I have the full "Studio" version of Jamstix, so I have a lot of extra styls and drummers and expansion paks.  In total, I currently have 510 different styles in 28 different groups.  Some of the 28 groups include:  Afro-Cuban, blues, funk, breakbeat, electronic, gospel, drum & bass, metal, march, Motown, country, R&B, surf, and others.

Click on the little black triangle that appears to the left of some of the styles, and you will see a bunch of sub-categories.  For example, under "rock" I have eleven different sub-categories.  Under "country," I have eight.  Under "other world rhythms," I have Beguine, Bolero, Middle Eastern, and Tango.  And finally, under Jamstix 1 (the legacy styles) I have what looks like a couple hundred different styles.  After you choose a style, you can click on the default button to the right to set it as your default, if you want.  Once you've picked a style, don't forget to press "Load" to load the samples into the player.

Next, you can pick your drummer.  The default is probably "James Stix," the usual Jamstix default.  I have a couple dozen other drummers who, as I alluded to in the last video, have first names that match a lot of famous drummers.  I'm pretty sure that I know who over half of them are, and I'll put my list of guesses at the bottom of this blog post.  There's probably a full list online somewhere.

In addition to the named drummers, there are a couple of special presets.  For example, "Latino" specializes in Latin flavours.  "Machine" is used in electronic styles where a more "drum machine like" behavior is desired, by disabling the limb transition time logic and avoiding timing or power variations.  There's also  a "Silent" drummer who doesn't create or modify any notes (this is good when you're hand editing a part that's already laid down).  There's a player description on the right side of the drummer panel to give you some feedback about the style of each drummer.  Again, once you've picked your drummer, don't forget to click on the "Load" button.

The next item you can pick is the kit.  When I did the demo song for the previous video, I stuck with the default, the Standard Rock Kit.  However, since I have the Studio version of Jamstix 3, I actually have 146 different kits to pick from.  Again, there are broad categories on the left side, including kits to match a lot of the "Style" choices we've already covered.  But you don't have to match a kit to its style.  You could pair a New Orleans Jazz kit with a Drum and Bass style if you want.  And of course, many of the styles have a black triangle beside them which you can click to see a list of sub-styles.  If you're looking at using a kit style that has sub-styles, you must actually pick which sub-style you're going to use.  For example, you can't just pick "drum and bass" as a generic kit style, without deciding on which particular sub-style you'll use.

A couple of the kits are special.  You'll see kit categories for Additive Drums, BFD, and Toontrack (EZDrummer).  If you look at the kit contents on the right side of the window, you'll notice that these say "MIDI output only," whereas all the other kits listed info to show where the audio samples will come from, and perhaps some description of the piece of kit.  The reason these say "MIDI output only" is because they are default routings.  You don't get the sound of BFD, etc., unless you happen to own that particular third-party drum module software or sound bank.  However, they're good to have, because if you do own Addictive or BFD or EZDrummer, this is a perfect quick way to route the Jamstix MIDI out to your other drum module and take advantage of the high quality samples.

Once you've picked the kit you want to use, make sure you click on the "Load" button on the lower right, to load it into the player and return you to the Song Builder menu.

If you have a version of Jamstix that includes the Jamcussion expansion, you'll also need to pick a Style, Drummer, and Kit for your Jamcussion sounds.  Remember that Jamcussion, if you have it, is a hand percussion based rhythm section that can accompany your main kit, or even play alone without a kit.  Picking the Style, Drummer, and Kit of the Jamcussion section is done exactly the same way as picking the Style, Drummer, and Kit of the main drum kit, although of course this is hand percussion based, so all the styles and drummers and kits are different.  You may want to experiment a lot here to find a Jamcussion kit that sounds appropriate with the main kit you picked.  Or then again, you may not.

I know that I said earlier that it's easy to put together a song really quickly, but I just showed you a lot of complicated choices.  Don't worry, you'll quickly start getting used to the choices of Styles, Drummers, and Kits available, and it won't feel like you're dealing with much.  And worse case, if you're confused at the start, you can just ignore it all and use the defaults.

We're just about finished creating your first song.  You just need to pick how many bars you'll have in a standard verse in your song, and how many in a standard chorus.  After you do that, click on the "Create A Song" button, and look over at your Song Sheet editor window on the left.  Your song should now be all laid out for you.


Song Sheet

At this point, you might want to make some minor tweaks in your song.  Do you need to change the number of bars in any of your parts?  You can double-click on the part's name (or anywhere else on the line) and it comes up with a list of things you can edit.  You can rename the part, change the number of bars in the part, or change the number of repetitions.  You can also change the time signature if you enable this in Options, but remember that Jamstix still syncs to the tempo of your host.

There are a couple other columns on your song sheet that you can play with if you want.  The RF column stands for Repeating Fill.  If this is checked, Jamstix plays a fill whenever the part is repeated.  The TF is Transition Fill, and if checked, a fill gets played on the last bar of the part.  The TRG column deals with trigger keys for Live Loop mode.  I'll talk about that in one of the other videos, it isn't important for most users.


Drum Kit

Ok, so now that we've gone through the Song Sheet, let's take a closer look at the kit we've picked.  Click on the kit tab up to the right in the Main Menu area.  I already demonstrated in the last video that you can click on different parts of the kit to preview different drums.  Also, because most of them have multiple articulations (sounds), you can hear different sounds depending on exactly where on the graphic you clicked.  This is slightly tied to a way of letting you preview MIDI velocity variations.  I'm going to try to avoid getting deeply into MIDI here, but the short version, if you don't understand MIDI, is that as you have higher "velocities" for notes or hits, the audio volume will probably also increase, and the type of sound of the hit can also change.  For example, a low velocity hit on a ride cymbal might be fairly quiet and sound like a light pinging sound with reverb, whereas a heavy velocity will probably be louder and might sound more like a "clunk" when it hits.

Depending on your kit, you may see other things like jam blocks, shakers, eggs, cowbell, tambourine, chimes, etc., spread out on the visual display around your kit.  Try clicking on some of them to preview them (this only works if the song is playing in the host).

If your song is playing, parts of the kit will light up as they're hit.  Watching a performance from overhead as your song plays is a good education in itself.  If you want to single out a specific part of your kit to see its effect on the performance in progress, you have two useful options.  You can hold Ctrl and left-click on that piece and it will be solo'd, while the rest of the kit is muted.  If you do a Shift-click, the piece is muted while the rest is solo'd.  These key commands are presumably different in the Mac version.

If you turn off the lock button, you can move pieces of the kit around.  I mentioned this in the first video.  If you pull a piece of the kit away slightly, the drummer will be less inclined to use it.  Pull it too far out of his reach and he will stop using it completely.  Rearranging the layout of the kit can affect the drummer's performance.

The dice icon is also interesting.  Click on it and the main kit will be rearranged somewhat, both in terms of layout and exact drums present, depending on what's available.  Go ahead and try it.  It can't hurt.

Up to the top left of the graphic of the kit, you'll see a drop-down tab beside the kit name.  Check it out.  Here's where you can adjust output routings if your host allows it.  Many hosts allow for up to eight separate outputs, although right now, Pro Tools is limited to a single stereo master out.  Be aware, as the manual states, you might have to configure your host to support multiple audio outputs or else you'll only hear the sounds going to the first output.  This depends on which host you're using.  If this all sounds like Greek to you, don't worry – the default value is for it to just work without any adjustments.

There are also a number of options in this menu for sending audio or MIDI output.  Hopefully they're fairly self-explanatory.

The closed hi-hat variations menu lets you affect how much variety you'll get in the high hats, which can impact the realism of the performance.  Directly underneath that, you can turn position based dampening on or off.

Resetting the visual kit arrangement doesn't seem to affect a kit generated from the dice, but if you pulled an individual piece of the kit away manually, this returns everything to an optimal placement.

Finally, the Key Map options are related to MIDI, which a lot of people won't worry about.  I'll skip those for now, but if you're really experienced with MIDI, the Key Map is the assignment list as a tabbed text file.

Next, try to right-click on part of the kit.  Now you have the option to remove the piece you clicked on, change its sound, or add another piece to the kit.  Try playing with some changes to your kit.  There are tons of options.  Remove a piece, change a couple, and add something else.  You'll find that there are tons of choices and its fun and easy to make big changes.  If you like what you've created, there's a save button in the upper right.  If you don't like what you've created, click on the "Load" button (or double-click the kit name over to the left) to bring up a new kit on screen.

Open the kit list again by clicking Load.  You'll see a couple of options under the list of kit contents:

- Lock Outputs locks the current output assignments so they won't be changed if you load a new kit.

- Lock Mixer locks the mixer settings from being changed by a new kit.

- Keys Only will mean that Jamstix only loads key assignments and not sounds or mixer settings.  This is for advanced users.

Finally, there is a "Filter" box at the bottom of the window.  This box lets you control what gets loaded when you load a new kit.  This is handy for lots of creative kit composition.  Maybe you like most of your current kit except for the cymbals.  Click on "Cymbals Only" to load cymbals from another kit while leaving the rest untouched.


Editing The Kit

To edit part of your kit, click on one of the pieces.  That piece can be changed with the kit editor down below.  You can click on the name to load a different sound.  You can change the volume, pan, ambiance, dampening, or tuning of that piece of the kit.  You can change MIDI parameters, if you're comfortable with advanced MIDI use and routing. 

On the right side is a velocity scaling graph.  Again, this section is only going to be useful for advanced users.  If you're being fed external MIDI that's playing through your kit and it's all at lower velocities than you'd prefer, you can use this to raise velocity levels in a linear scale or some sort of compressed or expanded curve.  You can also scale velocities down this way.  There's a lot of flexibility to get your MIDI data in to a useful band/range.  The Min and Max buttons are similar here, you can set Min and Max levels and incoming data will scale in that range.


Mixer

Next, let's jump over to the Mixer tab of the Main Menu.  You'll see that it's an eight channel mixer.  If you change the number of outputs you're using, you'll have to totally shut down then re-load your host, since audio outputs are set during the opening of your host when VST plug-ins are loaded. Also, remember that in the current version with AAX compatibility, Pro Tools is limited to a single master out.

Let me cover the features of the mixer in point form:

- The drop-down tab at the upper left lets you load or save mixer settings.

- When you start out, the EQ button is depressed and you have low/mid/high EQ knobs beside each channel slider.

- Click on the Comp knob and the EQ knobs will get switched out for four knobs controlling compressor settings.  If you know how a compressor works, they'll make sense.  From top to bottom, they control your threshold, attack, release, and wet/dry mix.  The blue button turns the compressor on and off.

- Click on the Echo knob and your compressor controls will be replaced by delay controls.  Top to bottom, the three knobs control feedback, low pass filter, and wet/dry mix.  The delay is also synchronized to the host's tempo.  So the 8th means eight note delay.  Click on it to see a list of choices, down to 48th note.  The –C- below it means that the delay is centered, but it can be changed to a slow or fast pan if you want.

- The Flip Stereo toggle changes audio from drummer's to audience perspective.

- Downmix puts all outputs to channel 1.

- The AMB To Last toggle will direct all ambient effects to the highest output channel.

- If MIDI Only is enabled, audio samples are unloaded and MIDI just routes to the host or to a drum module.

- The AMB knob controls the overall ambiance level for the currently selected drum or Jamcussion kit.

- DMP controls the dampening of the room's simulated ambient sound.

- WID adjusts the stereo panning of the kit.  All the way left is mono, all the way right is full width stereo.


MIDI Remote Control

I've tried to avoid getting into MIDI in this video, to keep it simple for people who don't need to play with MIDI.  But some of you may know that separate from MIDI note data, you can use what's called a MIDI controller to adjust controls in your software more easily than doing everything with a mouse.

If you don't understand what a MIDI controller does, you should.  You don't need an indepth knowledge of MIDI to understand or use one!  First, remember that it's called a MIDI controller primarily because it's using MIDI in the background as a communications system to control stuff.  So it's less technical than you might have expected.  It did a comprehensive video about MIDI controllers not long ago.  I really recommend that you check it out to understand exactly what a MIDI controller is capable of.


Anyway, the point of this is that you can control all of the mixer controls simultaneously using a MIDI controller.  This is so much easier and more powerful than trying to use a mouse!  Of course, if you're comfortable with automation, you can also automate controls by drawing or recording envelopes.  So much power.  Strap yourself in and feel the G's.


Conclusion

You may have questions about the software.  Rayzoon has an active and useful online support forum.


Go to their website and click on the forums link.  I can also try to answer questions on YouTube, but remember that I spend nine months of each year living in a remote forestry work camp with practically no internet.  I'll answer eventually, but you'll get a MUCH faster response on Rayzoon's forums.


PS – the Drummers

I promised a list of my guesses about who some of the drummers are modeled upon …

Animal, from The Muppets
Carter Beauford – Dave Matthews Band
Charlie Watts – Rolling Stones
John Bonham – Led Zeppelin
Phil Collins – Genesis
Roger Taylor – Queen
Stewart Copeland – The Police
Mark Brzezicki – The Cult
Danny Carey – Tool
Lars Ulrich – Metallica
Chad Smith – Red Hot Chili Peppers
Keith Moon – The Whoe
Tony Thompson – Power Station
Will Champion – Coldplay

However, as Jamstix points out, "Drummer models are fictional and not endorsed by actual drummers with the same first name."


By the way, I've created a clickable index for the whole series, so if you've watched everything but you want to review a certain section, this might come in useful. CLICK HERE to go to that index.


I'm Jonathan Clark, known online as DJ Bolivia.  Do you want to learn more about DJ'ing and music production?  If so, visit:


If you happen to enjoy techno tracks, most of my tracks are available as free downloads from this link:


Thanks so much for visit, and for your support!  I really appreciate the fan base that I've been able to build up over the years.

Also, if you want to visit any of my other sites, here are a few links:
    YouTube:  youtube.com/djbolivia
    SoundCloud:  soundcloud.com/djbolivia
    Blogger:  djbolivia.blogspot.com
    Main Site:  www.djbolivia.ca