Showing posts with label sample. Show all posts

Sunday, March 17, 2024

Techno Track: "Bolivia - Confidence Interval (Original Mix)"

Here's another one of my tracks for you to check out.  Spring is coming (and with it my seasonal tree planting work) and I feel like I've gotten a lot of work done in the past three months.  I finished a number of projects that have been on my to-do list for between 7-12 years, and I've gotten a bit of minor reno and painting work done at my house.  I also finished the last of my [major] website redesigns four days ago, which means that all twenty of the sites that I oversee are up to modern standards, finally.

I want to feature another track of mine this morning.  It's called, "Confidence Interval."  I'll have a download link below.


Here's a link to the track on SoundCloud.  You can also click on the down-arrow in the top right to download the mp3 directly from SoundCloud:


For the last few posts about my tracks, I've come up with some silly little stories.  Today, I'm going to do something different.  A confidence interval is a term used in statistical mathematics.  I came up with the title while I was working on a stats project.  I'm going to try to explain what it means:


Confidence Interval:

  1. Understanding the Basics:  A confidence interval gives us a range of values which is likely to include the true value of something we're trying to estimate.  For instance, if I'm out on a silviculture survey project, and I'm studying the average height of a crop trees in a plantation that we planted seven years ago, I may not want to measure every single tree (let's assume that it's a large block, with hundreds of thousands of trees).  Instead, my best approach will be to measure a sample of trees then use those measurements to estimate the average height for all the trees.  The confidence interval, in this case, is like saying: "Based on my sample, I'm fairly certain that the true average height of all the trees is 'somewhere in this range,' and should be between this minimum and this maximum height."

  2. Sampling and Variability:  The concept of a confidence interval hinges on the idea of sampling.  Since it may be impossible to examine every single member of a population, I select a limited sample. However, if I were to take several separate samples, each sample would probably exhibit slightly different results due to natural variability.  If I take a different piles of seedlings from an unbundled split box each time, one handful might have more or fewer seedlings than another. Similarly, in my previous crop tree example, one sample might have slightly taller or shorter trees on average.  The confidence interval accounts for this variability, offering a range that is likely to encompass the true average.

  3. Confidence Level:  The "confidence" in confidence interval refers to the level of certainty or assurance I have that the interval includes the true value.  It's typically expressed as a percentage (like 95%).  The confidence level tells me how sure I can be that the range I have calculated includes the true average.  If I say that I'm 95% confident, it means that if I were to take a hundred different samples and calculate one hundred confidence intervals (one for each sample), I should expect about ninety-five of those intervals to accurately contain the true average height of the trees.

  4. Interpreting a Confidence Interval:  It's important to understand what a confidence interval does and doesn't tell me.  It provides a range that's likely to include the true value based on my sample data, but it doesn't guarantee that the true value lies within my range every time.  Also, the interval itself can be wide or narrow, depending on the sample size and variability of the data.  A wide interval might tell me that I need to collect more data to make a precise estimate, or it might just reflect high variability in the data itself.

  5. Practical Implications:  In practice, confidence intervals are used across various fields of study to help make management decisions.  For instance, I'll use an example relating to public health.  A confidence interval can help determine whether a new treatment is effectively improving patient outcomes compared to an old treatment.  If the confidence interval for the difference in effectiveness between treatments does not include zero (which would indicate that there's a possibility that the new treatment isn't doing anything), then it suggests the treatment works.  Thus, confidence intervals provide a useful way to assess the reliability of estimates and to make informed decisions based on data.

Ok, there's your academic lesson for the day.


I also put up a version of this track on YouTube.  The visuals accompanying the track were done by an AI, although the music is my own of course.  These AI visuals are very rudimentary.  But thanks to OpenAI's Sora, my future music videos may look a LOT more professional:


To check out and/or download any of my other tracks, visit:

djbolivia.ca/tracks


Thanks for visiting, and thanks for the support!

- Jonathan Clark (DJ Bolivia)
www.djbolivia.ca


Friday, February 17, 2017

Finding Royalty-Free Samples for Music Production

Are you looking for sounds to put into music that you're producing?  If so, I have a video that I think will help you out a bit.

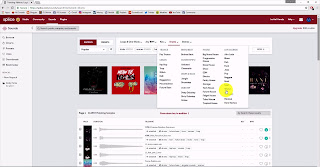
This video is about a service called Splice Sounds, from splice.com.  It's a great place to find samples and loops and sounds for your own productions.


If you're creating a song or producing a track, and let's assume that you're working on electronic-based production rather than traditional instrumental music, then you're probably looking for sounds for your track.  One source of these sounds is any instruments that might be within your DAW (Digital Audio Workstation, or audio editing/production software).  Most DAW's come with various built-in instruments, which are sometimes called VSTi's.  This stands for Virtual Studio Technology Instrument.  Examples of DAW's that come with built-in VSTi's include Ableton, Pro Tools, Cubase, Sonar, Reason, FL Studio, Logic, and several others.  The VSTi's in these various programs can produce sounds ranging from the various pieces of a drum kit (kick, snare, hi-hats, tom, crash, ride) to miscellaneous percussion instruments (shakers, sticks, tambourines, etc.) to traditional instruments like basses, guitars, pianos, and synths.

I should point out that a VSTi is a bit different than a VST (virtual studio technology plug-in).  VST's are more likely to be apps or plug-ins that affect that sound, rather than create a sounds.  For example, VST's might add things like reverb or delay or chorus or equalization or filtering to your sounds.

The only drawback with these VSTi's is that they're limited in what they can produce.  Some are pretty versatile and can produce thousands of different sounds, but more frequently, you're limited to only a few dozen sounds from a single VSTi.  Some VSTi's can only produce a single sound!  Eventually, you're going to start getting bored with the sounds from your existing VSTi's, and you'll start looking externally for additional sounds.

When you get to this point, the common practice is to go online and to start looking for things called Sample Packs.  A sample pack can contain several sounds or several dozen sounds.  These are called samples.  They're short audio clips that contain things like a note or a drum hit or a spoken word, or several of any of those things.  I've seen samples that were as simple as a single hit of a stick on a block of wood, or as complex as three or four lines of a singer's vocals.

Some samples are designed as one-shot samples.  These are intended to be played once, without repeating.  Even though it's called a one-shot, there may be more than one sound in the sample.  For example, I've seen one-shots that were a single hit on a hi-hat, and I've seen other one-shots that were sixteen consecutive hits on a hi-hat.  The main defining characteristic of a one-shot is that it's made to be played one time, rather than repeated constantly.

The other common type of a sample is designed as a loop.  Again, a loop sample can be as simple as a single sounds, but more frequently, it's a series of related sounds, such as four hits on a kick drum.  But the key thing with a loop is that it is designed to be played over and over and over again, constantly, in a repetitive motion.  And the way that it's designed, quite often, the intent is that it sounds "continuous" so that you can't really tell where the loop is starting or stopping.

Traditionally, there have been a lot of websites designed to supply loops to producers.  Some well-known examples are:

and dozens more

These sites all offer sample packs that producers can buy and use in their own music.

An important definition here is "royalty free."  You're probably going to want to make sure that all the samples you buy are designated as royalty-free.  This means that you can use them in your own music that you re-distribute, either for free or for sale, without having to pay further expenses based upon the frequency of use of the samples.  In other words, a royalty-free sample is a one-time purchase that legally lets you share the sample in your song forever, with no extra expenses owed in the future if your song becomes popular.

If you buy a sample pack, you may be paying anywhere between perhaps ten and thirty dollars.  Or less, or more.  That sample pack will contain a handful or maybe a few dozen samples, which are sometimes all fairly related, and intended to work together in the same key.  But your sample pack may also contain some diversity, such as some bass notes, some drum hits, some keyboard notes, etc.  The problem though is that you may not end up using all of those sounds.  You may end up buying a sample pack just because you like two or three specific sounds in the pack, and you ignore the rest.  In that case, those samples that you liked will be pretty expensive for you, several dollars apiece.  That doesn't sound like much, but if you do a lot of production work, you can easily go through hundreds or even thousands of samples in a busy month.

That's where Splice comes in.  Splice has several different sections.  Although we're going to focus on Splice Sounds, here's what else it includes:

Splice Studio - Collaborate remotely with other producers, using the Cloud.  Sort of like a real-time collaboration over Dropbox or Google Drive, if you can envision that.

Splice Community - Share your productions with the Splice community, which has hundreds of thousands of other producers.  Sort of like a SoundCloud meets a PHPbb message board concept.

Splice Sounds - Your source for Samples, as we'll discuss shortly.

Splice Plug-Ins - Buy or rent professional VST's and VSTi's, or download a number of free plug-ins too.

Splice Blog - Information about various topics associated with audio, music, production, etc.

If you want a full run-down of each of those sections, you can find info in the video.  But let's talk specifically about some features of the Splice Sounds section:

- Cost effective:  A subscription is either $8 or $13 USD per month, but allows you to download either 100 or 300 samples per month.  If you don't use up all your credits, they roll over into the future, so you don't lose them.  This works out to pennies per sample.
- Wide selection:  They have literally millions of samples to chose from, royalty-free.
- Easy filtering:  Sort samples by key, tempo, type, instrument, and other criteria, before you start browsing, to be able to find what you're looking for very quickly.
- Audio previews:  High quality audio preview to see if you like the sample.
- And lots more, as the video will show.

The best thing is that you can get a free test account that lets you download about a hundred samples, which lets you go through the service and realize exactly how useful it is.  And you will DEFINITELY realize that if you produce music even on a very casual basis, Splice is well worth the subscription.

If you want to skip the preamble in the video (all the stuff that I just described here), skip ahead to the 9minute 12second mark of the video, and begin playing it there.  From that point on, you'll see the screen shots as I'm describing everything.


Good luck with your music productions!

- Jonathan Clark (DJ Bolivia)
www.djbolivia.ca


PS:  Here's an example of a track that was produced predominantly with samples from Splice, plus a few stock Ableton Live sounds included:


I'm Jonathan Clark, known online as DJ Bolivia.  Do you want to learn more about DJ'ing and music production?  If so, visit:


If you happen to enjoy techno tracks, most of my tracks are available as free downloads from this link:


Thanks so much for visit, and for your support!  I really appreciate the fan base that I've been able to build up over the years.

Also, if you want to visit any of my other sites, here are a few links:
    YouTube:  youtube.com/djbolivia
    SoundCloud:  soundcloud.com/djbolivia
    Blogger:  djbolivia.blogspot.com
    Main Site:  www.djbolivia.ca

Saturday, April 13, 2013

Basic Mathematics of Sound: Sample Rate, Sample Size, and Binary

When I first sat down to write this post, my intent was to teach some of the people who follow me on YouTube what sample sizes and rates are all about. You may have seen reference to sample rates before: CD’s at 16/44.1. High quality studio sessions at 24/96. I figured that I could type up a few paragraphs, record a short accompanying video, and be done in under an hour.


But then I started to think about what I’d have to explain if I explained sample rates: for starters, how frequency is measured, what is considered the normal range for human hearing, and how binary works. And then I started to realize that I should probably touch on the Nyquist Theorum, which directly affects minimum sample rates required to make a recording sound good. If I got into Nyquist, it seemed that overlooking a quick explanation of aliasing and quantization noise would be criminal. And if I was going to mention anti-aliasing techniques, it would be a shame to skip over a basic explanation of dithering.

So this is going to be a story that touches as lightly as possible about some of the mathematics of sound and recording, but I promise that I will try to explain this in the most simple, common-sense, layman terms possible. I don’t want your eyes to glaze over and have you navigate to the latest episode of Breaking Bad, where the science seems more applicable to everyday life. Therefore, if you’re a professional audio engineer and you’re reading through this, and one of my explanations makes you start sweating and stuttering and your heart begins to palpitate, remember that I’m trying to make these explanations more accessible for a wide audience of people who don’t have advanced degrees in audio engineering. I’m going to explain things in ways that make simple sense to me. If you see an outright mistake, sure, go ahead and email me. But realize that sometimes I’m just trying to keep things simple. I’m sort of implying the spherical cow.

Before you go further in reading the rest of this post, here’s a link to an associated tutorial video that I put together to accompany this post:


Although watching the video is the best way to learn about this topic, because of my illustrations on the whiteboard, I've also put a copy of the audio portion of that tutorial video on SoundCloud, for people who would like to download it to listen to in vehicles, while travelling, etc. Here's the audio-only version:


Sample Rates

Alright, let’s get started. You’ve probably heard lots of things about sampling. First of all, you need to understand that I’m talking about sample rates and frequency, which relate to the way that a computer converts an analogue signal (a real-world sound) to a digital representation. The word “sampling” is also used in the music industry in reference to recording a short section of audio, perhaps from another record or song, and pasting copies or altered copies of that into a new song. I’m not referring to that kind of sampling.

When “digitizing” an audio source, the way that a computer works is that it takes a measurement of the audio many times per second, and then just plays these samples back in order very quickly. Each individual slice is called a sample of the audio. The number of times per second that the audio is sampled is called the “sample rate.”

Basically, anything that is expressed in “occurrences during a period of time” is a frequency. There was a German physicist and Nobel Prize winner named named Gustav Ludwig Hertz. Any time people refer to frequency, they refer to something that happens over and over again at a regular interview, whether it is a cyclical thing (rotation, oscillations, or waves) or a periodic thing (counts of an event). The number of occurrences per second is the frequency, and the unit it is expressed in is called the Hertz (Hz). The “period” of something, ie. the time between occurrences, is the reciprocal of the frequency.

So when something is recorded at 800 Hz, that means that a sample measurement of the sound is recorded eight hundred times a second. That seems like a lot, eh? It’s not. In today’s world of audio engineering, a typical sample rate is much faster than that. All CD’s have been standardized as having sample frequencies of 44,100 Hz, or 44.1 kHz. That’s why the default sample frequency for a lot of music is at 44.1 kHz, because it’s been conformed for CD distribution.

Having a higher sample frequency gives you a better true representation of what was happening in the underlying waveform. Let’s try to use a really simple example. Let’s say that you’re in a concert hall listening to a singer. The singer’s volume, as he/she sings, is jumping up and down a lot, from very quiet to very loud and back. If you take a “sample” once per minute, you don’t have a very good idea of how loud the singer is over the time that he/she is singing. You have no idea whether the sound is louder or softer in the other fifty-nine seconds between your samples, or maybe both, jumping up and down. But if you increase your sample rate so you can take sample once per second, you’ve got a better idea of how much the singer is changing their volume over time.

That was a coarse example. Increasing your sample frequency means that your digital interpretation of the audio is more accurate. But to get a really accurate representation in today’s world, computers sample audio at a stunning 44,100 times per second to get a really accurate representation. And that’s just for CD’s. If you can sample faster, your digital sound is going to be even better (more similar to the original). DVD’s are recorded at a slightly higher sample rate than CD’s, at 48 kHz. And in today’s recording studios, sampling audio twice as fast is quite common, at rates of 96 kHz. Of course, taking twice as many measurements (96 thousand per second instead of 48 thousand per second) means that you’re going to require twice as much storage space on your computer, and more accurate equipment, which is why many studios don’t go with rates that are higher than 96 kHz.

So now that you understand what sample frequency is, what does the bit depth mean? The simple answer is “the resolution or accuracy of each individual sample.” But in order to understand that better, I’m going to talk a bit about binary numbers. I promise, this next section about binary is the only section where I have to get fairly mathematical.


Binary Notation

How does binary work? Binary is a numbering system. It’s the simplest complex numbering system, base two. There are only two digits in this numbering system, 0’s and 1’s. We’re used to base 10, which has ten different digits. Base two should be a lot easier with only two digits to think about. And base two is also easy to deal with when you’re thinking about computers and electrical engineering. Computers can’t “think” because they aren’t sentient brains. But numbers can be represented by “simulating” the 1’s and 0’s of binary with two different power states, power-on and power-off.

In binary, a single digit is called a “bit.” Bit is basically the base-two equivalent of “digit” in the base-ten system that we’re used to.

In binary, a numerical value is called a “word.” Word is basically the base-two equivalent of “number” in base-ten.

In base ten, we don’t really use the phrase “number length” to talk about how many digits are in a number. But in base-two, we use the phrase “word-length”. Computers have to deal with electrical connections that are much more simple than the human brain, so we have to keep things simple and consistent. When computers communicate, instead of a stream of single bits, they can sometimes deal with full words, ie. a group of bits communicated simultaneously. Think of it like a highway with multiple lanes, and individual cars as being bits. Because there are multiple lanes, several bits can pass a certain point at the same time. Computers are analogous because a full “word” of bits can often be shared as a single entity. The word-length refers to how many bits that is.

In the early days, computers were simple and could only understand short binary words. By the 1980’s, the commodore 64 and the apple computers were talking with 8-bit word lengths. Soon after, PC’s with MS/DOS came out that talked in 16-bit words. In the past few years, PC’s have grown up from 32-bit operating systems to 64-bit.

In the audio world, a sixteen bit word length allows for a lot of different numbers. The number of different samples possible in binary depends on the square of the word length. If you have four-bit words, you have sixteen different choices (4^2). If you have eight-bit words, you have 256 different choices (8^2). If you have sixteen-bit words, you have 65,536 choices. If you have 24-bit words, you have TONS of choices – 16,777,216 to be exact.

Ok, enough math. What does this mean? Well, having more choices means higher resolution. What if you could measure the volume of a sound that could vary from complete silence (zero decibels) to the volume of a loud jet engine (128 dB)? And what if your scale for measuring is digital? With an analogue measurement, such as recording on magnetic tape, you can measure the exact volume. But if you have to have a digital representation, you only have certain numeric choices. If you’re limited to 4-bit sample size/resolution, then remember that 4 bits only gives you sixteen possibilities. So you have to go with some pretty rough measurements. Anything from 0 to 8 dB might have to be represented in your sample as “0”, from 8 to 16 dB as “1”, from 16 to 24 dB as “2” and so on. But there’s a lot of variation between say 8 and 16 dB. That’s not very accurate if you later see that your sample was written down as “1” and you have no idea whether the real sound was at 8dB or 16dB, or anything in between.

But what if you can increase your sample width, the number of choices. If you can measure the sound with 16-bit sample size, you have 65,536 different possible levels to choice from. That gives you a lot more choices in the scale from silence up to 128dB. You might be looking at a scale like this:
       0 = 0.000 dB
       1 = 0.002 dB
       2 = 0.004 dB
       3 = 0.006 dB

And all the way up to:

       65,534 = 127.998 dB
       65,536 = 128.000 dB

Obviously, by having more bits, you can capture/communicate more information at a higher resolution, which gives you a better representation of what the volume was in the original sound. Going from 16-bit sample size to 24-bit sample size obviously means that you can measure things with an even better resolution. By the way, note that I'm talking in generalizations here so far. If you're an experienced audio engineer, you'll know that digital audio in a DAW is treated a bit differently in that the higher sample size actually means a lower noise floor, but we'll get into that in tutorials 8 and 9. For now, let's keep things simple.

If you want a rough example of a real world analogy, think about the resolution of the camera in your cell phone. If you’ve got a 3 megapixel camera in one phone and a 13 megapixel camera in a second phone, the 13mp is obviously going to give you a better picture, right? That’s because it’s a higher resolution. You’ll get a more accurate representation of what you’re trying to record (photograph) because there are more bits used to store the information.

CD standard resolution is 16-bit. That should be the minimum sample size that you want to work with in a music production or recording environment. Anything less sounds noticeably imperfect even to untrained ears. But we have the technology to do better. If you see a sound card that is referred to as 24/96, it means that the sample size is 24-bits, and the frequency with which those samples are taken is 96,000 times per second. If you have the choice, try to work with 24-bit equipment, and make sure your computer software has your “project settings” at 24-bit instead of a lower number. The only drawback is that 24-bit recording takes up more space on your storage device.

Before I move on, let me just say something about a different type of binary. Different type? Well, in all of the above, I’m assuming that you’re using what’s called a “fixed point” notation. But there is also something called a “floating point” notation, so you’ll see things like “32-bit floating.” In such a system, the last eight bits may not be used specifically to increase resolution, but might instead be used to increase dynamic range significantly. I won’t bother trying to explain the significand/mantissa or the rest of the theory. You’ll find all kinds of discussion and debate about this on the internet, but I think the simple answer is that 32-bit floating isn’t necessary much better than 24-bit fixed, and 32-bit takes up 33% more space. Check out this link for more: http://www.bores.com/courses/intro/chips/6_precis.htm

For now, I’d suggest that you shouldn’t select 32-bit at the start of a project because your newly recorded files will be 33% larger without any improvement whatsoever in fidelity. It makes more sense to switch a session's resolution to 32-bit float later, when bouncing mixes or performing complex signal and effects processing.


Sample Rates as applied to Sound

So I started out to explain the difference between sample frequency (times per second that samples are taken) and sample depth (number of bits of data per sample). And it turned into a three thousand word essay. Can I give you anything more practical to wrap things up? I’ll try:

First, be aware that if you are saving audio files, a single STEREO audio file at 16-bit resolution and sample rate of 44.1kHz will take up approximately ten megabytes of disk space for each minute of audio. Memorize that. Once you know that, you can calculate potential storage requirements for all variations of sample size, rate, number of tracks, and project length.

Example:

Let’s say you’re recording a vocal (single mono track), an acoustic guitar (single mono track), and a piano (feeding a stereo signal to your DAW). All told, you have a total of four tracks. Mono signals count as a single track, and stereo signals count as two. Four mono track is equal to two stereo tracks. So based on what you’ve memorized of 10 megs per minute of stereo audio at CD quality (16/44.1), then you’ll need double the storage space for your project, because you have the equivalent of two tracks. So budget for 20 mb per minute of audio.

Let’s say that you’re making a recording that will be exactly eight minutes long. Multiply your 20megs by 8, and you’ll need 160megs of storage.

But wait, let’s say that a studio engineer comes in and says that he wants you to change from 16-bit to 24-bit sample sizes. Your requirement just grew by 50%, so now you need 240megs of storage instead of 160.

Then, let’s say that he also adds that the project will be for DVD with no CD equivalent, so you need to change from 44.1 kHz sampling to 48 kHz. Roughly, add 10% to your numbers, so your 240megs becomes 264megs.

Then finally, the engineer changes his mind yet again and decides to jump it up from 48 kHz to 96, just because he’s going to be working with a lot of digital effects and he wants the highest project quality possible. So double it again, and your storage requirements go from 264 to 528megs.

That kind of stuff is handy to know when you’re calculating space requirements for a project. However, to be honest, if I’m budgeting for storage space for a project, I’ll double what my calculations show me, just to be safe. So I’d want to have a full gigabyte of storage available for the example above. Things always get out of control and take up more room than you anticipate.


Oh yes, and what do I recommend/use for sample rates? I often just use 16/44.1 for projects. Face it, CD standard has been great quality for a couple decades. How can you go wrong? Unless the project is very important, using 16/44.1 saves disk space, and saves a bit of time because I don’t have to down-sample my final track at the end for compatibility with CD players. For most of my work, CD quality is just fine. However, I'll sometimes use 24/44.1 for projects. That's an odd setting, which you'll rarely see, but I'll explain why I use that in tutorials 8 and 9. You'll also see most studios use 24/96 for their projects. The advantage of 24/96 is that when you save it as an archive, if you need to go back to it ten years from now, computers will probably have advanced so much that it’ll probably even be possible for cell phones to be used to edit projects of that complexity.


Alright, that’s enough for today. I’ll save the Nyquist Theorem, Quantization Noise, Anti-Aliasing, and Dithering for future tutorials. Thanks for reading. I hope you now understand a lot more about the basic mathematics of audio.


To see the rest of the tutorials in this Audio Recording series, visit:


Thanks so much for visit, and for your support!  I really appreciate the fan base that I've been able to build up over the years.

Also, if you want to visit any of my other sites, here are a few links:
    YouTube:  youtube.com/djbolivia
    SoundCloud:  soundcloud.com/djbolivia
    Blogger:  djbolivia.blogspot.com
    Main Site:  www.djbolivia.ca

Sunday, September 18, 2011

Sampling in Music - Creativity or Lack Thereof?

One of the more contentious areas of argument in the modern music industry is the ethics behind the use of sampling in the creation of new music. Some people argue that it proves or enhances creativity. Others say that it is just theft, and is used by artists who aren't creative enough to come up with their own original works.

Basically, for those who don't understand sampling, it is when someone takes a piece of an existing song and uses it in (or as the entire basis for) another song. The sample can be simple, like two or three notes or chords, or it can be more complex, consisting of a full bassline or a more complicated chord set of chord structures. Sometimes the artist will copy the exact sound from the old song, and other times they'll just create a very similar replication of their own.

I'm going to give you a few examples, and I'll start with one that probably very few people are aware of. Listen to the first few seconds of each of these two songs. One is the very well-known "Paper Planes" by MIA from just a couple years ago. The other is an old song called "Straight To Hell" by The Clash, which I listened to a lot when I was younger:


House music and Hip Hop are probably the two genres which rely most heavily on the use of sampling. Interestingly, in an evolutionary sense, house and hip hop are very closely related genres, although most people wouldn't expect that. I won't get into that discussion, but suffice it to say that they both evolved from very similar origins, just like chimpanzees and humans shared common ancestors.

I first became acquainted with the use of sampling when I was just a kid. My parents had a lot of old 45 records from the 50's and 60's, and I used to listen to them constantly and watch shows like "Name That Tune" on TV. One of the records was a novelty production called "The Flying Saucer," by Buchanan & Goodman. They experimented with a story of a UFO that landed on earth, and pretended they were doing a newscast of the event, but threw in clips from eighteen other popular 50's songs as part of the story (yes, they eventually got sued). It's pretty odd, but as a kid, I thought it was pretty fascinating:


Anyway, I'm going to show you five other pairs of songs where the first song uses samples from the second. Most are really obvious. The last one is far less obvious (it's in the bass line). See if you can figure out the samples used.


"Ice Ice Baby" (Vanilla Ice) samples "Under Pressure" (Queen)


"Rapper's Delight" (Sugarhill Gang) samples "Good Times" (Chic)


"I'll Be Missing You" (Puffy) samples "Every Breath You Take" (Police)


"Barbara Streisand" (Duck Sauce) samples "Hallo Bimmelbahn" (Nighttrain)


"Rhythm Nation" (Janet Jackson) samples "Thank You (Falettinme Be Mice Elf Agin)" (Sly and the Family Stone)


As I said, this last one is pretty tough to notice if you're not looking for it specifically. Some artists will manipulate a sample heavily in order to try to change it significantly before they recycle it, either though the use of tempo changes, pitch changes, effects processing, or a combination of all of the above.

That's all for now, but at some point in the future, I think I'll probably make another post with some comparisons of some really subtle samples.


I'm Jonathan Clark, known online as DJ Bolivia.  Do you want to learn more about DJ'ing and music production?  If so, visit:


If you happen to enjoy techno tracks, most of my tracks are available as free downloads from this link:


Thanks so much for visit, and for your support!  I really appreciate the fan base that I've been able to build up over the years.

Also, if you want to visit any of my other sites, here are a few links:
    YouTube:  youtube.com/djbolivia
    SoundCloud:  soundcloud.com/djbolivia
    Blogger:  djbolivia.blogspot.com
    Main Site:  www.djbolivia.ca